— 13 —
STEP 11
Mount Range Hood Onto Wall
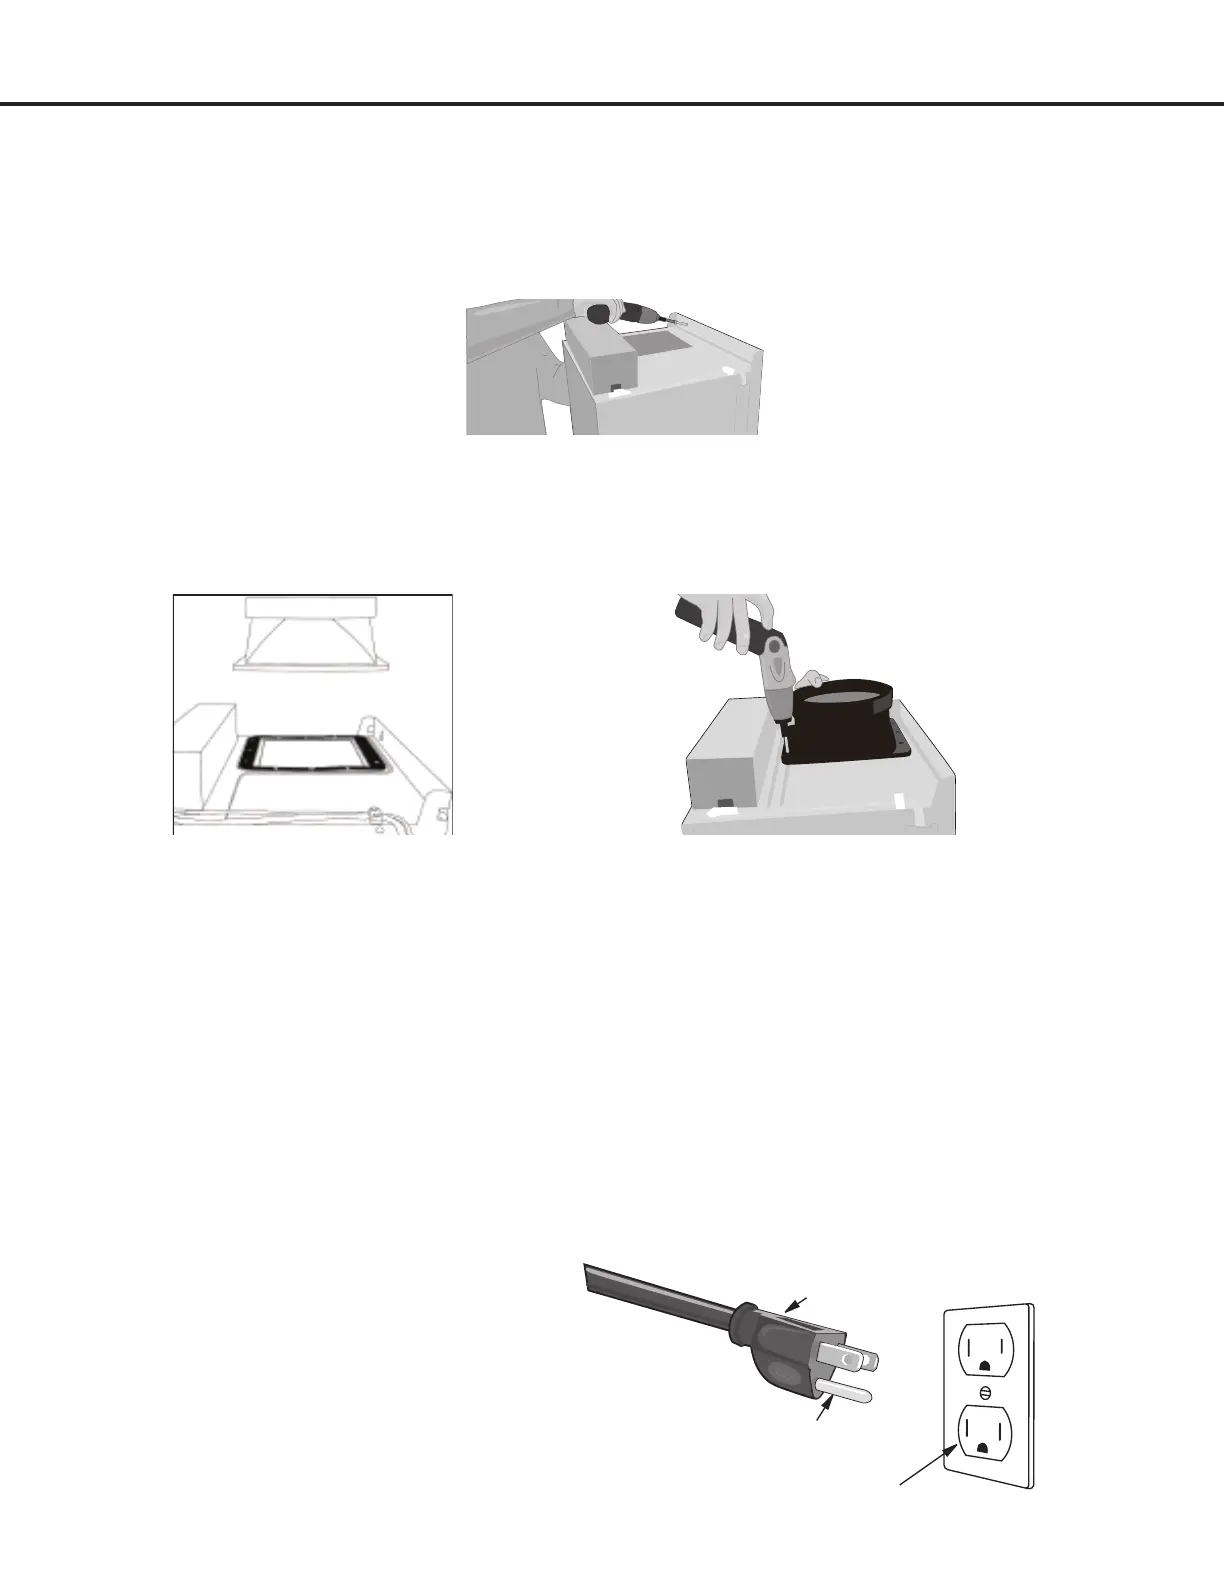
• Position the range hood’s mounting key holes securely onto the range hood mounting screws.
• Finish screwing in the screws until they cannot tighten any further.
STEP 12
Install Damper
• Place the damper gasket followed by the damper over the ventilation hole on top of the motor body.
• Secure using the four screws (included).
STEP 13
Connect Ductwork
• Attach ductwork to damper. Secure the ductwork with duct tape to make sure joints are secure and air- tight.
• Do not install the duct tape too tightly as this may prevent the damper aps from opening which will overwork the motor
and cause improper functioning of the unit.
• Fasten all connections with sheet metal screws and tape all joints with certied aluminum or foil tape. Use caulking to
seal exterior wall or roof opening around the cap.
STEP 14
Connect to AC
• ConnectACplugintoagroundedACoutlethaving120V,60Hz.Placetheoutletatamaximumdistanceof33-1/2”
(851 mm) from where the cord exits on the hood.
• SEE IMPORTANT INSTRUCTIONS ON THE
FOLLOWING PAGE.
3-Pronged Plug
Ground Plug
3-Prong Receptacle


 To Next Page