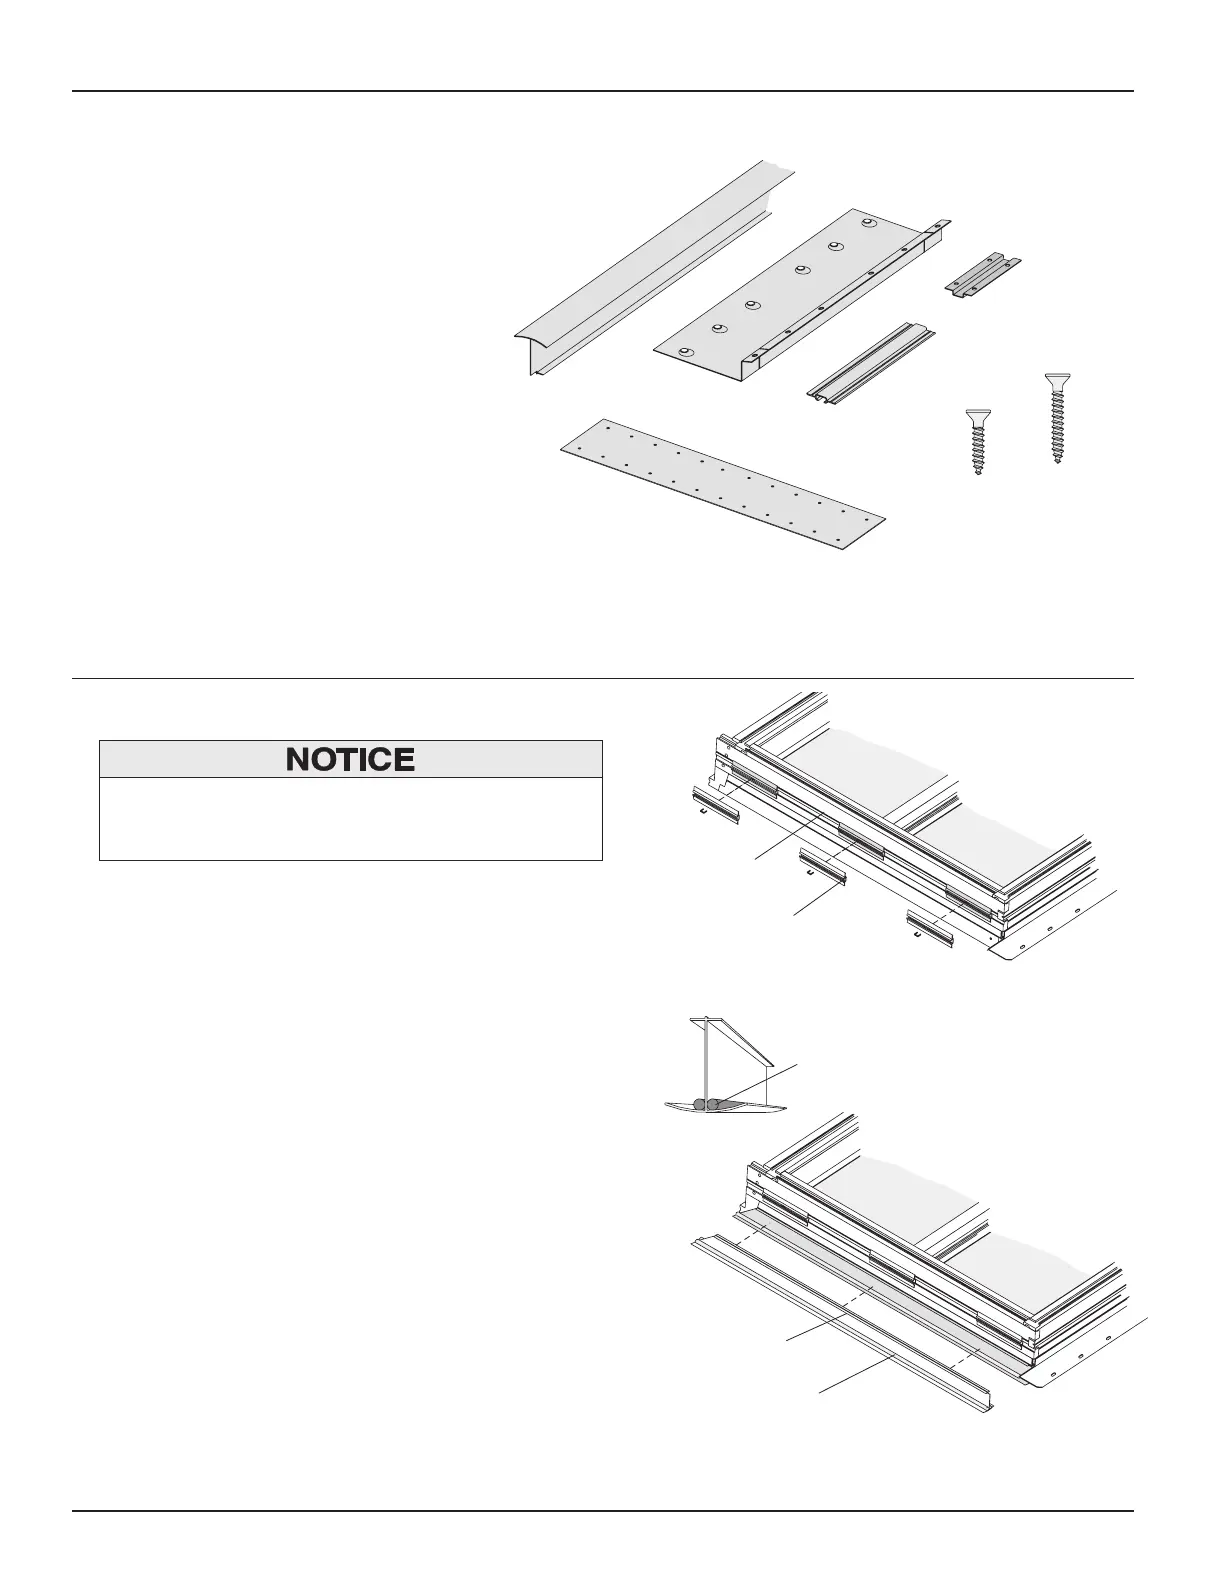
Components
1" Screw
1-3/8"
Screw
Head Gusset Plate
Sill Gusset Plate
Non-Reinforced
Mullion Alignment
Spacer
Vertical Exterior
Trim Strip
Non-Reinforced
Mullion Clip
Non-Reinforced
Mullion Alignment
Spacer
Vertical Exterior
Trim Strip
Side Jamb
Joining Dado
Vertical
Exterior
Trim Strip
Sill
Sealant
3/16" Diameter
Sealant Bead
Remove any excess adhesive along side jambs being
joined with putty knife to prevent inadequate join.
1. Prepare and Join Units
Interior Sides Up
Non-Reinforced Joining Guide (Vertical)
2
Tools and Supplies
•SafetyGlasses
• Hammer
•ElectricDrill
•3/32"DrillBit
•PhillipsHeadScrewdriver
•CaulkGun
•Sealant
•PuttyKnife
•UtilityKnife
Parts Included
(1) Sill Gusset Plate
(1) Head Gusset Plate
(5) Non-Reinforced Mullion Clips
(3) Non-Reinforced Mullion Alignment Spacers
(1) Vertical Exterior Trim Piece
(10) 1" Screws
(20) 1-3/8" Flat Head Screws
• Placeunitssidebyside,interiorsideuponacleanat
work surface.
• RemoveInstallation Flange from side jambs being joined.
• SelectoneunitforattachingNon-Reinforced Mullion
Alignment Spacers and Vertical Exterior Trim Strip.
• LocateAlignment Spacers into unit's Side Jamb
Joining Dado at top, bottom and center of side jamb,
tacking in place with 1/2" staples or nails.
• Applya3/16"beadofsealant,fulllengthtobothsides
of Vertical Exterior Trim Strip leg, as illustrated below.
• PlaceVertical Exterior Trim Strip, tapered end at sill,
into unit's flange groove. Vertical Exterior Trim Strip
must be flush at ends.