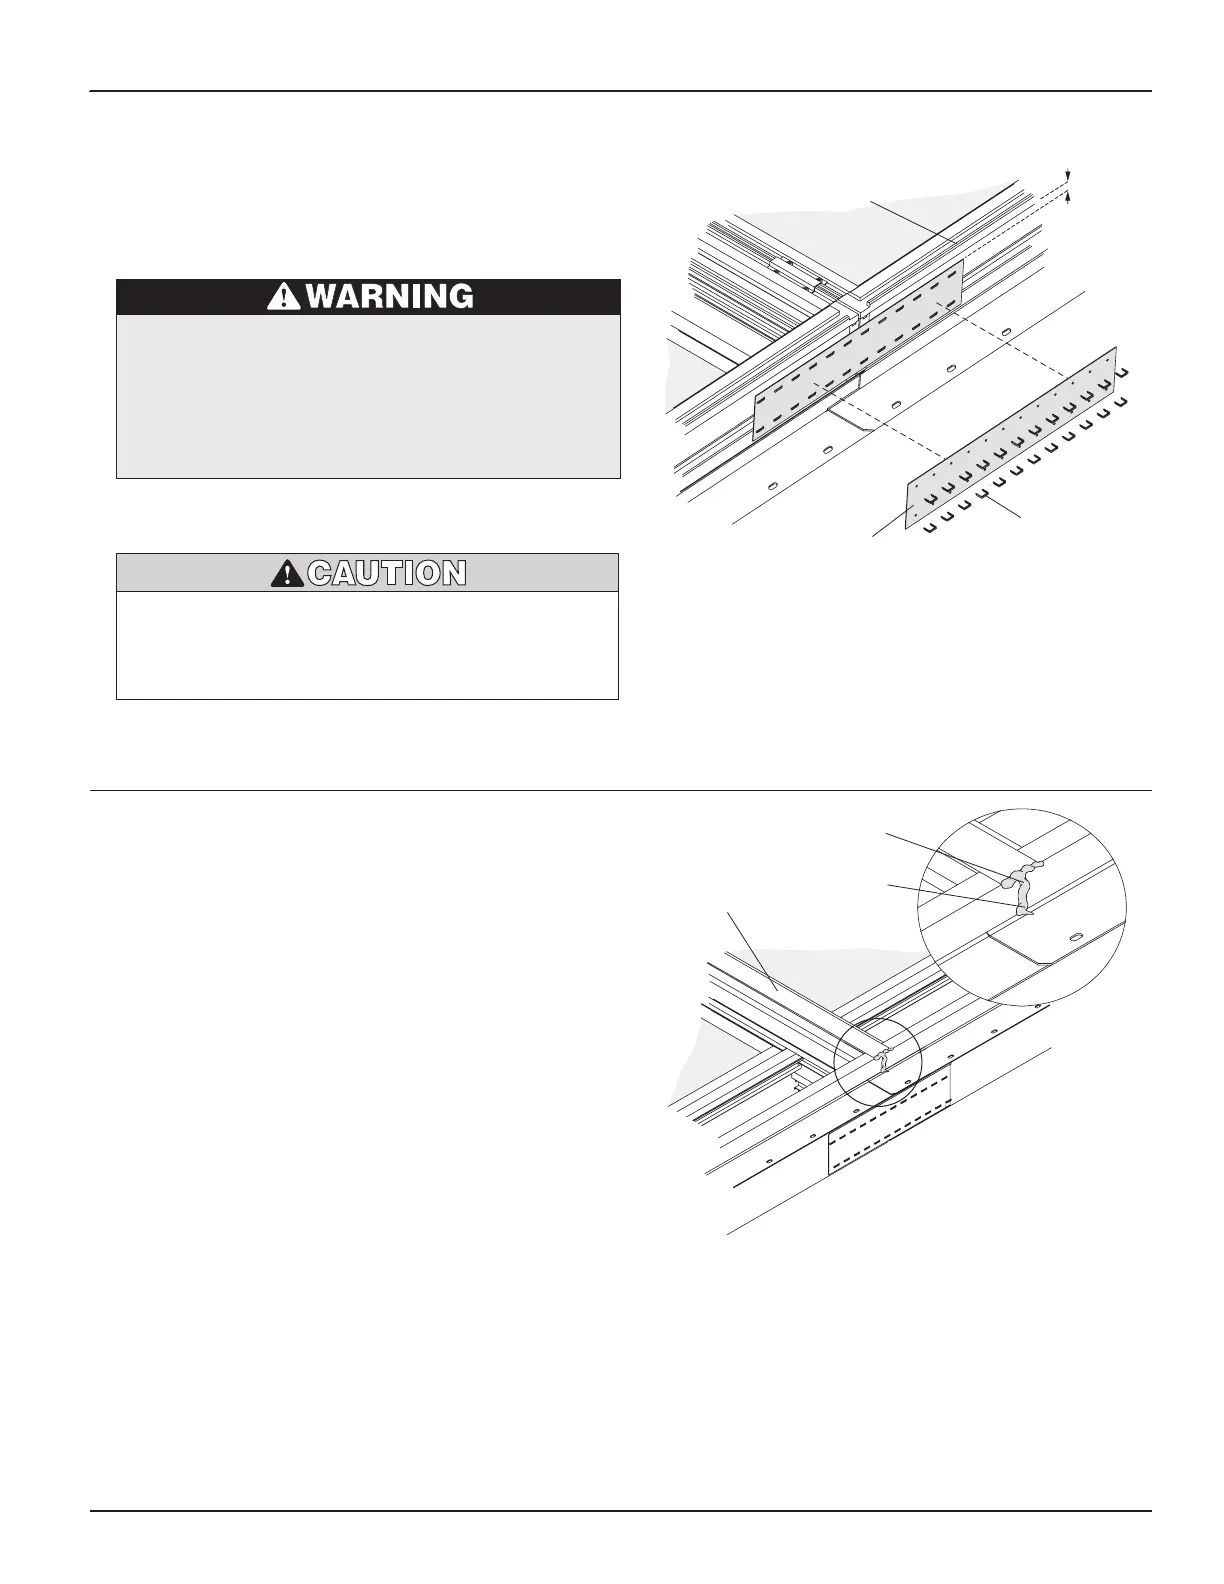
4. Attach Head Gusset Plate
• PlaceHead Gusset Plate on top of Head Jamb 3/4"
below Inside Trim Stop centering at mullion joint.
• Holdinplaceandsecurewithtwenty-four(24)
1/2" staples or nails.
1/2"
Staples or
Nails
Head Gusset
Plate
Inside Trim Stop
Windows and doors can be heavy. Use safe lifting
techniques and a reasonable number of people with
enough strength to lift, carry and install window
and door products to avoid injury and/or product
damage.
• Carefullyturnjoinedunitsover,exteriorsideup.
Make sure all Sash are in the raised position
against the Head Jamb before shipment. Failure to
do so could result in product damage.
5. Seal Mullion Joint
• Sealheadandsillendatmullionjointswith
sealant as illustrated and tool smooth.
• Joinedunitsarenowreadyforinstallation.
Follow installation guide packaged with unit for
window and drip cap installation.
Head of Unit
Mullion Joint
Sealant
3/4"
Interior Sides Up
Exterior Sides Up
Vertical Exterior
Trim Strip
Non-Reinforced Joining Guide (Vertical)
5