2. Attach Non-Reinforced Mullion Clips
• PlaceNon-Reinforced Mullion Clips into groove
betweeninsidestopsalongsidejambs.Locateclips
3" from top, 3" from bottom and one at center
between check rails. Equally space remaining two
clips between check rail and top and bottom clip.
• Makesureunitsareushatends.
• UsingNon-Reinforced Mullion Clips as a guide, drill
into Inside stops using a 3/32" drill bit.
• SecureNon-Reinforced Mullion Clips using four
1-3/8" flat head screws per clip.
Non-Reinforced
Mullion Clips
1-3/8" Screws
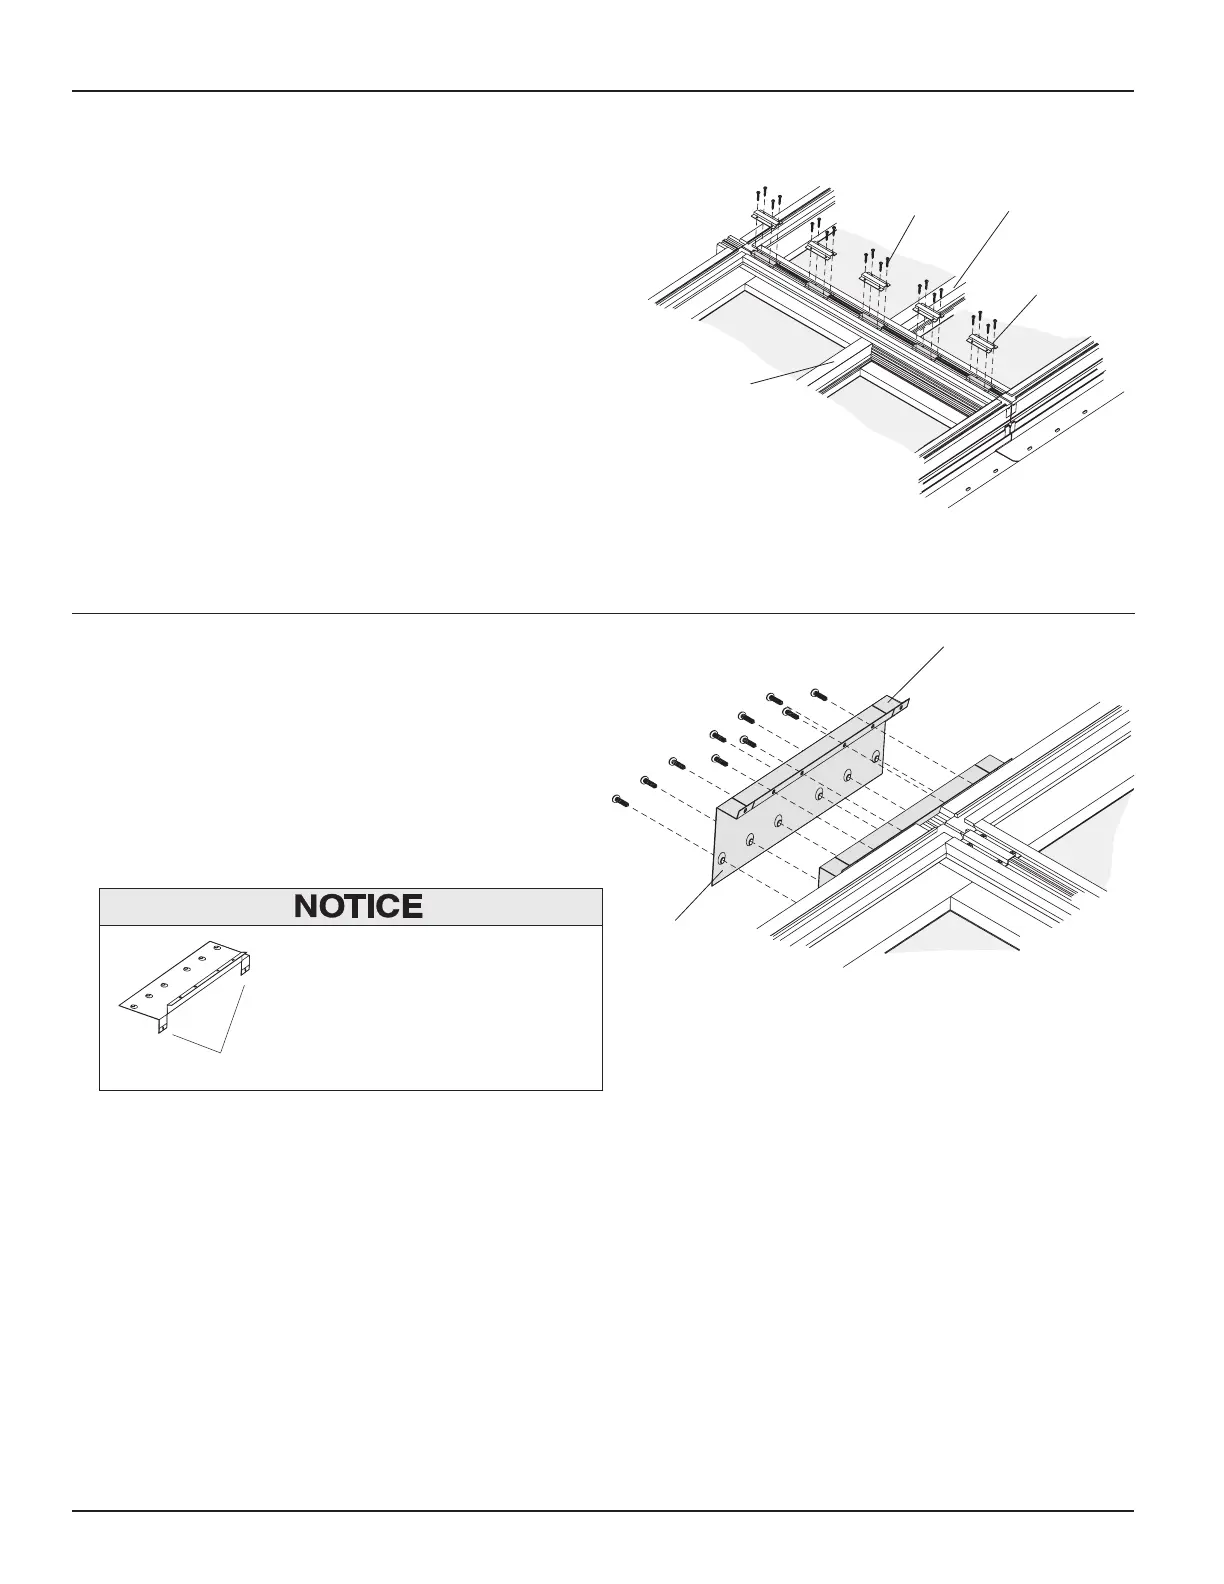
3. Attach Sill Gusset Plate
Sill Gusset
Plate
1" Screws
Sill Gusset Tab
Sill Gusset Tabs can be bent
down and secured to sill plate
after unit has been installed. Sill
Gusset Tabs provide additional
support to joined unit.
• Place Sill Gusset Plate on bottom of sill, formed
edge over sill, centering at mullion joint.
• AlignSill Gusset Plate edge with Sill and secure
with 1" screws as shown. DO NOT insert screws in
the outermost holes (Sill Gusset Tabs) on formed
section of Sill Gusset Plate.
Sill Gusset Tabs
Interior Sides Up
Interior Sides Up
Sill
Head
Check Rail
Check Rail
Non-Reinforced Joining Guide (Vertical)
4