Please read these instructions carefully and retain them
for future reference to ensure that the product is used
correctly. For your own safety, please study each step of
this instruction manual first. &Tradition is not responsible
for any faults or damages caused by not following these
instructions correctly. Do not modify this product in
any way.
Contents
A Tabletop
B Legs x 4
C Corners x 4
D Long frames x 2
E Short frames x 2
F Flat head hex screws x 16
G Short button screws x 16
H Long button screws x 8
I Allen key x 3
J Cover component x 4
K Hex socket head cap screws x 8
Safety precautions
- Dispose of plastic bag from packaging and do not allow
children to play with it.
- The table is only intended for indoor use.
- Handle tabletop with care in order not to scratch surfaces.
- Two or more adults are required when lifting the table.
Cleaning instructions
Laminate can be cleaned with a soft cloth wrung in a mild
solution of lukewarm water and an universal cleaning
detergent. Always wipe with a dry soft cloth after clean-
ing. For difficult stains such as coffee or tea use a nylon
bristle brush with mild household cleaner or detergent,
rinsing with clean water and repeating as necessary. Rinse
thoroughly with water.
Aluminium (powder coated or polished) can be cleaned
using a soft cloth wrung in lukewarm water. Always dry im-
mediately with a soft cloth. Avoid use of abrasive cleaning
products such as steel wool as this will cause damage to the
surface.
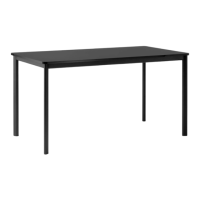
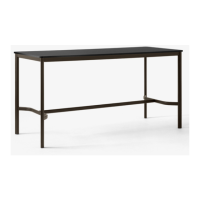
Drip HW58-HW60
Hee Weeling
2021
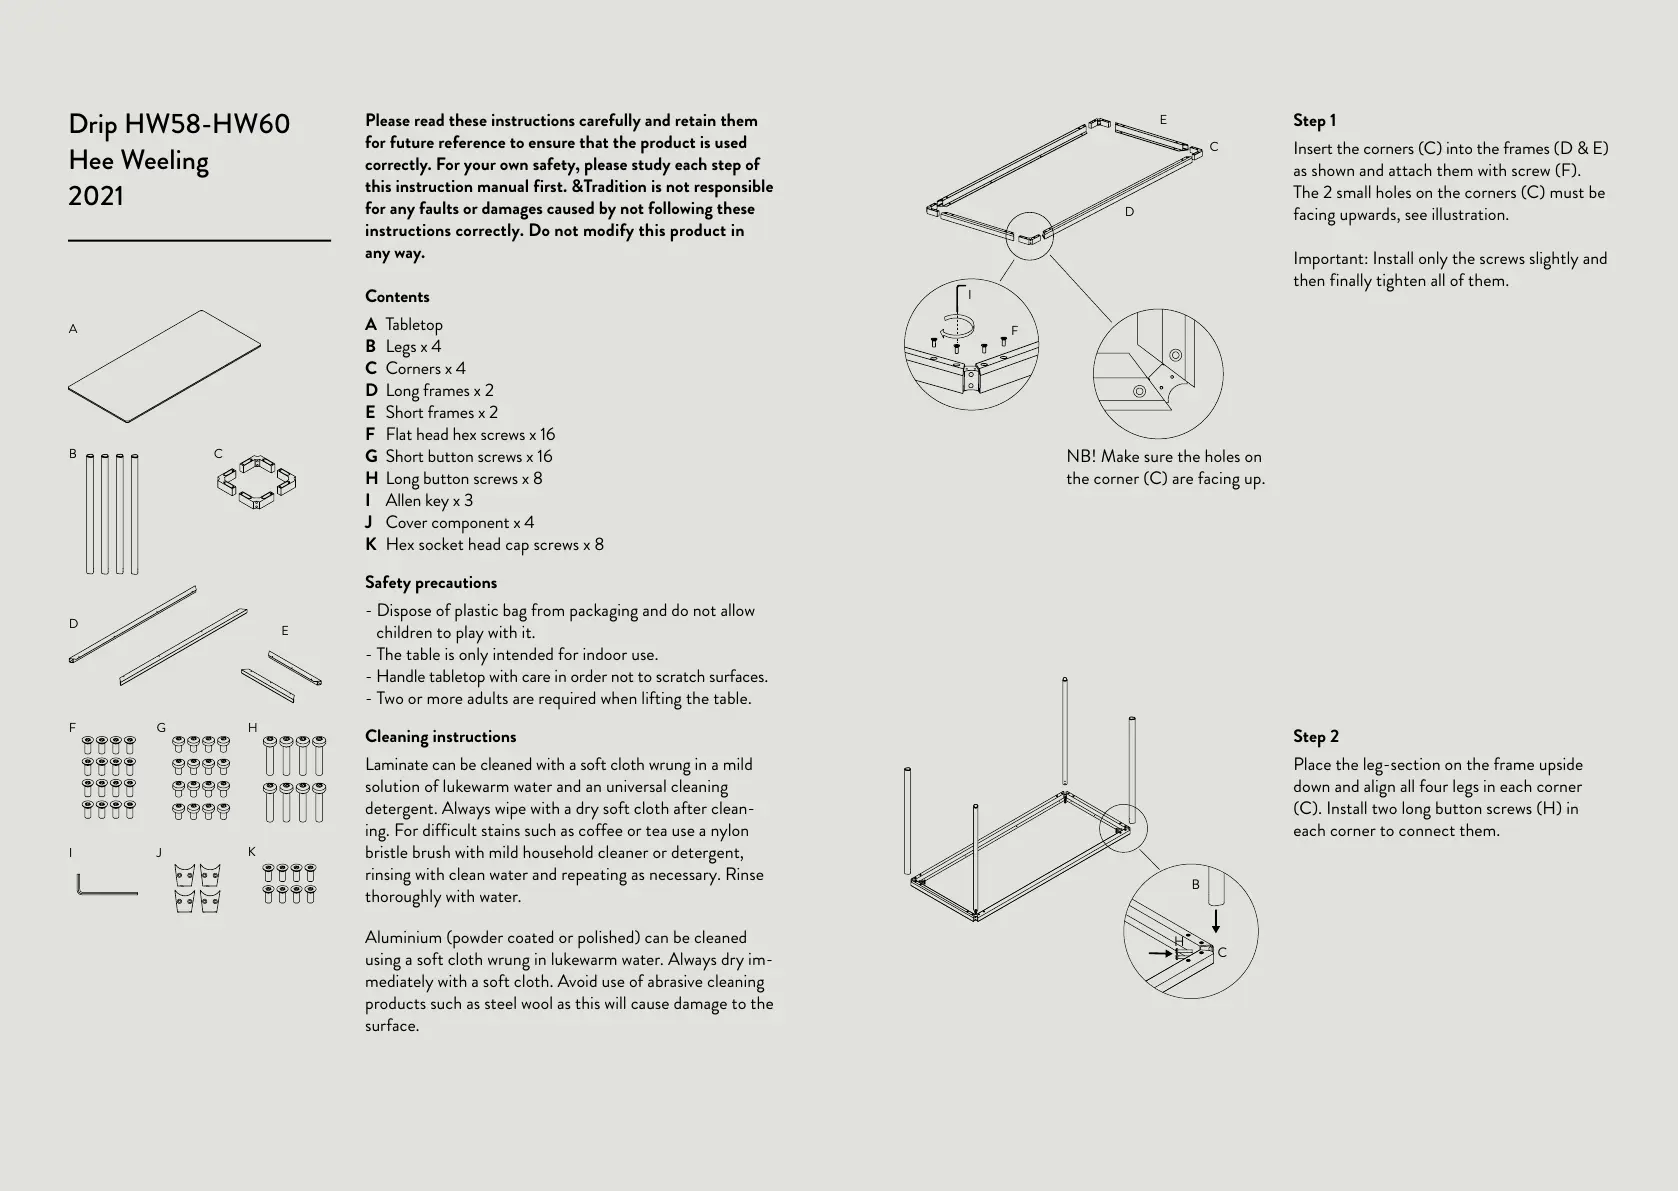
Step 1
Insert the corners (C) into the frames (D & E)
as shown and attach them with screw (F).
The 2 small holes on the corners (C) must be
facing upwards, see illustration.
Important: Install only the screws slightly and
then finally tighten all of them.
Step 2
Place the leg-section on the frame upside
down and align all four legs in each corner
(C). Install two long button screws (H) in
each corner to connect them.
NB! Make sure the holes on
the corner (C) are facing up.
I J
K
A
B
D
C
E
F G
H
C
B
H
E
D
C
A
D
DETAIL D
SCALE 1 : 5
A A
B B
C C
D D
E E
F F
G G
H H
12
12
11
11
10
10
9
9
8
8
7
7
6
6
5
5
4
4
3
3
2
2
1
1
DRAWN
CHK'D
APPV'D
MFG
Q.A
UNLESS OTHERWISE SPECIFIED:
DIMENSIONS ARE IN MILLIMETERS
SURFACE FINISH:
TOLERANCES:
LINEAR:
ANGULAR:
FINISH:
DEBURR AND
BREAK SHARP
EDGES
NAME
SIGNATURE
DATE
MATERIAL:
DO NOT SCALE DRAWING
REVISION
TITLE:
DWG NO.
SCALE:1:10
SHEET 1 OF 1
A2
WEIGHT:
HW62_1900x800x950
I
F