The provided document is a user manual for the Drip HW61-HW64 table, designed by Hee Welling in 2021 for &Tradition. This manual outlines the assembly instructions, contents, safety precautions, and cleaning instructions for the table.
Function Description:
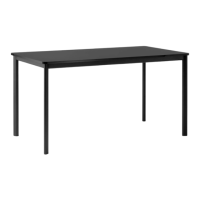
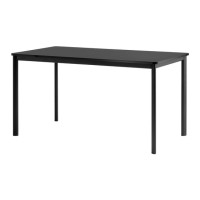
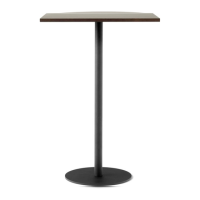
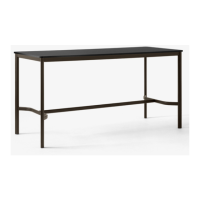
The Drip HW61-HW64 is a table designed for indoor use. Its primary function is to provide a stable and aesthetically pleasing surface for various activities within a home or office environment. The design, attributed to Hee Welling in 2021, suggests a modern and functional piece of furniture. The assembly process involves connecting several frame components, legs, and a tabletop to form the complete structure.
Important Technical Specifications:
While specific dimensions are not provided, the manual lists the components required for assembly, giving an indication of the table's construction.
- Components:
- Tabletop (A)
- Legs (B) x 4
- Corners (C) x 4
- Long frames (D) x 2
- Short frames (E) x 2
- Middle crossbar (F)
- End-crossbars (G) x 2
- Adaptor (H) x 6
- Long hex screws (I) x 12
- Short hex screws (J) x 12
- Flat head hex screws (K) x 16
- Short button screws (L) x 14
- Long button screws (M) x 8
- Allen key (N) x 3
- Cover components (O) x 4
- Hex socket head cap screws (P) x 8
- Materials (implied by cleaning instructions):
- Laminate (for the tabletop)
- Aluminium (powder coated or polished, likely for the frame and legs)
Usage Features:
The Drip table is designed for straightforward assembly, though it emphasizes careful adherence to instructions.
- Assembly: The manual provides a step-by-step guide for assembly, starting with connecting corners to frames, then attaching adaptors to legs and crossbars, followed by connecting crossbars to legs, attaching the middle crossbar, and finally securing the leg-section to the frame and placing the tabletop.
- Step 1: Insert corners (C) into frames (D & E) and attach with flat head hex screws (K). Crucially, the two small holes on the corners (C) must face upwards. Screws should initially be installed slightly and then fully tightened.
- Step 2: Install one adaptor (H) in the lower middle part of each leg (B) using two long hex screws (I), ensuring correct adaptor direction.
- Step 3: Connect one adaptor (H) in the middle of each end-crossbar (G) using two long hex screws (I), ensuring correct adaptor and crossbar direction.
- Step 4: Connect the end-crossbar (G) to two legs (B) using short hex screws (J).
- Step 5: Attach the middle crossbar (F) to the frame, ensuring the holes are in the correct direction.
- Step 6: Place the leg-section on the frame upside down, align all four legs in each corner (C), and connect them using two long button screws (M) in each corner.
- Step 7: Place cover components (O) on each of the 4 corners (C) and attach them with hex socket head cap screws (P).
- Step 8: Place the tabletop (A) upside down on a soft, flat surface. Place the assembled frame on top, also upside down. Install short button screws (L) slightly, then tighten all of them to secure a correct fit. Finally, flip the table to its upright position.
- Safety Precautions:
- Dispose of plastic packaging properly and keep it away from children.
- The table is intended exclusively for indoor use.
- Handle the tabletop with care to prevent scratches.
- Two or more adults are required when lifting the table, indicating its potential weight or size.
Maintenance Features:
The manual provides specific cleaning instructions for the materials used in the Drip table.
- Laminate (Tabletop):
- Clean with a soft cloth wrung in a mild solution of lukewarm water and an universal cleaning detergent.
- Always wipe with a dry soft cloth after cleaning.
- For difficult stains (e.g., coffee or tea), use a nylon bristle brush with a mild household cleaner or detergent. Rinse with clean water and repeat if necessary.
- Thoroughly rinse with water after cleaning.
- Aluminium (Powder Coated or Polished, for frame/legs):
- Clean with a soft cloth wrung in lukewarm water.
- Always dry immediately with a soft cloth.
- Avoid using abrasive cleaning products, such as steel wool, as these will cause damage to the surface.
The manual emphasizes the importance of following instructions carefully for correct assembly and to prevent faults or damages, stating that &Tradition is not responsible for issues arising from incorrect assembly or modification of the product.