EN 5857 EN
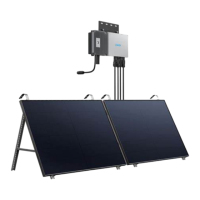
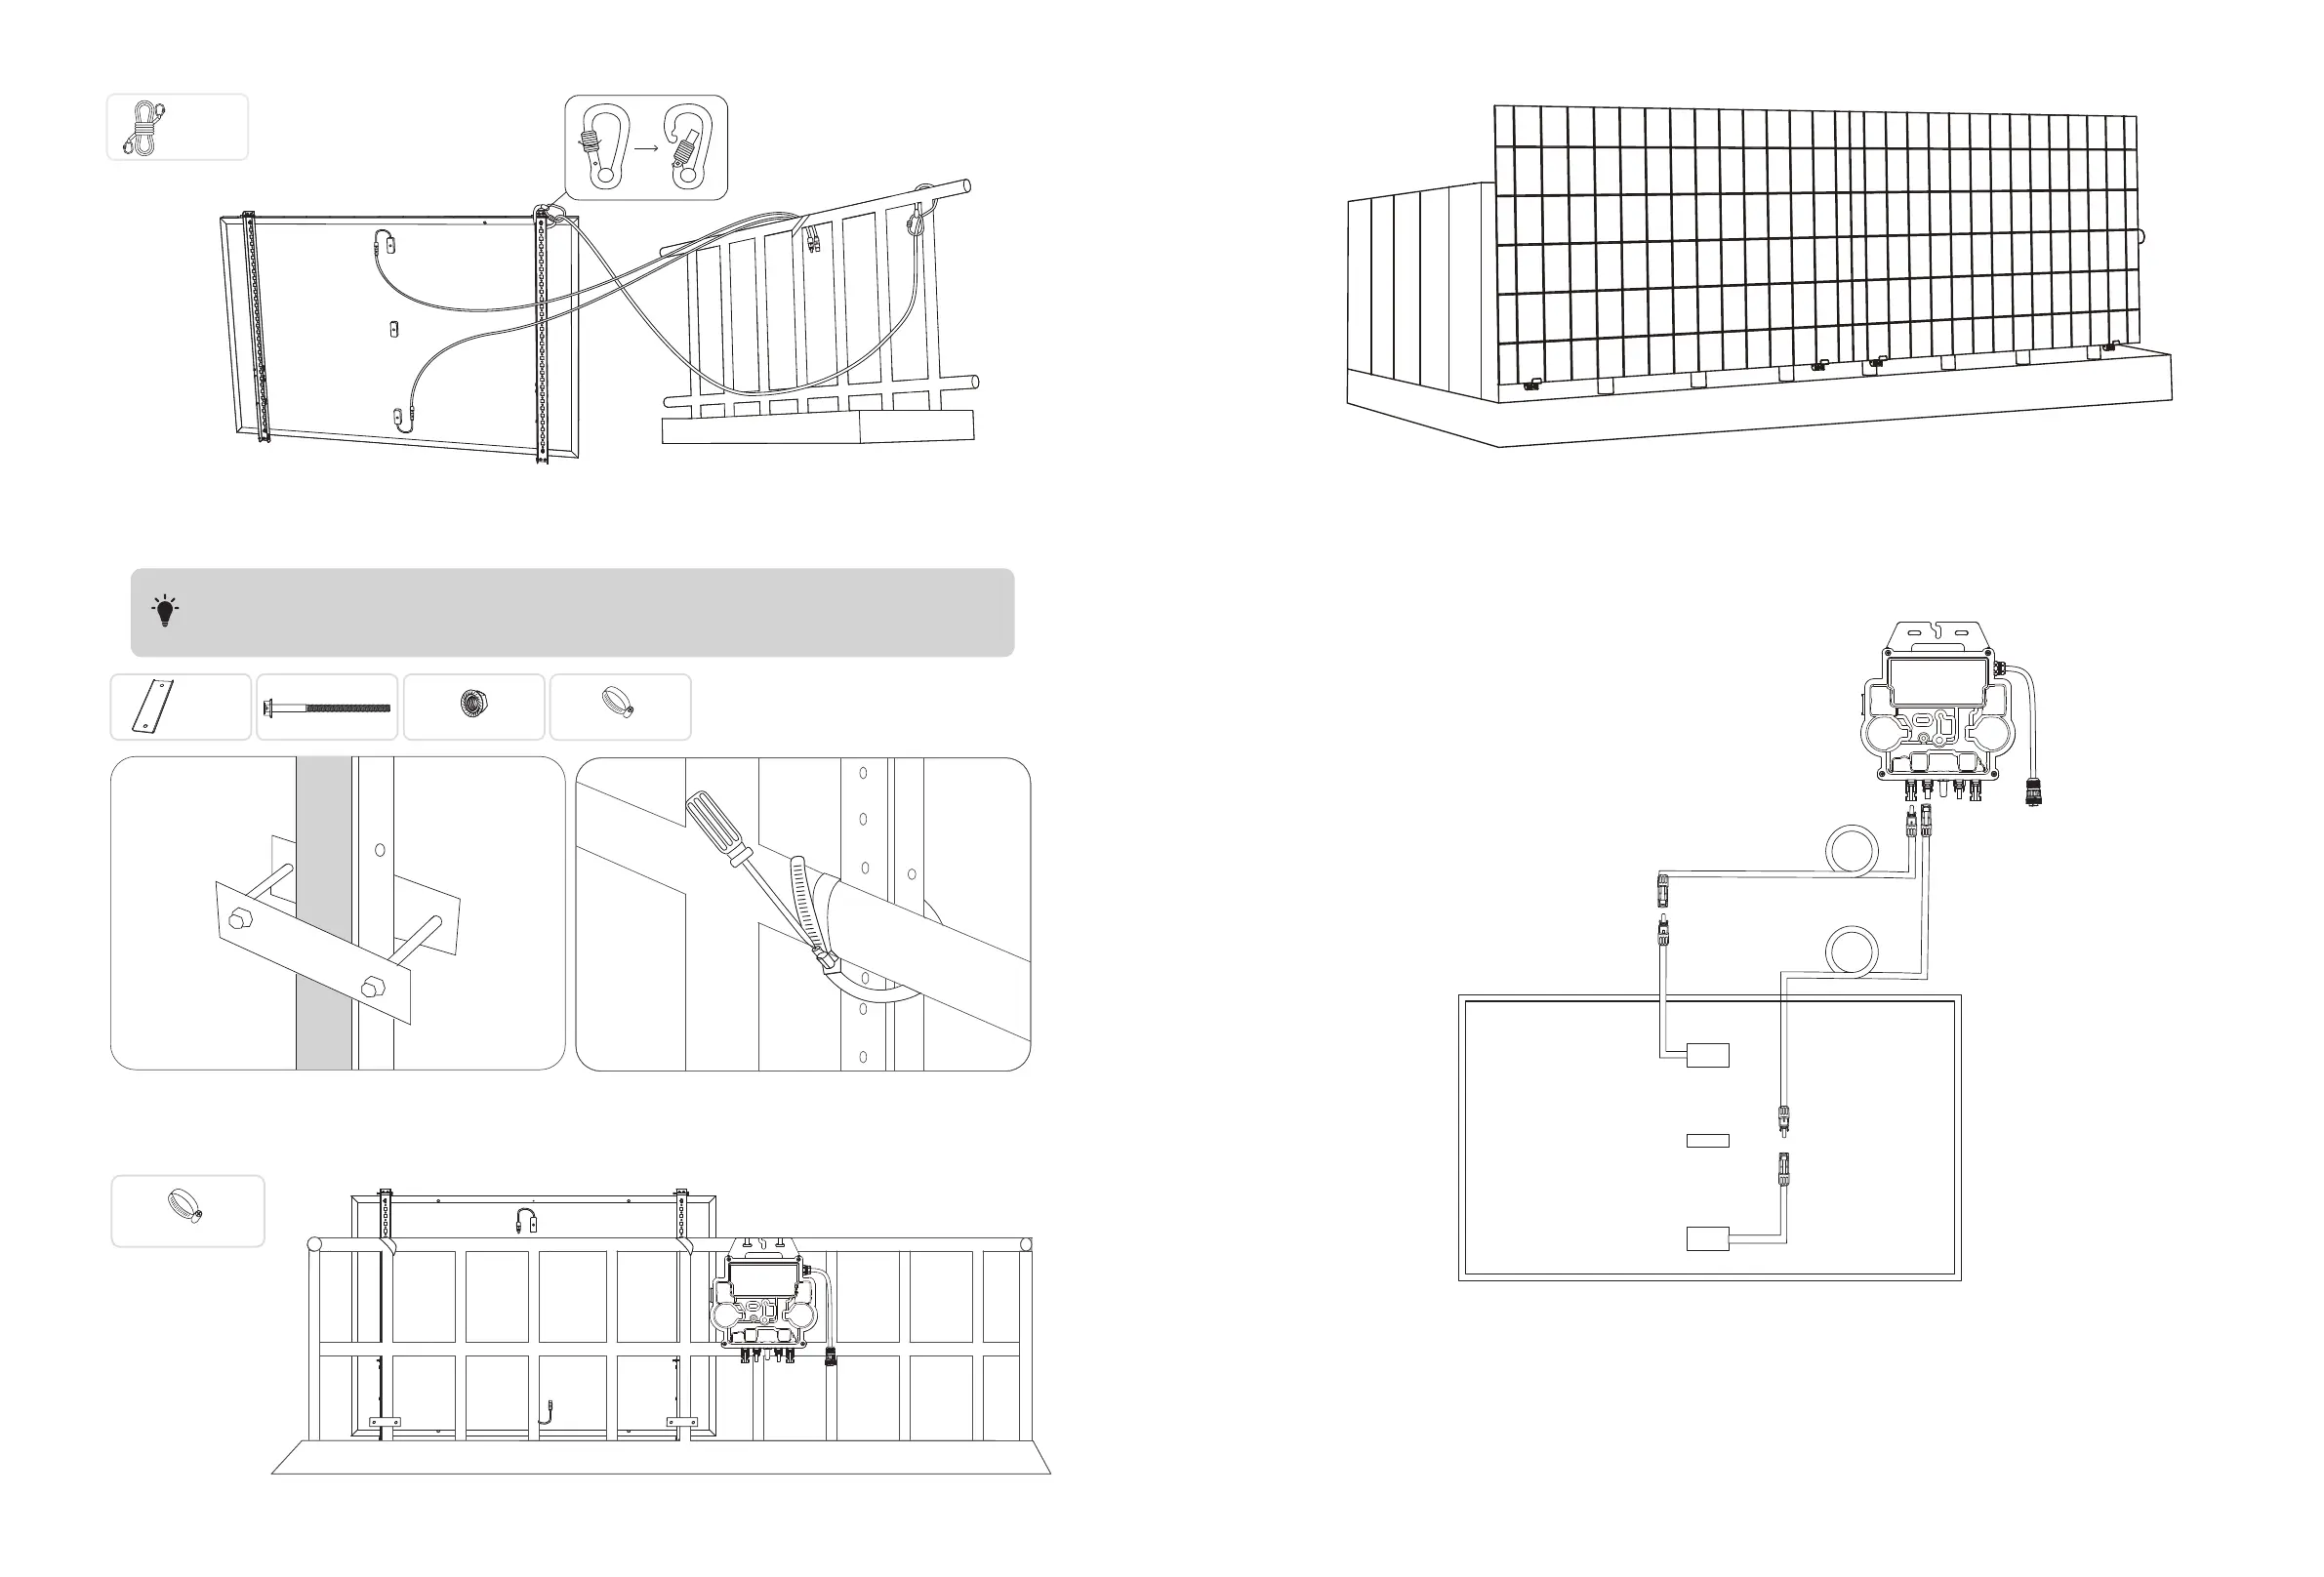
8. Repeat the steps above to install another solar panel.
9. Connect the solar panel and the microinverter with the solar panel extension cables.
Note:
1. Ensure that two solar panels have been installed before this step.
2. This step must be done while there is enough sunlight for the solar panel to provide power to the microinverter.
10. Turn on Bluetooth on your phone.
11. Download the app, and follow the in-app instructions to finish the microinverter configuration and Schuko cable connection,
Then you can connect the microinverter to your home grid via the Schuko cable.
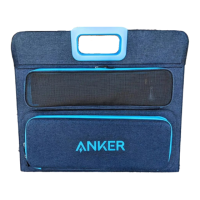
5. Fasten the Mounting Auxiliary Rope to the bracket and the balcony railing. Make sure the rope is tightened.
O x1
Mounting Auxiliary Rope
6. Install the solar panel's support brackets on the balcony railing, then secure them using fastening clamps and stainless steel
hose clamps.
T
·
Tighten the stainless steel hose clamps clockwise, and loosen the stainless steel hose clamps
counterclockwise.
·
At least 2 stainless steel hose clamps are needed to secure the brackets on one side.
M6×100 Hexagon Flange Bolt
E x4
Fastening Clamp
G x4 J x4
M6 Flange Nut
304 Stainless Steel Hose Clamp
K x2
7. Install the microinverter to the balcony railing with stainless steel hose clamps.
Note: The microinverter's front surface (with the Anker logo) should face outwards.
304 Stainless Steel Hose Clamp
K x2
Check if all screws are tightened and complete the installation.
 Loading...