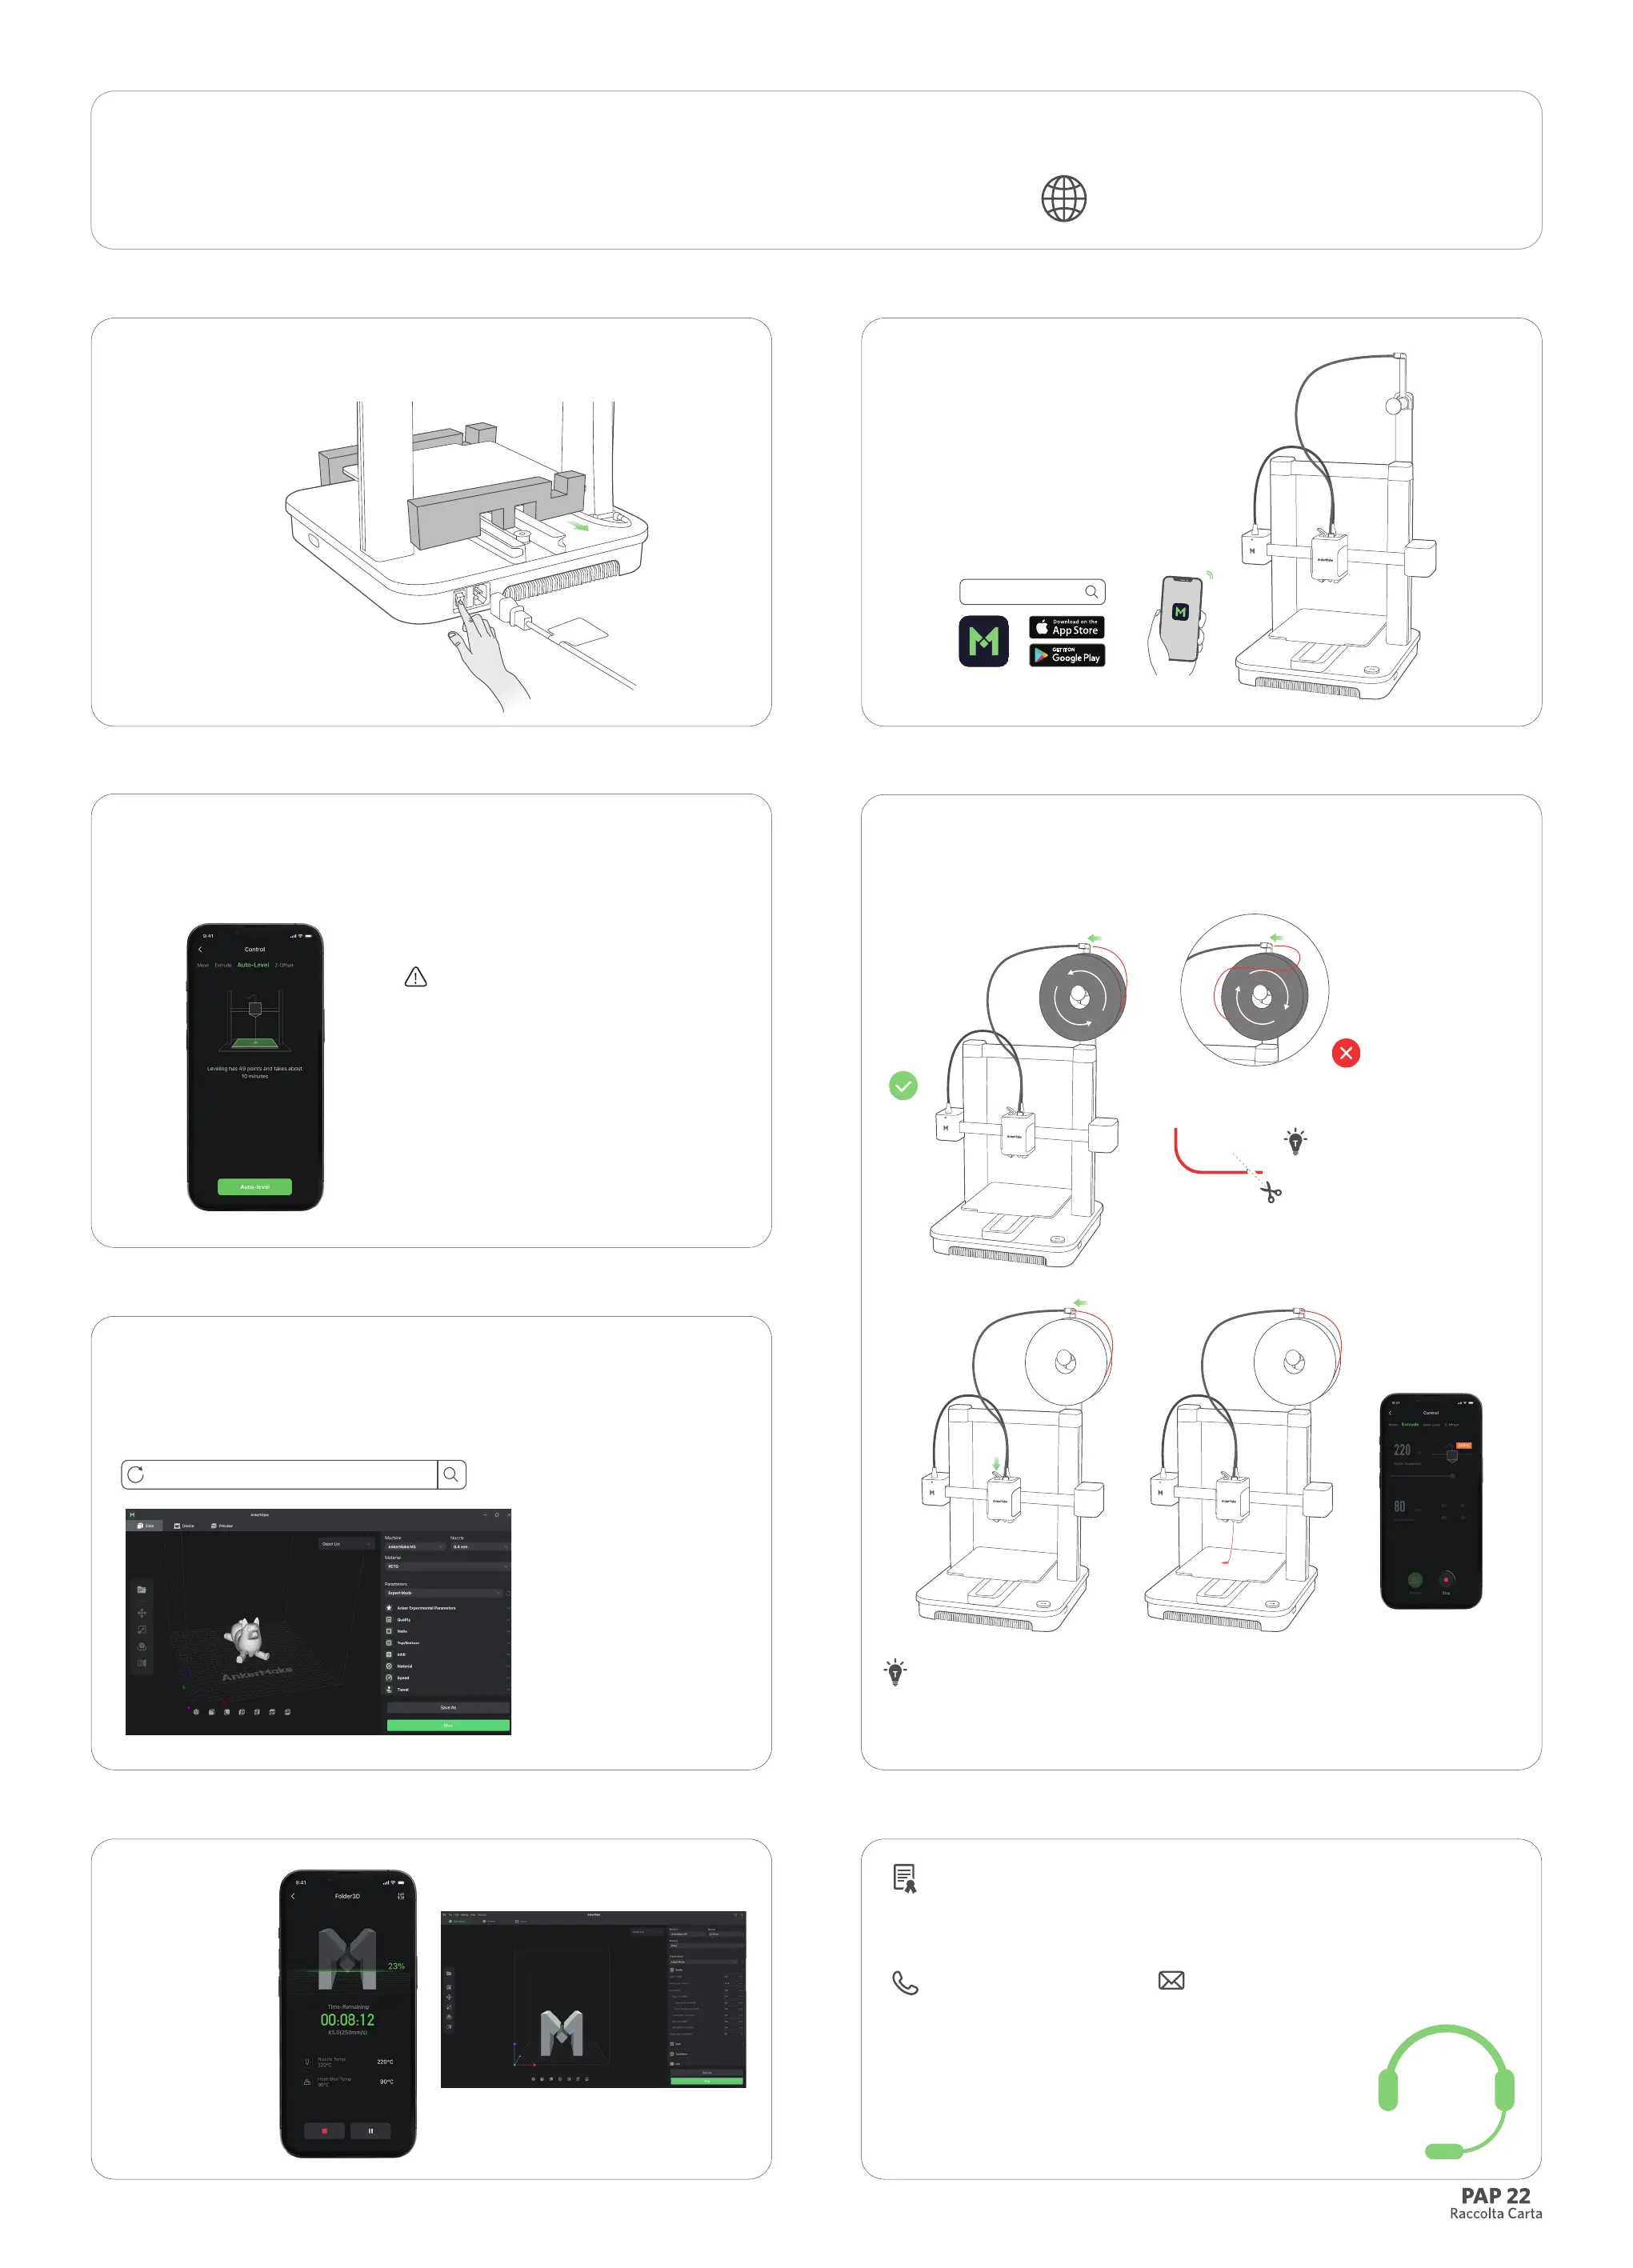
❹ Loading
Filament
Press and hold the extrusion clip while continuing to insert the lament. Stop when you feel
some resistance.
Presione y mantenga presionado el clip del extrusor mientras continúa insertando el lamento.
Deténgase si nota alguna resistencia.
Appuyez et maintenez le clip de l'extrudeur tout en continuant à insérer le lament. Arrêtez
lorsque vous ressentez une certaine résistance.
12-month limited warranty | 12 Monate eingeschränkte Garantie | Garantía limitada de 12 meses |
Garantie limitée de 12 mois | 12 mesi di garanzia limitata | 12 meses de garantia limitada |
通常保証 12 ヶ月
| 1
2 개월 제한 보증
|
ضمان محدود لمدة 12 شهر
ً
ا
support@ankermake.com
support.mea@anker.com
(Middle East & Africa)
CED-CN@anker.com
(中国)
support@anker.com
(日本)
Lifetime technical support | Technischer Support für die Produktlebensdauer | Asistencia
técnica de por vida | Assistance technique à vie | Supporto tecnico per l’intero ciclo di vita |
Suporte técnico ao longo da vida útil do produto |
テクニカルサポート
|
평생 기술 지원
|
دعم تقني دائم
(US) +1 (800) 221-0126
(UK) +44(0)1604 936200
(DE) +49(0)69 9579 7960
(Middle East & Africa) +971 520750842
(UAE) +971 8000320817
(KSA) +966 8008500030
(Kuwait) +965 22069086
(Egypt) +20 8000000826
(AU) +61 3 8331 4800
(TR) +90 (850) 460 14 14
(RU) +8(800)511-86-23
(中国)
+86 400 0550036
( 日本 ) 03 4455 7823
(한국)
+82 02-1661-9246
Anker Innovations Limited
Room 1318-19, Hollywood Plaza,
610 Nathan Road, Mongkok,
Kowloon, Hong Kong
QUICK START GUIDE
AnkerMake M5C 3D Printer
❶
Powering On
❺
AnkerMake Slicer
For the best printing experience, download and install the AnkerMake Slicer to your computer from
Para obtener la mejor experiencia de impresión, descargue e instale el AnkerMake Slicer en su
computadora desde
Pour une expérience d'impression optimale, téléchargez et installez le trancheur AnkerMake sur
votre ordinateur à partir de
❷
Setting up the System
❸
Leveling Heatbed
Avoid moving the printer during the
auto-leveling process.
Procure no mover la impresora
durante el proceso de nivelación
automática.
Évitez de déplacer l'imprimante
pendant le processus d'auto-
nivellement.
Straighten the lament at least
0.78 inches / 2 cm and cut
the tip of the lament at a 45°
angle.
Enderece el lamento al menos
2 cm y corte la punta del
lamento en un ángulo de 45°.
Redressez le lament d'au
moins 0,78 pouces / 2 cm et
coupez l'extrémité du lament
en biais à un angle de 45°.
❻
Printing
51005003867 V1
Encendido
Mise sous tension
Nivelado de la cama caliente
Nivellement du lit chauffant
Impresión
Impression
Carga del lamento
Chargement de lament
Conguración el sistema
Mise en place du système
https://support.ankermake.com/s/


 To Previous Page
 Loading...