Do you have a question about the Anthem AVM 90 and is the answer not in the manual?
Instructions for installing batteries in the MRX/AVM remote control.
Guidance on optimal range and distance for the MRX/AVM remote control.
Diagram for connecting speakers and subwoofers to AVM 90/70 models.
Diagram for connecting speakers and subwoofers to MRX 1140/740/540 models.
Diagram showing how to connect audio and video sources to MRX/AVM units.
Instructions for connecting the MRX/AVM to a network using an Ethernet cable.
Guide for connecting the MRX/AVM to a wireless network via Wi-Fi or Bluetooth.
Accessing and using the web-based interface for MRX/AVM settings.
Methods for navigating the front panel menu using the remote or buttons.
Explanation of virtual and premade inputs for device customization.
Overview of ARC technology for optimizing sound based on room acoustics.
This document serves as a Quick Start Guide for the Anthem AVM 90/70 and MRX 1140/740/540 series of audio/video receivers and processors. It provides essential information for initial setup, including remote control operation, basic connections, network configuration, and an introduction to key features.
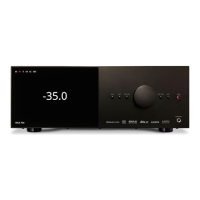
The Anthem AVM 90/70 and MRX 1140/740/540 are sophisticated audio/video components designed to deliver high-quality sound and video performance in home theater environments. The AVM series typically refers to Anthem's AV Processors, which handle audio and video processing but require external power amplifiers for speakers. The MRX series refers to Anthem's AV Receivers, which integrate both processing and amplification into a single unit. These devices are central to a home entertainment system, managing various audio and video sources, processing signals, and driving speakers for an immersive experience.
The remote control for the MRX/AVM units is designed for ease of use. It requires batteries, which should be installed according to the diagram provided in the guide, showing the correct polarity. The remote operates optimally within a range of 6 meters (20 feet) and within a 30-degree angle from the front of the unit. This ensures reliable control from typical viewing distances in a living room or home theater.
The guide details how to connect speakers, subwoofers, and various audio/video sources to the MRX/AVM unit.
Speakers/Subwoofer (AVM 90/70 ONLY): For the AVM 90/70 processors, which require external amplification, the guide illustrates connections to an external amplifier. Speakers are connected to the amplifier's speaker terminals (indicated by '+' and '-' for positive and negative). The amplifier, in turn, connects to the AVM unit's pre-out terminals. Subwoofers can be connected using either XLR IN or SUB IN (RCA) connections on the AVM. The diagram shows multiple subwoofer outputs (SUBWOOFER 1, 2, 3, 4) and balanced XLR outputs for various channels (FRONT, CENTER, SURR, SURR BACK, HEIGHT, WIDE). This flexibility allows for complex multi-channel audio setups, including advanced Dolby Atmos or DTS:X configurations.
Speakers/Subwoofer (MRX 1140/740/540 ONLY): For the MRX series receivers, which have integrated amplification, speakers connect directly to the "ASSIGNABLE SPEAKER OUTPUTS" terminals on the rear of the unit. These terminals are clearly marked for various channels like FRONT L/R, CENTER, SURR L/R, SURR BACK L/R, HEIGHT1 L/R, and HEIGHT2 L/R. Subwoofers connect via the SUB IN (RCA) jacks. The diagram shows the speaker wires connecting to the binding posts, with red for positive and black for negative. The MRX series offers robust power delivery to drive a wide range of passive speakers.
Sources (All MRX/AVM Models): Both MRX and AVM models support a variety of audio and video sources. The primary connection for modern sources is HDMI. The guide shows an HDMI source (e.g., a Blu-ray player or streaming device) connected to an "HDMI IN" port on the MRX/AVM unit. The MRX/AVM then connects to a display (TV or projector) via an "HDMI OUT" port. This setup allows the MRX/AVM to process both audio and video signals before sending the video to the display and the audio to the connected speakers. The rear panel also features multiple HDMI inputs, optical and coaxial digital audio inputs, analog stereo inputs, and Ethernet for network connectivity.
Network connectivity is crucial for accessing the Web UI, streaming content, and utilizing Anthem Room Correction (ARC).
Wired Network Setup (Ethernet Connection): The simplest and most secure method is to connect the MRX/AVM to your network using an Ethernet cable. This provides the quickest setup and a stable connection. The Ethernet port is located on the rear of the unit.
Wireless Network Setup (WiFi or Bluetooth): For wireless connectivity, both antennae must be connected to the unit.
Detailed setup instructions are available in the full manual online at manuals.anthemav.com/mrx-avm/en.
The Anthem Web UI is a new feature that allows users to adjust menu settings from any device (phone, tablet, or computer) connected to the same network as the MRX/AVM. The UI resizes to fit the screen of the device being used. To access the Web UI, you first need the MRX/AVM's IP address, which can be found via the Front Panel Menu: Setup Menu > Network/Control > IP Configuration. Once you have the IP address, enter it into the URL bar of a web browser (e.g., Safari or Google Chrome). The Web UI provides comprehensive control over various settings, including general setup (device name, language, display info, volume scale), speaker configuration, input management, network settings, and system updates.
The Front Panel Menu can be accessed and navigated using either the remote control or the front panel buttons.
Anthem products utilize "Virtual Inputs," offering extensive customization. This means physical inputs are not rigidly tied to specific functions. Users can create custom input combinations, for example, using HDMI 1 for video and a different input (like RCA) for audio, or even creating multiple inputs from the same physical HDMI port with different speaker profiles. Up to 30 Virtual Inputs can be configured. More details are in the full manual at manuals.anthemav.com/mrx-avm/en. The MRX/AVM also comes with "Premade Inputs" for immediate use without complex setup. These include HDMI 1-7, eARC, Streaming, Bluetooth, Optical 1, Coax 1, Analog 1, and Phono (AVM Models Only). These can be modified or deleted as needed.
ARC is a proprietary technology that optimizes the system's sound quality by adjusting the frequency response, level, and phase of each speaker and subwoofer. It aims to preserve the unique acoustic qualities of the room while delivering a natural and balanced sound. Software download and information on how to run ARC are available at AnthemARC.com.
| Brand | Anthem |
|---|---|
| Model | AVM 90 |
| Category | Computer Hardware |
| Language | English |