EasyManua.ls Logo

ANZ EFTPOS User Manual

ANZ EFTPOS
2 pages
To Next Page IconTo Next Page
Page #1 background imageLoading...
Page #1 background image
MID
TID
Magnetic Stripe
Card Reader
CANCEL key (Red)
CLEAR key (Yellow)
ENTER key (Green)
FUNCtion key
Printer
CHQ (Green)
SAV (Green)
CR (Red)
Paper FEED key
CHIP Card Reader
MAG Stripe Swipe
Card
CHIP Insert
Card
EFTPOS
Quick Reference Guide
ANZ Merchant Services Support 1800 039 025 Credit Card Authorisation Centre 1800 999 205
Debit Card Authorisation Centre 1800 039 025 Stationery www.anz.com/merchantconnect or
1800 039 025 (Opt 1, 1)
Purchases
Swipe or insert Card
Key in purchase amount and press <ENTER>
Key in cash out amount (if required) or <ENTER> to continue
Conrm amount is correct and press <ENTER>
Select account type: <CHQ> <SAV> <CR> or
Select application type*: 1 for Visa Debit, 2 for eftpos SAV
or 3 for eftpos CHQ
Have customer enter their PIN or press <ENTER> for customer
to sign the receipt
Verify customer’s signature
• Press <ENTER> to print customer copy.
*Application type names and order can vary depending on the Card that is used.
Refunds
• Press <ENTER> until the PUR CASH REF screen
appears. Select refund by pressing the <CR> key
Swipe EFTPOS & multiPOS merchant card
(Terminal ID Card)
If you have not received this card please contact
ANZ Merchant Services Support on 1800 039 025 for
Manual Processing assistance.
Enter refund amount, then press <ENTER>
Conrm amount then press <ENTER>
Swipe or insert customers card
Select account type: <CHQ> <SAV> <CR> or
Select application type*: 1 for Visa Debit, 2 for eftpos
SAV or 3 for eftpos CHQ
Have customer enter their PIN or press <ENTER> for
customer to sign the receipt
Verify customer’s signature
• Press <ENTER> to print customer copy.
*Application type names and order can vary depending on the Card
that is used.
Last Transaction – Copy
Press <ENTER> until “SUPERVISOR” screen
Select Copy <CR>
Question and Answer IconNeed help?

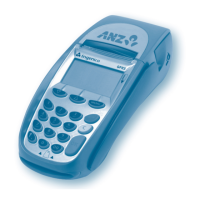
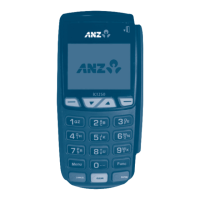
Do you have a question about the ANZ EFTPOS and is the answer not in the manual?

ANZ EFTPOS Specifications

General IconGeneral
Connectivity4G
DisplayTouchscreen
Payment MethodsCredit/Debit cards, Contactless payments, Mobile payments
SecurityEnd-to-end encryption
Power SourceRechargeable battery, power adapter

Summary

EFTPOS Purchases

Card Insertion and Amount Entry

Steps for inserting card, entering purchase and cash out amounts, and confirming the transaction.

Account and Application Type Selection

Selecting the correct account type (CHQ, SAV, CR) and application type for the transaction.

Customer Verification and Receipt Printing

Customer enters PIN or signs, verifies signature, and prints receipt copy.

EFTPOS Refunds

Initiating a Refund

Accessing the refund screen by pressing ENTER, and selecting the refund option.

Processing Refund Details

Entering refund amount, confirming it, and selecting account/application types for the refund.

Customer Verification for Refunds

Customer verification via PIN or signature, and printing the refund receipt copy.

Last Transaction Copy

Accessing Supervisor Menu

Navigating to the 'SUPERVISOR' screen by pressing ENTER multiple times.

Selecting and Printing Copy

Selecting the 'Copy' option and confirming to print the last transaction receipt.

Printing Reports

Accessing Report Menu

Navigating to the 'ANZ EFTPOS / TOTL DETL SET' screen to select report options.

Selecting Report Types

Choosing specific reports like Sub Totals, Summary Totals, or Last Settlement.

Settlement Process

Initiating Terminal Settlement

Accessing the settlement screen and selecting the SETL option to begin.

Settlement Timing and Procedure

Understanding settlement times and terminal's automatic or manual settlement process.

Clearing EFB Transactions

EFB Transaction Clearing Steps

Procedure to clear stored Electronic Fall Back (EFB) transactions using specific key presses.

Manual Processing Assistance

Contact for Manual Processing

Contacting support for manual processing floor limits and obtaining necessary cards/plates.

Sleeper Timer Configuration

Understanding Sleeper Timer

Information on the terminal's 'power down' feature to conserve battery life.

Terminal Fault Troubleshooting

Self-Help Steps for Faults

Performing power resets and initializations to resolve common terminal issues.

Advanced Troubleshooting

Steps for power cycling the unit and checking cable connections for persistent faults.

Terminal Security Measures

Secure Terminal Placement

Ensuring the terminal is in a secure location to protect cardholder data entry.

Authorized Maintenance

Only authorized personnel are permitted to install or maintain the terminal.

Related product manuals