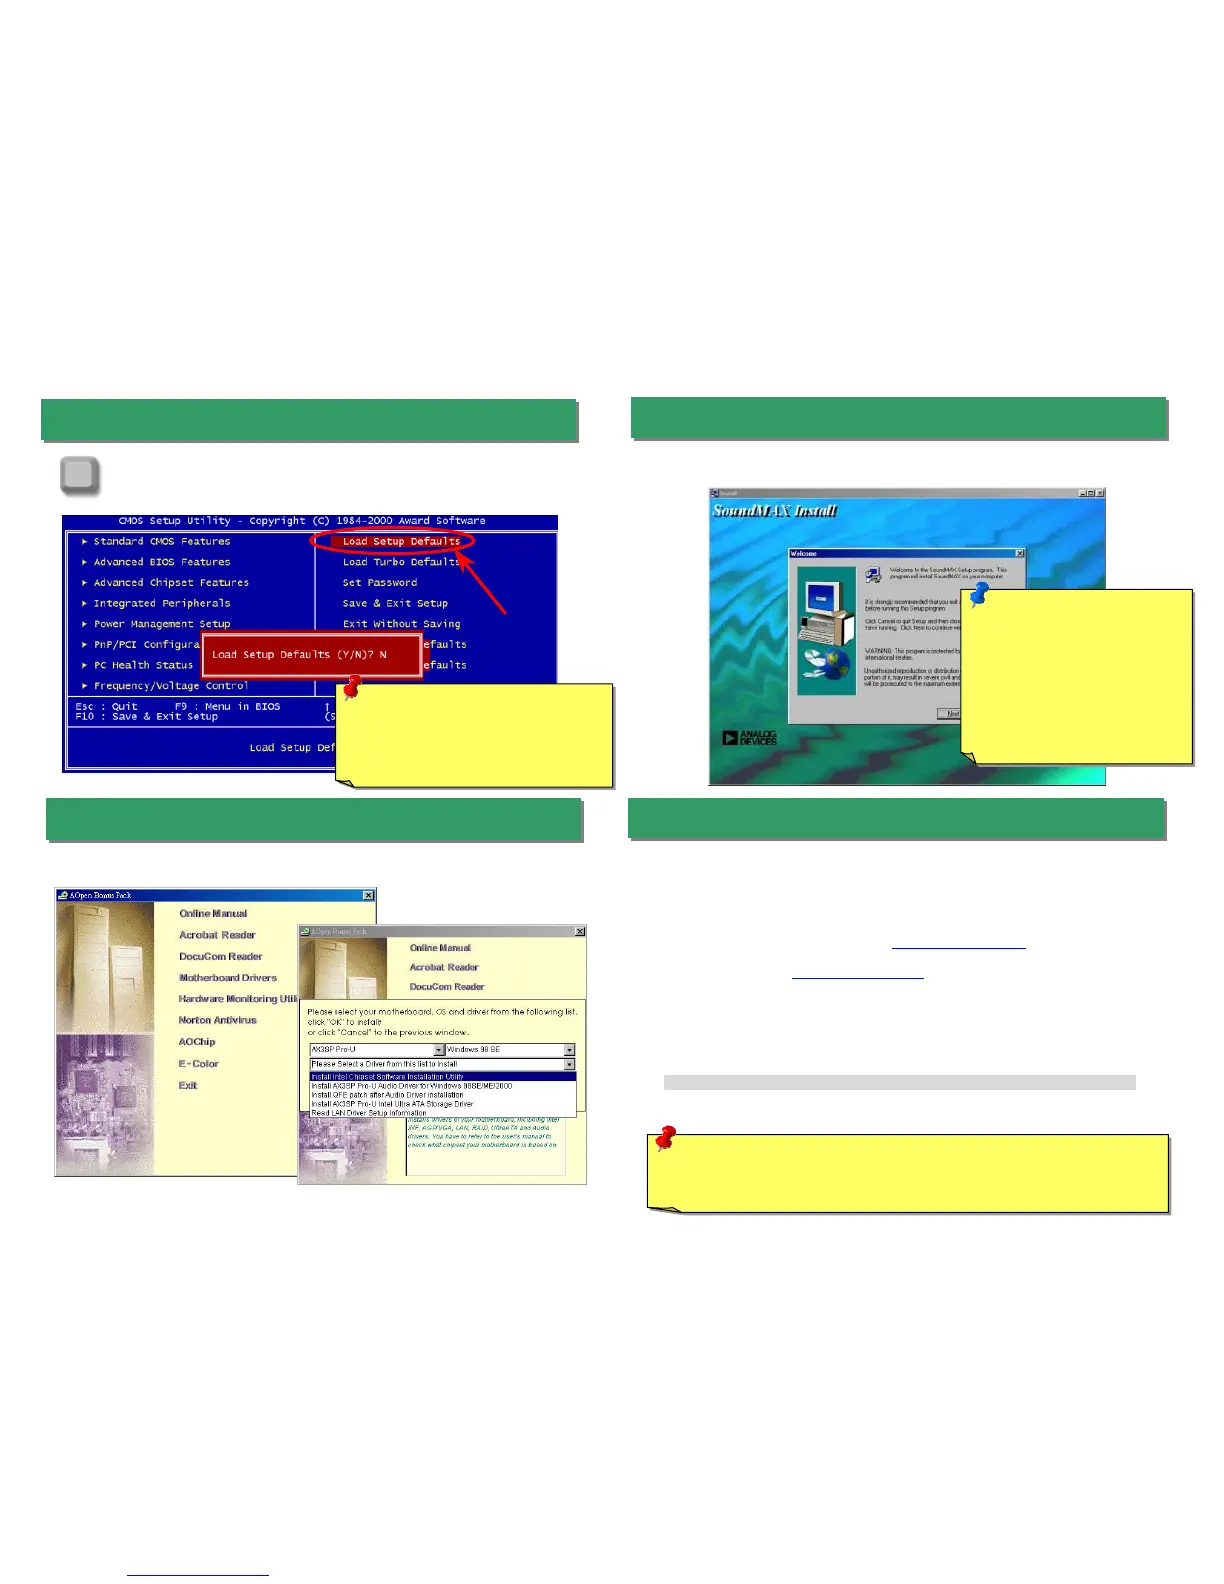
fter you finish the setting of jumpers and connect correct cables. Power on
and enter the BIOS Setup, press <Del> during POST (Power On Self Test).
Choose "Load Setup Defaults" for recommended optimal performance.
14. Power-on and Load BIOS Setup
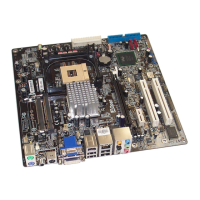
15. AOpen Bonus Pack CD
17. BIOS Upgrade
Open Easy Flash is more user-friendly than traditional flash method. The BIOS binary
file and flash routine are combined together and you simply run a single file to complete
the flash process.
1. Download new BIOS upgrade zipped file from AOpen's web site. For example,
AX3SPPU102.ZIP.
2. Run shareware PKUNZIP (http://www.pkware.com
) which supports
miscellaneous operation systems to extract the binary BIOS file and the flash
utility. Or Winzip (http://www.winzip.com/) in Windows environment.
3. Save the unzipped file into a bootable floppy disk.
For example, AX3SPPU102.BIN & AX3SPP102.EXE
4. Reboot the system to DOS mode without loading any memory handler (such as
EMM386) or device driver. It needs around 520K free memory space.
5. Execute A:> AX3SPPU102 and the program will do the rest of it.
DO NOT turn off the power during FLASH PROCESS until you are asked to!!
6. Reboot system and press <Del> to enter BIOS Setup, Choose "Load Setup
Defaults", then “Save & Exit Setup” and finish the BIOS upgrade.
Warning: The upgrade of new BIOS will permanently replace your original BIOS
content after flashing. The original BIOS setting and Win95/Win98 PnP information
will be refreshed and you probably need to re-configure your system.
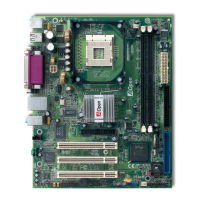
16. Installing Onboard Sound Driver
You can use the autorun menu of Bonus CD disc. Choose the utility and driver and select
model name.
Del
Warning: Please avoid of using "Load
Turbo Defaults", unless you are sure
your system components (CPU, DRAM,
HDD, etc.) are good enough for turbo
settin