- 7 -
Fot. 16
I
II
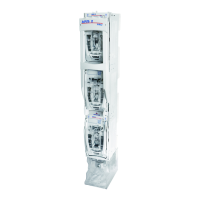
b) chwycić za „uszy” pokrywki i osadzić ją w prowadniku (aż do oporu) zgodnie z kierunkiem strzałki oznaczonej
jako „I” (Fot. 16). Wsuniętą pokrywkę obrócić zgodnie z kierunkiem strzałki oznaczonej jako „II” (Fot. 16)
take „ears” of the cover and set it in a guide (up to resistance) in direction indicated by the arrow
marked „I” (Fig. 16). Inserted cover rotate in accordance with the arrow marked as „II” (Fig. 16)
c) zatrzasnąć pokrywkę w prowadniku (Fot. 17)
snap the cover in the guide (Fig. 17)
d) powyższe operacje wykonać dla kolejnych pokryw
above operations one should make for the following covers
7.ZAŁĄCZANIEAPARATU
SWITCHINGONTHEDISCONNECTOR
a) chwycić rączkę i energicznym ruchem przesunąć ją w kierunku jak wskazuje strzałka (Fot. 18)
aż do całkowitego zamknięcia rozłącznika (Fot. 19)
take the handle and firmly move it in direction indicated by the arrow (Fig. 18) until the disconnector
is completely closed. (Fig. 19)
Fot. 18 Fot. 19
Fot. 17
 Loading...