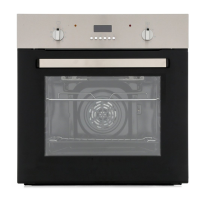
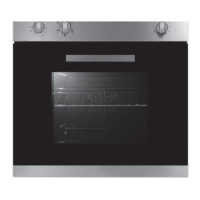
The AMFTZ60SS is a built-in electric multifunction twin zone oven designed for domestic use, offering versatility and control for various cooking needs.
Function Description
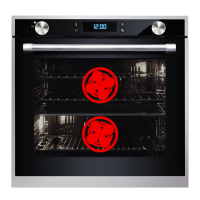
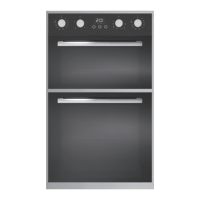
This oven features a unique twin zone capability, allowing the oven cavity to be divided into two separate cooking zones using a removable oven cavity divider. This enables independent cooking in the upper and lower zones simultaneously, or the use of a single, larger zone when the divider is removed. The oven supports various cooking functions including True Fan, Top Heat + Convectional, Large Grill, Small Grill, Bottom Heat + Convectional, Conventional, and Defrosting. The electronic programmer allows for precise control over temperature, cooking time, and delayed start cooking. A kitchen timer function is also available.
Important Technical Specifications
- Model: AMFTZ60SS
- Type: Built-in Electric Multifunction Twin Zone Oven
- Power Supply: 220-240V~, 50/60Hz
- Power Consumption: 3.9-4.7kW
- Power Supply Cable: H05RR-F 3 x 2.5mm²
- Bulb Type: E14
- Wattage & Voltage (Lamp): 25W/220-240V
- Oven Capacity (Net): 67L
- External Dimensions (WxHxD): 594x566x594mm
- Net Weight: 42.7kg
- Protection Class: I (must be connected to a protective ground/Earth)
- Fuse Rating: 32 Amps (recommended for Switched Fused Connection Unit to BS 1363 Part 4)
- Temperature Range: 40°C - 250°C for all zones (Single, Upper, Lower)
Usage Features
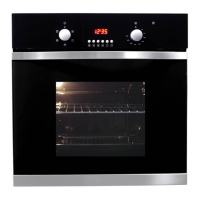
The oven's control panel includes an ON/OFF and cooking zone selection dial, temperature button, function button, display, time button, twin zone - active zone selection, and a time/temp/function control dial.
Setting the Clock: Upon first power-up, the display will show "0:00" blinking. The clock is set by turning the Time/Temp/Function dial to adjust hours, then pressing the Time button to select minutes. The oven cannot be operated until the clock is set.
Using the Divider: The oven cavity divider, when inserted in the central position (level 3), creates two independent cooking zones. This enhances energy efficiency and flexibility.
- Upper Zone (divider inserted): Functions include True Fan, Top Heat + Convectional, Large Grill. Ideal for cooking small amounts of food, saving energy and time.
- Lower Zone (divider inserted): Functions include True Fan, Bottom Heat + Convectional. Also ideal for cooking small amounts of food, saving energy and time.
- Single Zone (divider removed): Functions include True Fan, Top Heat + Convectional, Conventional, Large Grill, Small Grill, Bottom Heat = True Fan, Defrosting.
- Twin Zone (divider inserted): Allows both upper and lower zones to operate simultaneously, enabling cooking two dishes at different temperatures. Functions include True Fan in both, Top Heat + True Fan in both, Top & Bottom Heat + True Fan in both, Small/Large Grill in Top & Bottom Heat + True Fan in Bottom, Small/Large Grill in Top & True Fan in Bottom.
Setting Temperature:
- Single, Upper, Lower Zones: Press and hold the Temperature button (B) for 2 seconds until the temperature flashes. Turn the Time/Temp/Function dial (G) to adjust in 5°C increments.
- Twin Zone: Press and hold the Temperature button (B) for 2 seconds until the temperature flashes (upper or lower zone). Adjust using the Time/Temp/Function dial (G). Press the Twin Zone button (F) to switch between zones and set the temperature for the other zone.
Setting End Cooking Time: This feature automatically turns off the oven after a programmed time.
- Single, Upper, Lower Zones: After starting cooking, press the Time button (E) for 2 seconds until "0:00" and the end time icon flash. Turn the Time/Temp/Function dial (G) to set the desired end time.
- Twin Zone: Use the Twin Zone button (F) to select the desired zone, then follow the steps for single zone end time setting. Repeat for the other zone.
Setting Delayed Start Cooking: Allows the oven to turn on automatically at a prescribed time.
- Single, Upper, Lower Zones Only: Select cooking zone and temperature. Press and hold the Time button (E) for 2 seconds until "0:00" and the end time icon flash. Turn the Time/Temp/Function dial (G) to set the cooking time. Press the Time button (E) again within 3 seconds to set the end cooking time. Turn the Time/Temp/Function dial (G) to set the desired end time.
Kitchen Timer: Functions independently of cooking. Press and hold the Time button (E) for 2 seconds until "0:00" and the kitchen timer icon flash. Turn the Time/Temp/Function dial (G) to set the time.
Lock Function: Locks touch control buttons. Press Time button (E) and Twin Zone button (F) simultaneously for 1 second to lock (Locked icon appears). Hold for 3 seconds to unlock.
Oven Operational Safety:
- Safety Shut-off: If no cooking time is entered, the oven will shut off automatically after a period (16 hours for <105°C, 8 hours for 105-200°C, 4 hours for 200-250°C).
- Thermal Shut-off System: Automatically cuts power to heating elements if the oven reaches abnormally high temperatures, until a safe temperature is restored.
- Cooling Fan: Operates during and after cooking to release hot air, turning off when internal temperature drops to 110°C or after 22 minutes.
Maintenance Features
First Use Cleaning: Before first use, operate the oven at 200°C on the convection setting for 1 hour to burn off manufacturing residues. Ensure the kitchen is well ventilated during this period.
General Cleaning:
- Enamelled and Stainless Steel Parts: Wipe with a damp cloth using minimal soap and lukewarm water. Avoid abrasive powders or corrosive substances. Rinse thoroughly and dry.
- Inside of the Oven: Clean when still warm with hot water and soap. Rinse and dry thoroughly. Avoid abrasive detergents, sponges, or acids. For tough grease, use a specialist oven cleaner according to instructions.
- Glass Door: Clean with non-abrasive products or sponges and dry with a soft cloth.
- Rubber Seal: Check regularly for condition, clean if necessary, and avoid abrasive products. Contact customer service if damaged.
- Condensation: If condensation forms during extended use, remove it with a dry cloth after the oven cools.
Removing Oven Doors (for thorough cleaning):
- Open the door fully.
- Open lever A on the left-hand hinges completely.
- Open the door to an angle as shown.
- Close the door until left & right hand levers A are hooked to part B of the door.
- Withdraw the hinge hoods by following arrow C.
To replace, reverse the procedure.
Removing Inner Pane of Glass:
- Remove the top plate by unscrewing the 2 screws (A).
- Gently pull out the inner panel of glass.
Clean the glass with an appropriate cleaner, dry thoroughly, and place on a soft surface. This also allows cleaning the inside of the outer glass. To replace, reverse the procedure.
Replacing Oven Lamp:
- Disconnect power, open oven door, and remove oven shelves.
- Remove all internal shelves and shelf support guides by applying downward pressure to Point A and upward pressure to Point B.
- To remove the glass cover, position thumb at the top of the glass panel, exert downward pressure, and the panel will pop off. Use two hands to hold the glass.
- Unscrew the old light bulb and dispose of it safely. Replace with a new bulb as specified in "Technical data" and replace the cover.
Safety Precautions for Maintenance:
- Always switch off the electricity supply before performing maintenance.
- Do not use hot water, diluents, petrol, alcohol, kerosene, washing powder, cleanser, alkaline detergent, acid, chemical cloth, etc., as these can damage enamel coating and plastic.
- Do not clean directly with water to avoid rusting or insulation inefficiency.
- Never use a steam cleaner to clean the inside of the oven.
- Do not line the oven bottom with aluminum foil, as this can compromise cooking and damage the enamel.