This document provides an assembly and user guide for the ApexDesk 71"/60" Elite Series Electric Height-Adjusted Sit to Stand Desk. It details the steps required to set up the desk, explains its core functionalities, and offers troubleshooting and maintenance advice.
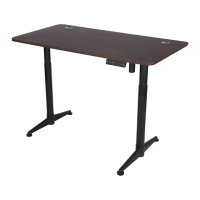
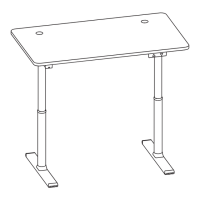
The ApexDesk Elite Series is an electric height-adjustable sit-to-stand desk designed for indoor use in dry work areas. Its primary function is to allow users to easily switch between sitting and standing positions throughout their workday, promoting better ergonomics and health. The desk's height is adjusted via electric motors, providing a smooth and convenient transition between desired positions.
Usage Features:
- Height Adjustment: The desk features electric motors that allow for seamless height adjustment. Users can raise or lower the desk to their preferred ergonomic height, whether sitting or standing.
- Controller with Presets: The desk is equipped with a controller that includes a display and buttons for operation. It offers the ability to program and store up to four preset height positions. To recall a preset height, users simply press the corresponding number button twice or press and hold it. This feature allows for quick and easy transitions to frequently used heights.
- Initialization (Reset) Function: Before first use, and periodically thereafter, the desk must be initialized or reset. This process synchronizes the dual motors and ensures proper operation. The initialization involves pressing and holding both the UP and DOWN arrow buttons until "000" blinks on the display, then releasing them. The desk will cycle through its lowest and highest positions before settling at a default height, typically indicated by "38" (+/- 1) on the display. This reset is crucial for resolving many operational issues.
- Anti-Collision Protection: The desk includes an anti-collision protection feature, which is off by default. This function is designed to prevent damage by detecting obstacles during height adjustment. If activated prematurely, its sensitivity can be reduced or the function can be turned off.
- Cable Management (Optional): An optional cable management tray is available (sold separately) to help organize and conceal cables, contributing to a tidier workspace. The tray mounts to the backside of the beam and can be adjusted left or right as needed.
Assembly and Setup:
The assembly process is broken down into several steps, starting with securing the feet to the lifting columns, then attaching the top support brackets to the beam. A key step involves securing the lifting columns to the beam using L-shaped locking levers. These levers have a shorter axle bar and a curved longer handle, designed to securely clamp the legs to the crossbar. It's important to ensure both locking levers are correctly inserted and pressed down firmly until flush with the beam, and that the lifting columns are tightly secured without wiggling.
After assembling the underframe, it is recommended to connect the height controller cable, motor cables, and power cord to the control box and a power outlet. This allows for initialization and testing of the desk's functionality before mounting the desktop. The motor cables can be connected to either port on the control box and are interchangeable, which can be useful for troubleshooting.
The final assembly step involves carefully placing the assembled frame onto the desktop (a two-person job) and securing it using screws into pre-installed anchors. The controller is then secured to pre-drilled holes on the right-hand side of the desktop. If a different mounting position is desired for the controller, new holes may need to be drilled. Leveling studs on the feet should be adjusted to ensure solid contact with the floor and a stable desk.
Maintenance Features:
- Troubleshooting Guide: The manual includes a comprehensive troubleshooting section to address common issues such as the desk not moving, uneven column movement, excessive wobbling, or unusual noise. Many issues can be resolved by checking connections, performing a desk reset, or switching motor cables.
- Error Code Explanations: A list of error codes (e.g., E0, E1, E3, E4, E5, E6, E7, E8, E9, E11) is provided, along with their corresponding solutions, to help users diagnose and resolve problems. These codes indicate issues ranging from initialization requirements and system malfunctions to motor stalls, cable problems, and anti-collision activation.
- Noise Reduction: If the desk becomes unusually noisy, particularly when one stage extends into another, applying a silicon-based lubricant is suggested as a maintenance step.
- Stability Adjustment: For excessive wobbling, users are advised to ensure all screws are tightened and to adjust the leveling studs on the feet to compensate for uneven floors.
- Manufacturer Support: The manual emphasizes contacting the manufacturer directly for missing parts or persistent issues, providing an email address and phone number for support. This ensures users receive official assistance and replacement parts if needed.
Safety Precautions:
The manual highlights several safety precautions, including ensuring no obstacles are in the desk's path, keeping the desktop clear of walls, and verifying that all cords are long enough to accommodate height changes. It explicitly states that the product is not intended for young children or those requiring supervision, and warns against sitting, standing, crawling, or lying under the desk. Users are also cautioned not to place objects taller than 20 inches underneath the desk and to avoid opening any components (lifting columns, control box, or controller) due to the risk of electric shock. Understanding the manual before installation or operation is strongly advised.