EasyManua.ls Logo

Apexis APM-H.264 User Manual

Default Icon
5 pages
To Next Page IconTo Next Page
Page #1 background imageLoading...
Page #1 background image
APM-H.264 quick installation guide
1 Hardware installation
1.1 Open the package and take the ipcam and accessories out, First install
the ipcam wireless antenna
1.2 Fix the ip camera, insert one end of the network cable to the camera tail
Ethernet card interface, on the other end of the network interface connected
to a router or switch.
1.3 The software of IP Camera support windows xp/windows8/windows7 etc.
operation system, Pls use the power adapter to connect the DC5V port on the
back of the ip camera. Plug the other end to an electrical outlet. Check the
card's power indicator light (yellow) and the network indicator (green) is
working properly, the camera pan and tilt rotate automatically.
2.2. IE Browser Settings
OCX will be downloaded automatically when users login the IP Camera, so
users have to set the IE browser to enable the OCX be downloaded
automatically after signing in. Steps as below:
1. Close the firewall of your computer.
2. Change the ActiveX settings, “IE” browser > “Tool > “Internet Options” >
“Security”> Custom Level > “ActiveX control and Plug-ins”, all the ActiveX
options set to be “Enable”:
Question and Answer IconNeed help?

Do you have a question about the Apexis APM-H.264 and is the answer not in the manual?

Apexis APM-H.264 Specifications

General IconGeneral
Video CompressionH.264
Image sensor1/4 inch CMOS
Lens3.6mm
Night VisionYes
Motion detectionYes
External memoryMicroSD card up to 32GB
Operating Temperature-10°C to 50°C
WeatherproofIP66
Resolution1280x720
Viewing Angle60°
Night Vision Range10 meters
WirelessIEEE 802.11b/g
ProtocolsTCP/IP, HTTP, SMTP, FTP, DHCP, DDNS
Power SupplyDC 5V

Summary

Hardware Installation

Initial Setup and Network Connection

Unpack the camera, install the antenna, and connect the network cable to the camera and router.

Powering and System Verification

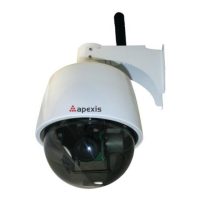
Connect the power adapter, check indicator lights, and confirm camera auto-rotation.

IE Browser Settings

Firewall and ActiveX Configuration

Disable firewall and enable ActiveX controls in Internet Options for automatic download.

Enabling ActiveX Controls

Configure specific ActiveX settings like 'Download unsigned ActiveX controls' to 'Enable'.

IP Address Search Tool

Using SearchIPCam.exe

Use the SearchIPCam.exe tool to find the IP address of the camera on the LAN.

Locating Camera IP

Double-click 'Search IPCam' to display the camera IP and MAC list; refresh if needed.

Logging into the Camera

Choose the camera's IP, click 'Login' or double-click the IP to access the IE login interface.

OCX ActiveX Installation

First-Time OCX ActiveX Login

Click 'Load OCX' on the first login to install the OCX ActiveX automatically.

Installing Plug-in

Download and install the OCX file (e.g., DvmHIPCam) by double-clicking it.

Software Operation

IE Browser Login

Select language, enter username 'admin' and password 'admin', then click 'Login'.

Login Interface

Click to access the IE interface after successful login, displaying the network video server.

Related product manuals