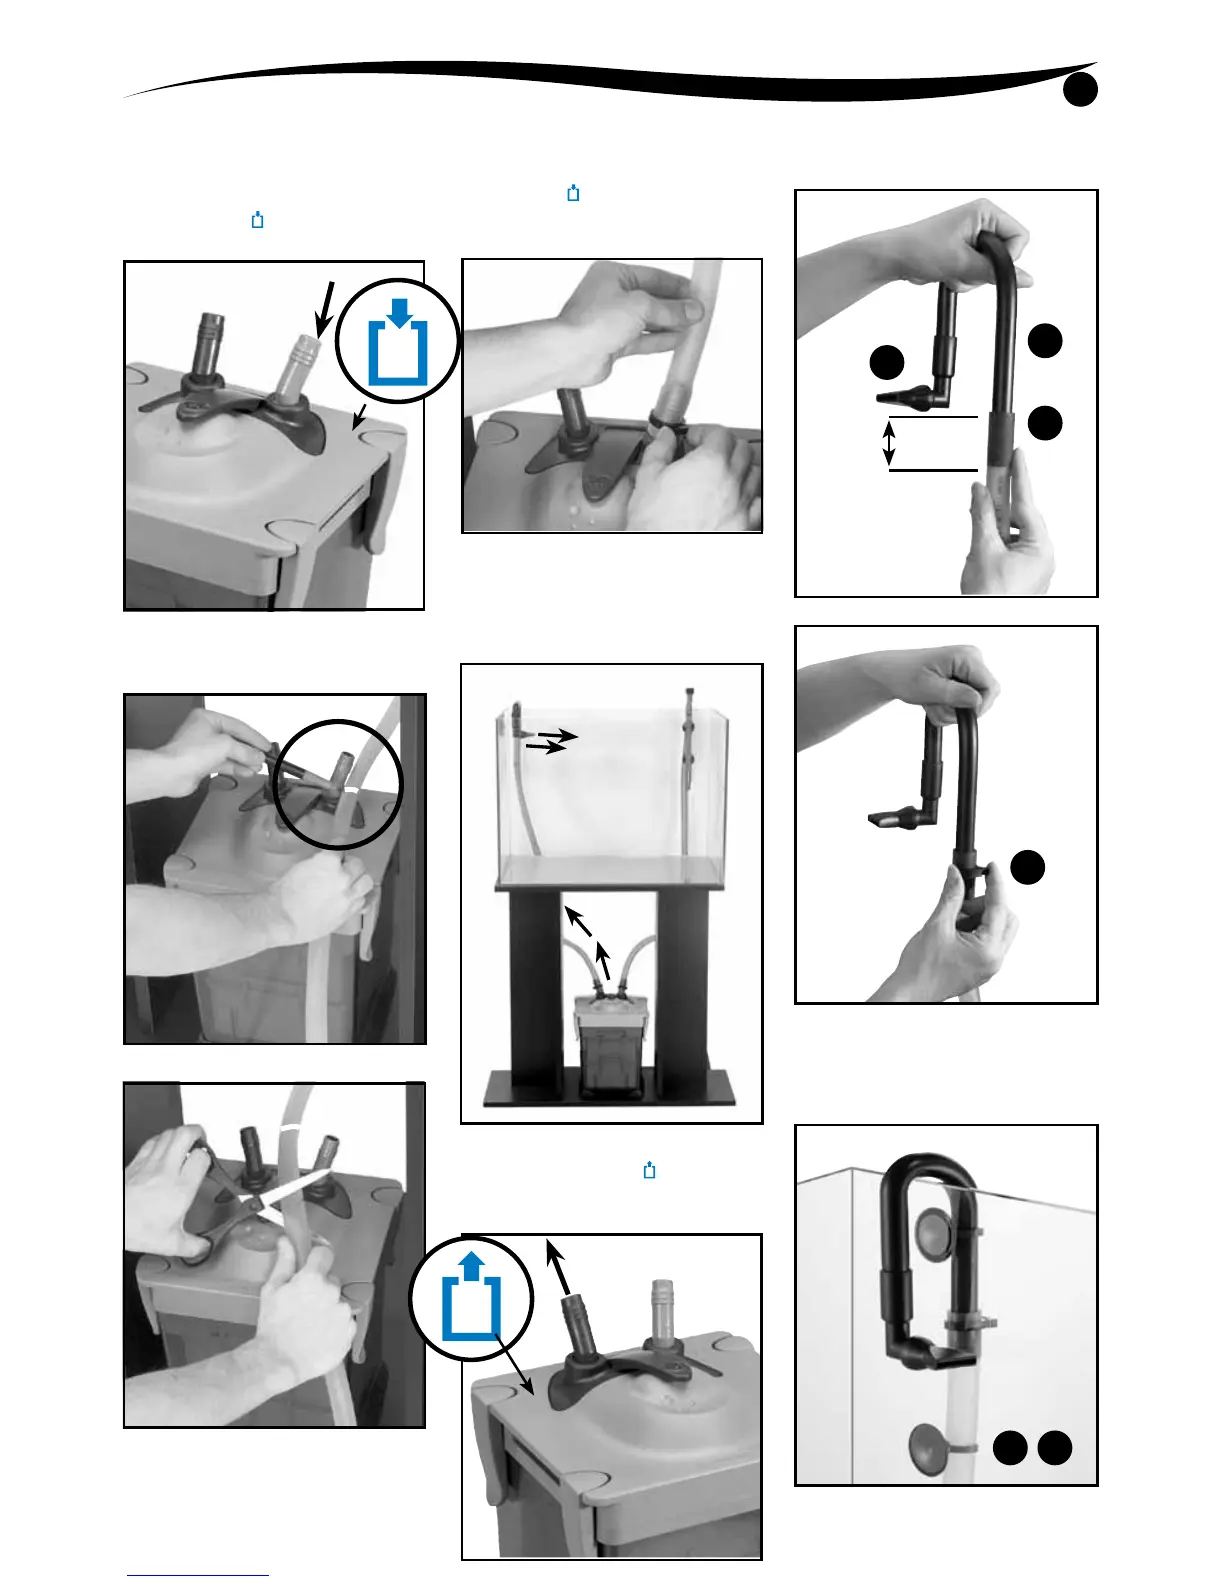
DIRECTIONS
5
CONNECTION TO THE
FILTER
1.
by the drawing and by the same
color of the accessories one (light grey).
\
2.
attached to the Inlet Assembly, mark with
a pen.
3. Add 4” (10 cm) to this mark and cut.
Note: It is very important NOT to cut the
tubing too short. If the tubing is cut too short
it creates tension on the quick disconnect
4.
Quick Disconnet Valve. This inlet
the drawing and by the light grey
color. Secure the Flexible Tubing with a
Flexible Tubing Clamp.
OULET PIPE ASSEMBLY
1. This is the set-up that returns water back to
the aquarium.
2.
marked by the drawing and by the
same color of the accessories one (dark
grey).
3. The Flexible Tubing 5 should be pushed
B 2” (5 cm) and
secured with a Flexible Tubing Clamp I.
4. Attach two each Suction Cup Clamps
H with two each Suction Cups G to the
the aquarium.
2”
(5 cm)
5
B
A
GH
I