4
DIRECTIONS
EN FR
ES
BEFORE YOU BEGIN
Read all safety instructions in this booklet
before beginning.
In the directions:
“Inlet” refers to water going INTO the
Filter
“Outlet” is water coming OUT of the
Filter and back into your
aquarium
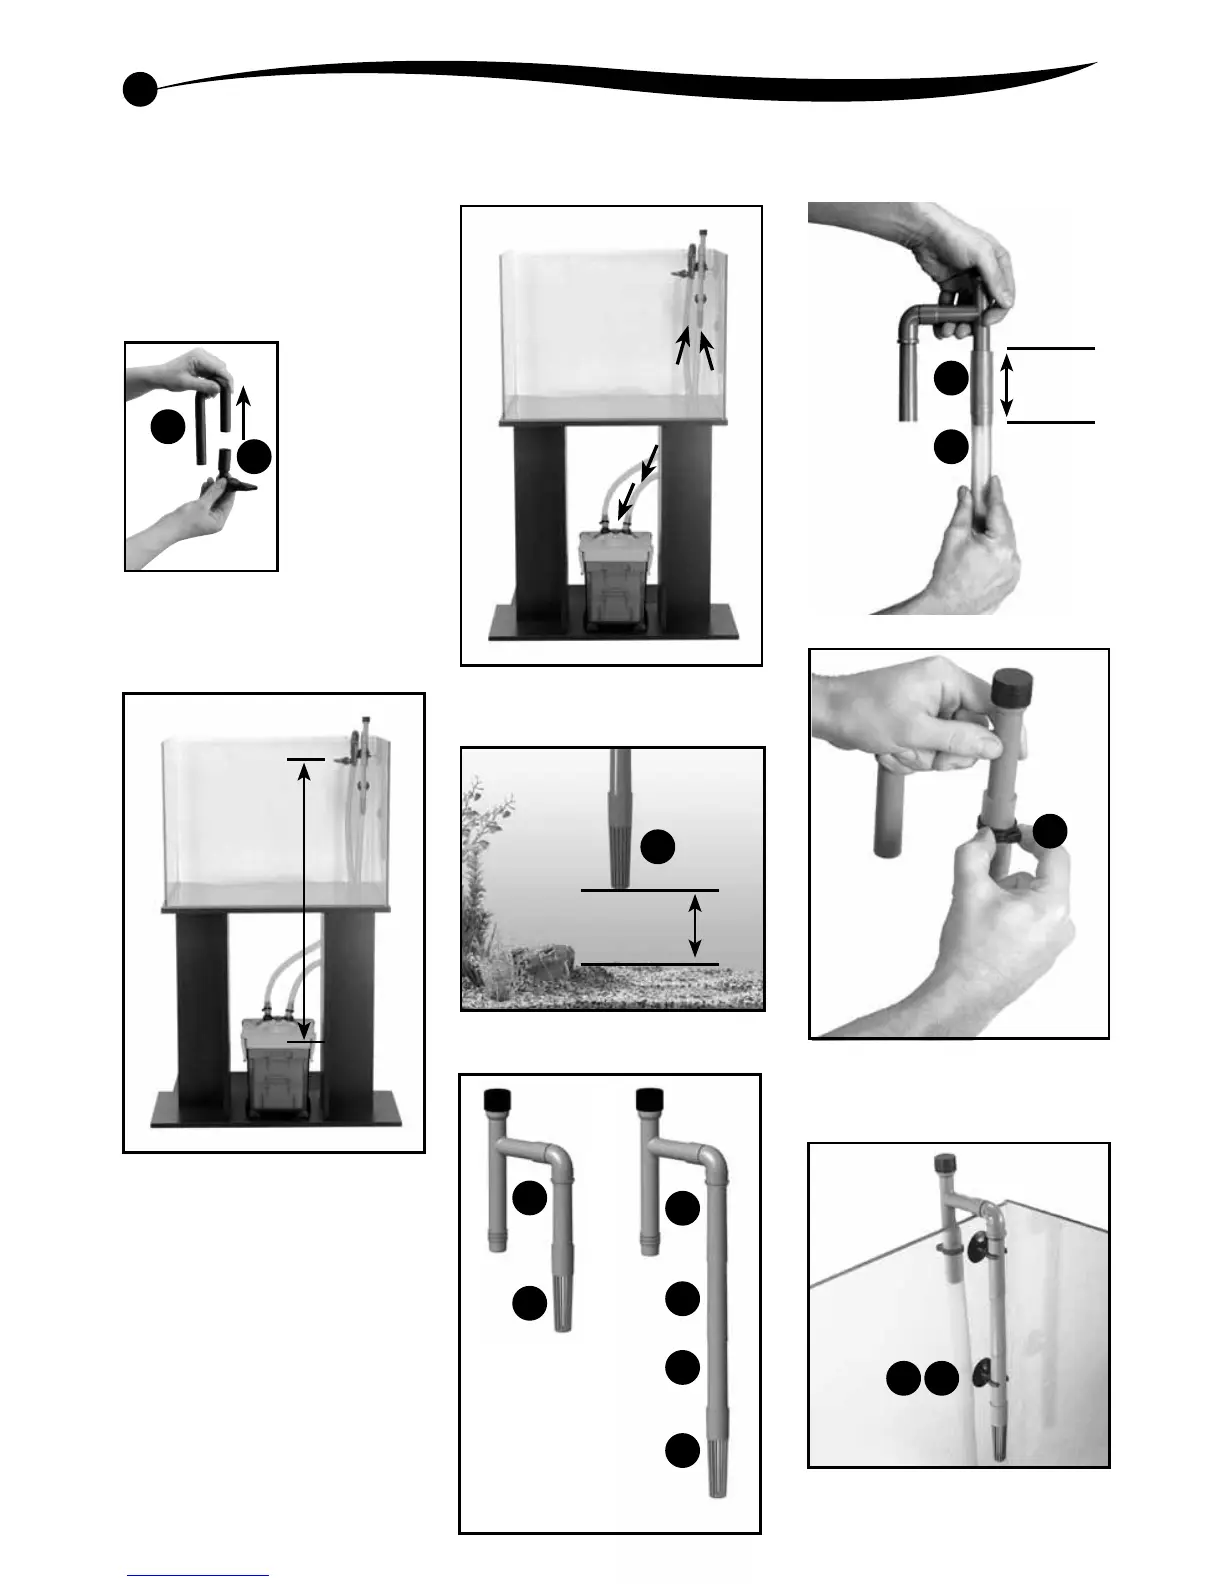
1. Connect Goose
neck A to Outlet
pipe B.
2.
(60 cm) to a maximum of 55” (140 cm)
3. Take a look at your aquarium and decide
where you want to place the inlet and
outlet pipes and the Filter.
4. Make sure the hoses will be long enough
and won’t be stretched after installation.
For USA and Canada
If a part is missing or damaged, please do not
Call our Technical Service Department at
1-800-847-0659
or visit our website:
Other countries: please ask your retailer.
INLET PIPE ASSEMBLY
1.
2. You will want the Inlet Strainer F on the
C to be about 4” (10 cm) from
the gravel bed.
3. Choose the number of E pieces according
to the depth of your aquarium.
B
A
F
≥ 4”
(10 cm)
C
F
E
E
C
F
24”
(60 cm) Min
55”
(140 cm) Max
4. The Flexible Tubing 5 should be pushed on
C 2” (5 cm) and secured
with a Flexible Tubing Clamp I.
5. Attach 2 each Suction Cup Clamps H with
2 each Suction Cups G C
so that it can be secured to the aquarium.
5
C
GH
2”
(5 cm)
I