6
DIRECTIONS
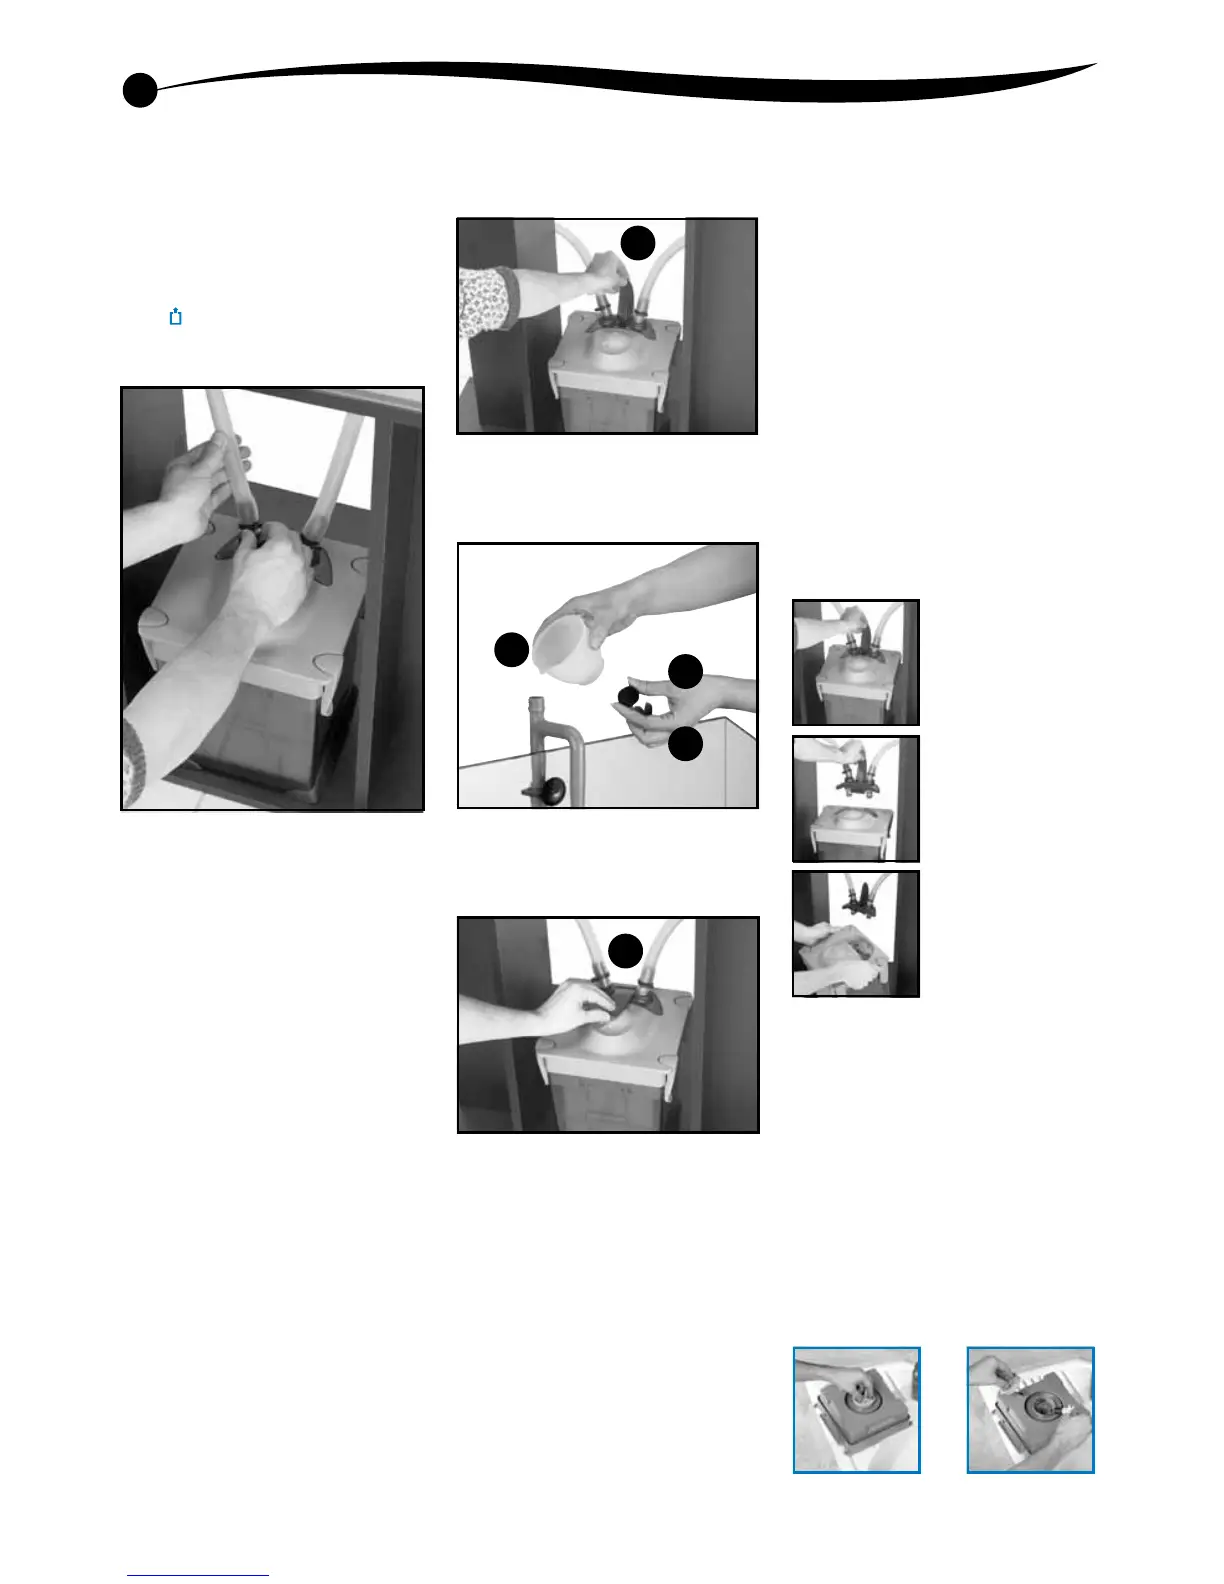
CONNECTING TO THE
FILTER
1. Follow the procedure described on page
7 to measure and cut your tubing.
2.
Quick Disconnet Valve. This outlet
the drawing and by the dark grey color.
Secure the Flexible Tubing with a Flexible
Tubing Clamp.
PRIMING THE FILTER
1.
Valve.
2. D .
3.
Disconnect Valve is full of water.
4. Replace the Inlet Cap securely.
5. Make sure the Quick Disconnect Valve is
then push the lever down.
6.
and air should be forced out through the
tubing.
7.
Once the unit is primed and plugged in, the
water should start to pump into the tank and
drain back out into the canister. If it does not,
consult the Trouble Shooting on this page.
Plugging in the power cord: To avoid the
possibility of the electric plug getting wet, a
“drip-loop”, should be arranged by the user.
See Safety Instructions on page 2 for more
information on the drip-loop.
NOTE: If water does come into contact with
the receptacle or the plug, turn the power
supply off at the circuit box. DO NOT unplug
the cord until the power supply is off.
CLEANING & MAINTENANCE
Regular cleaning, maintenance and
in order to assure continued trouble free
As a general rule:
•
Every month
•
Every 2 months
aquarium.
If the ow of water through your lter begins
to decrease or stops, it is most likely due to
dirty or clogged lter media, and should be
cleaned immediately.
1. Unplug the power cord from the
electrical outlet.
2.
Disconnect Valve.
3. Gently disengage the
Quick Disconnect
Valve from the top of
4.
sink using the handles
clamps on the
canister, this could
5. Release the 4 clamps and remove the
baskets from the canister and empty
out the water. Rinse or change the
recommended to replace this pad at every
cleaning.
If you are using a bio-media such as
lightly with water from the aquarium, NOT
TAP WATER.
6. Rinse the canister, baskets and impeller.
7.
and the baskets in the canister. Replace
the housing unit, secure the 4 clamps and
3
2
5
1
4
+
 Loading...