224
|
Chapter 26
> End time
> Whether to define the appointment as a repetitive event
> Whether to display and sound an alert before the appointment
> What calendar to put the appointment on
> Any additional notes about the appointment
You don’t need to define all of these items.
For example, you might skip defining the loca-
tion of the appointment. In addition, the Calen-
dar automatically uses default settings for every
option except for the event description, location,
and any additional notes you might want to add,
so you can just focus on typing a description of
your appointment, such as “Doctor’s appoint-
ment” or “Secret meeting with Elvis Presley.”
To create an appointment, follow these
steps:
1. From the Home screen, tap Calendar. The
Calendar screen appears.
2. Tap the plus sign that appears in the
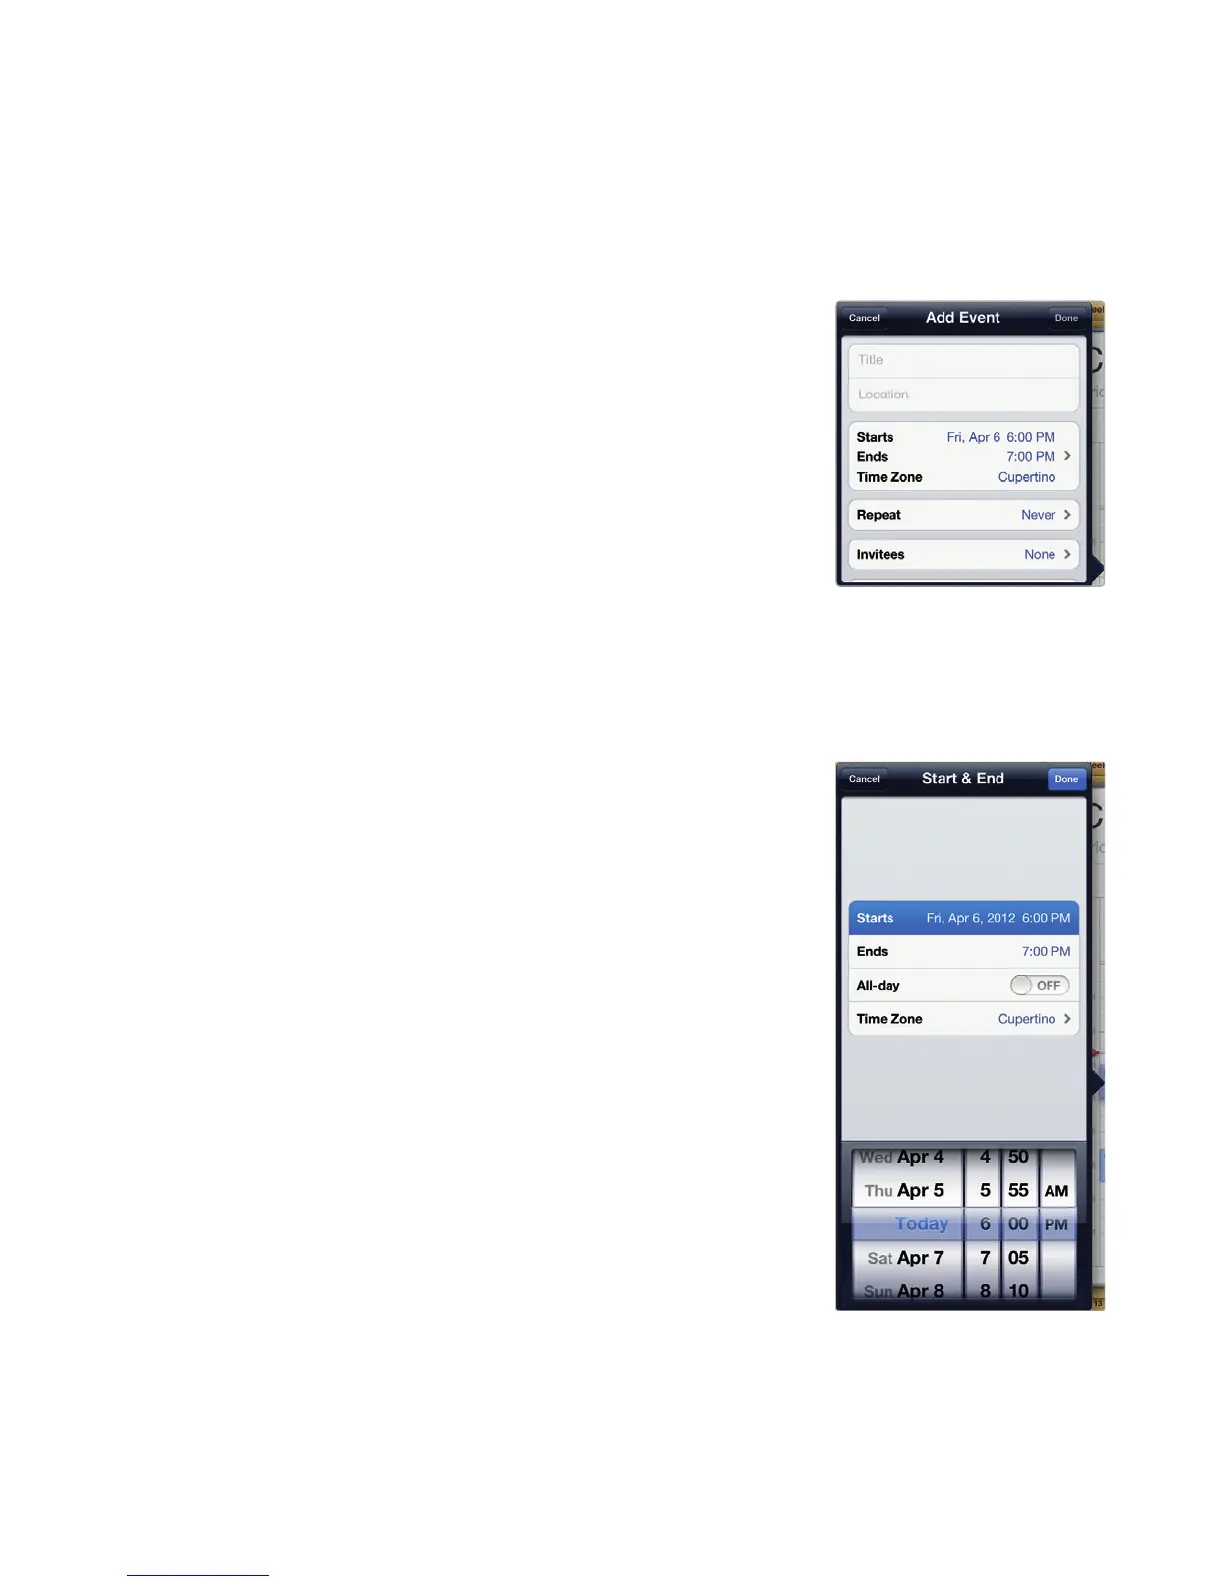
bottom-right corner of the screen. The
Add Event window appears, as shown in
Figure26-2.
3. Tap the Title text field, and type a descrip-
tion of your appointment.
4. (Optional) Tap the Location text field, and
type a description of the location where
your appointment will take place.
5. Tap the Starts/Ends field. The Start & End
window appears, as shown in Figure 26-3.
6. Tap the Starts field, and then scroll through
the date picker at the bottom of the Start
& End window to choose a date and time.
7. Tap the Ends field, and then scroll through
the date picker at the bottom of the Start
& End window to choose a date and time.
8. (Optional) Tap the All-day on/off switch to
read ON if you want to define an appoint-
ment to take an entire day.
9. (Optional) Tap Time Zone to define a time
zone for your appointment.
10. Tap Done in the upper-right corner of the
Start & End window.
FIGURE 26-2: The Add
Event window lets you
define the specifics of
your appointment.
FIGURE 26-3: The Start
&End window lets you
define the times of your
appointment.