QuickBooks for Mac 2014 User’s Guide 46
Your Chart of Accounts
Remember in the previous section, I talked
about accounts being like shoeboxes
where you kept the records of all your
transactions? Well, you’ll need
someplace to store and manage those
shoeboxes and that’s where the Chart
of Accounts comes in.
Your chart of accounts is a complete
list of a business’s accounts and their
balances. You use it to track how much
money your company has, how much
money it owes, how much money is
coming in, and how much is going out.
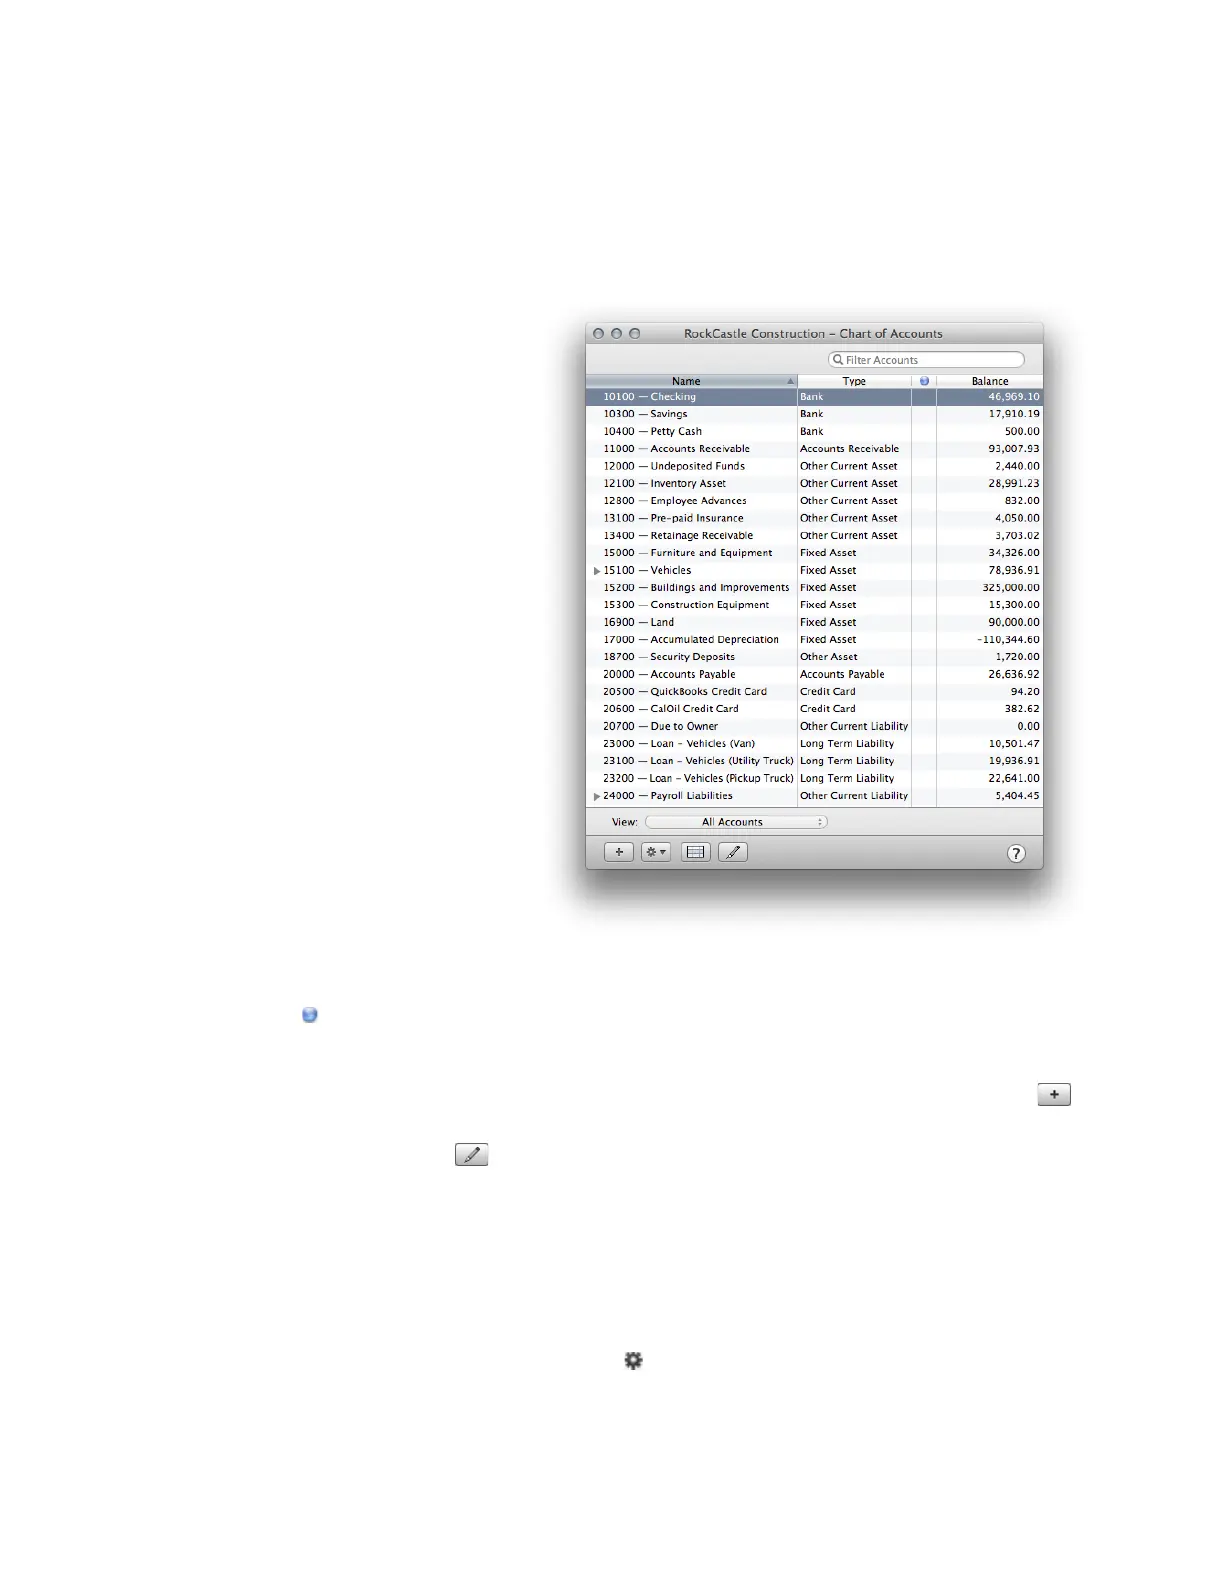
The Chart of Accounts shows the name
and type of each account in your
company. When you set up your
company file, QuickBooks sets up
certain accounts for you automatically.
As your business grows or changes, you
can add new accounts to your Chart of
Accounts to better organize your
finances. For example you might want
to create expense accounts to track
office supply purchases separately from
advertising costs.
The Chart of Accounts lists the name of each account, the type of account, and the balance. If the account shows
a blue dot ( ) in the last column, then online banking is enabled for that account.
• To open the Chart of Accounts. Choose Lists > Chart of Accounts.
• To add an account. Click + at the bottom of the Chart of Accounts and enter information for the account.
• To edit an account. Select the account name, click Edit at the bottom of the Chart of Accounts, then change
information for the account.
• To open the register for an account. Double-click the name of an account to open the register. Or click Open
Register at the bottom of the Chart of Accounts.
• To show only active or inactive accounts. Use the View menu at the bottom of the Chart of Accounts to
change the view to show only Active Accounts or Inactive Accounts. To make an account active or inactive, edit
the account and check or uncheck “Inactive.” Or Control-click the account name and choose Make Account
Inactive or Make Account Active.
• To reorder the accounts in the list. On the Action ( ) menu, be sure Enable Custom Ordering is checked. Then
you can drag and drop account names where you want them to appear in the list. When Enable Custom
Ordering is unchecked, the list uses the default ordering of account names. In any case, all of the account