EasyManua.ls Logo

Aqua Source T802D User Manual

Aqua Source T802D
18 pages
To Next Page IconTo Next Page
Page #1 background imageLoading...
Page #1 background image
1
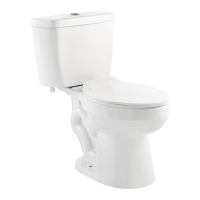
HIGH-EFFICIENCY DUAL-FLUSH TOILET
ITEM #0806386
MODEL #T802D
Español p. 13
Français p. 7
ARE YOU READY?
Please read and understand this entire manual before attempting to
assemble, operate or install the product.
WARNING: Do not use in-tank cleaners in your toilet.
Products containing chlorine (calcium hypochlorite) can
seriously damage fittings in the tank. This damage can cause
leakage and property damage.
CAUTION: Do not lift or rock the bowl after placement. If you
break watertight seal, you must install a new wax seal.
Be sure the water supply valve is shut off before installation.
If replacing an existing toilet, follow these general guidelines. (Not all
toilets and connections are the same. Therefore, these guidelines may
or may not apply.)
Remove Old Toilet
NOTE: Mounting surface must be clean and level before
new toilet is installed.
Estimated Installation: 50 Minutes
Questions, problems, missing parts? Before returning to your retailer, call our customer service
department at 1-866-417-7564, 8 a.m. - 8 p.m., EST, Monday - Friday.
AquaSource
®
is a registered trademark of LF, LLC.
All Rights Reserved.
DO YOU HAVE?
Putty Knife
Flathead
Screwdriver
Carpenters
Level
Safety
Goggles
Adjustable
Wrench
Supply Line
Hacksaw
NOTE: Items not included.
ATTACH YOUR RECEIPT HERE
AB16729
1. Turn off water supply and flush tank completely. Use a towel to
dry remaining water from tank and bowl.
2. Disconnect and remove old water supply line.
3. Remove tank from bowl by removing old tank-to-bowl hardware.
4. Remove bowl from floor by removing bolt caps and floor bolt nuts.
5. Remove floor bolts from toilet flange and clean old wax, putty and
sealant from base area. (Temporarily plug floor flange with a towel
or cover to block sewer gases from escaping.)
Questions and Answers:

Aqua Source T802D Specifications

General IconGeneral
BrandAqua Source
ModelT802D
CategoryToilets
LanguageEnglish

Summary

Installation Instructions

Install Floor Bolts

Inspect existing floor flange for damage. Insert floor flange bolts into toilet flange and secure with plastic disc nuts.

Install Wax Ring

Place wax ring over the raised outlet ring of the bowl and press firmly to adhere it to the bowl.

Position Bowl on Floor Flange

Lower the bowl onto the floor flange bolts, ensuring it is level and seated firmly to create a watertight seal.

Continue Installation

Secure Bowl to Floor

Place bevel discs, flat washers, and bowl nuts onto floor flange bolts, then tighten. Snap floor bolt caps into place.

Install Tank-to-Bowl Seal

Turn tank upside down and press the tank-to-bowl seal into place over the lower tank opening.

Install Tank on Bowl

Lower tank onto bowl, aligning screws, and secure from underside with metal washers and wing nuts.

Attach Water Supply Line

Connect water supply line to tank and shut-off valve. Tighten coupling nut and check for leaks after filling.

Final Installation Steps

Install Seat

Center seat on bowl, insert bolts into hinges, adjust, and secure with lock nuts from underneath.

Install Flush Button

Position flush button on tank lid, aligning rods with flush valve levers. Adjust rod length as needed.

Care and Maintenance

General Care

Flush several times, check for leaks. Use soft cloths, rinse cleaners immediately. Do not use in-tank cleaners.

Flush Button Operation

Small button for liquids (1.1 gal), large button for solids (1.6 gal). Flush valves are factory set.

Troubleshooting and Warranty

Troubleshooting Common Issues

Addresses poor flush, toilet leaking, and excessive noise during tank filling with possible causes and corrective actions.

One-Year Limited Warranty

Details warranty coverage, exclusions, and requirements such as proof of purchase and proper installation.

Replacement Parts List

Lists available replacement parts with part numbers for ordering and customer service contact information.