Do you have a question about the AquaCraft paradise and is the answer not in the manual?
Never attempt to swim after a stalled RC boat. Do not get in water.
Never operate your R/C boat while standing in water or near swimmers.
Always use a PFD when boarding and operating retrieval craft.
R/C boat running hardware is very sharp. Be careful when working.
AquaCraft products are to be used by ages 14 and over.
Read the manual for fun and successful operation. Return if not suitable.
Pictures, descriptions, and specs subject to change without notice.
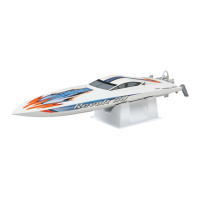
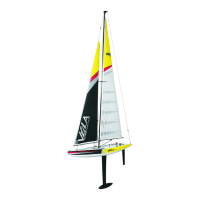
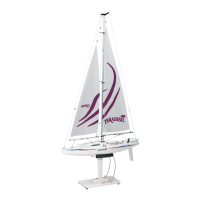
Hull Length, Height, Beam, and Weight specifications for the Paradise sailboat.
Lists features like fiberglass hull, pre-assembled sails, radio system.
90-day warranty for defects; exclusions apply. Proof of purchase required.
Contact Hobby Services for warranty information and support.
Do not swim after boat. Use retrieval craft and PFD.
For ages 14+. Avoid collisions with people or property.
Beware of radio interference and running on free-flowing water.
Defines basic nautical terms like Bow, Stern, Starboard, Port, Hull, Deck, Rudder.
Defines sailboat parts like Mast, Boom, Sails, Keel, Rudder, Stays.
Explains terms like Luffing, Tacking, Close-hauled, Close-reach, Beam reach.
Instructions for inserting uprights and tightening thumb screws for the boat stand.
Install 4 "AA" batteries into the transmitter. Check battery status.
Turn on transmitter, check LED for power and battery status.
Remove keel and rudder parts from the plastic bag.
Insert keel shaft through hull, secure with thumbnut.
Install 4 "AA" batteries into the boat's battery holder.
Remove mast/sail assembly from packaging, secure rigging lines.
Attach forestay and backstay to corresponding eyelets.
Attach snap rings, tighten lines to ensure mast is straight.
Turn transmitter and sailboat power ON. Center trims.
Check rudder movement by moving control stick. Use servo reverse if needed.
Thread control lines, attach to jib boom cleat, set initial tension.
Gently twist helm pedestal to lift rear hatch and access rudder controls.
Insert rudder shaft through stern, ensuring correct orientation.
Thread control lines and attach to booms for initial sail tension.
Replace hatches, turn boat power OFF, then transmitter power OFF.
Sailing requires reaction to wind and adjustments to rudder/sails.
Guidelines for adjusting sails based on wind conditions (1-15 MPH).
Explains downwind sailing, 'in irons' and tacking maneuvers.
Defines close-hauled, close-reach, beam reach, and broad reach.
Avoid swimming after boat, limit sailing to 15 MPH, avoid low light.
Check screws, beware of rough water, and potential water ingress.
Illustrates beam reach, broad reach, downwind, and port/starboard tacks.
Turn power ON to transmitter/boat, place in water (12" deep, clear).
Launch downwind, adjust trim for a straight line at neutral.
Turn power OFF, remove keel/rudder, allow to dry.
Use fishing rod to retrieve stuck boat; never swim after it.
Tape hatches, use jelly on shafts, rinse with freshwater after use.
Racing is fun and can be informal without formal competition stress.
Use milk jugs for marker buoys and set up oval or custom courses.
Use order numbers to purchase parts from hobby shops or online.
Lists parts like Switch Boot, Rudder, Mast/Boom, Keel, Sails with part numbers.