Do you have a question about the AquaScape DIY Backyard Waterfall Kit and is the answer not in the manual?
Choose a suitable location for your new waterfall, considering visual appeal and proximity.
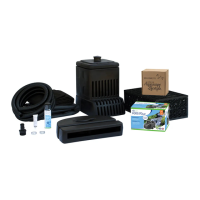
Unpack all kit components and verify against the contents list.
Connect AquaBlox panels using the provided pegs for the waterfall basin structure.
Position the vault and AquaBlox within the designated area, ensuring proper alignment.
Dig out the basin to the specified depth, allowing space for components and backfill.
Ensure the excavated basin is level and the soil is compacted for stability.
Install underlayment and EPDM liner, ensuring full coverage and proper fit within the basin.
Re-position the vault and AquaBlox into the excavated and lined basin.
Backfill the sides of the basin with suitable material to secure the AquaBlox.
Route the kink-free pipe from the vault to the spillway location and dig a trench.
Connect the pump to the plumbing using provided fittings and secure with a hose clamp.
Place boulders and gravel to support the basin edges, cover AquaBlox, and create the waterfall structure.
Position and stack rocks to create the waterfall and stream, ensuring water flows correctly.
Attach the spillway to the plumbing and ensure it is level, adjusting height with gravel if needed.
Use foam sealant to fill gaps between rocks, preventing water loss over the waterfall.
Fill the basin with water and check the level using the inspection port.
Connect the pump to power and adjust rocks/gravel to achieve the desired water flow and sound.
Trim excess liner once the waterfall is running and the basin is filled to the correct level.
Add mulch around the basin and plant surrounding areas to integrate the feature.
Your DIY Backyard Waterfall Kit is now complete. Enjoy the sights and sounds.
| Brand | AquaScape |
|---|---|
| Model | DIY Backyard Waterfall Kit |
| Category | Outdoor Fountain |
| Language | English |