5
aquascapeinc.com
|
☎
CAN (866) 766-3426
|
☎
US (866) 877-6637
Installation
STEP 1
SELECT YOUR LOCATION
• When choosing the location for your new waterfall, we
recommend putting it near a deck or patio so you can
sit and relax close to your water feature. Also keep in
mind viewpoints from inside the house. Make your new
waterfall visible from a kitchen window or patio door, giving
you year-round enjoyment. Make sure your waterfall and
stream face the viewing area.
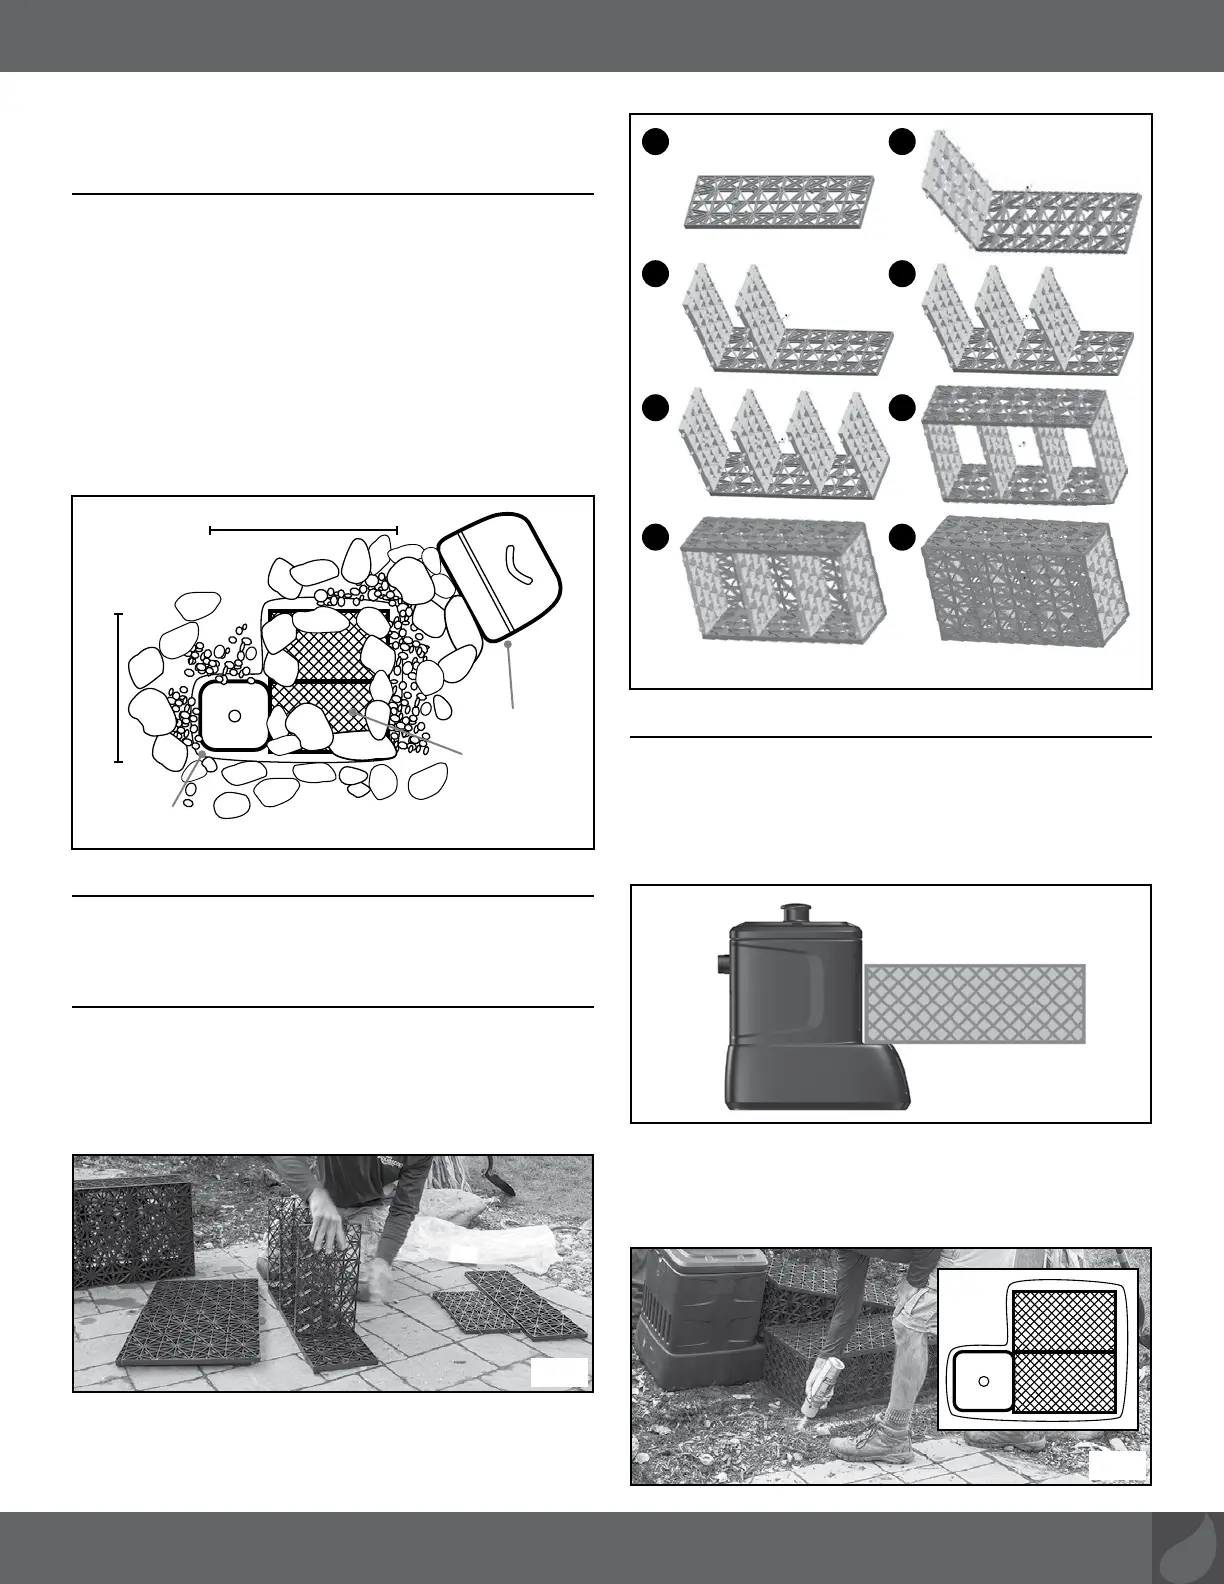
• For this waterfall kit you will need roughly a 32"W x 48"L
area for the basin of the falls and a maximum 3' stream
and waterfall (Ex. 1).
STEP 2
CAREFULLY REMOVE CONTENTS FROM BOX
• Verify all parts are present. Read instructions carefully.
STEP 3
ASSEMBLE AQUABLOX
• Line up the pegs with the corresponding holes on the
panels and follow the pattern in (Ex. 3) to assemble the
AquaBlox (Ex. 2 and Ex. 3). A rubber mallet can be used
to tap the pegs into place.
STEP 4
PLACE PONDLESS WATERFALL VAULT AND AQUABLOX
• Lay out the AquaBlox
and the Pondless Waterfall Vault in
desired location. The AquaBlox
should be placed side by
side with the wider panel face down. Place the AquaBlox
over the front edge of the Pondless Waterfall Vault (Ex. 4).
• Use a can of brightly colored, highly visible spray paint to
outline the shape around the Pondless Waterfall Vault and
AquaBlox.
This will help mark out the area to be excavated
(Ex. 5).
Ex. 2
Ex. 4
Ex. 5
Ex. 1
Waterfall Spillway
Pondless
Waterfall Vault
AquaBlox
48"
32"
1 2
3 4
5 6
7
8
Ex. 3