EasyManua.ls Logo

AquaTools AT11523 - Page 7

Default Icon
18 pages
Print Icon
To Next Page IconTo Next Page
To Previous Page IconTo Previous Page
Loading...
7
10. Complete all plumbing connections (see Page 5 for
piping requirements).
A. Pipe from valve RETURN port to pool return.
B. Pipe from valve WASTE port to waste.
C. Suction piping from pool to trap inlet on pump.
11. System is ready for startup.
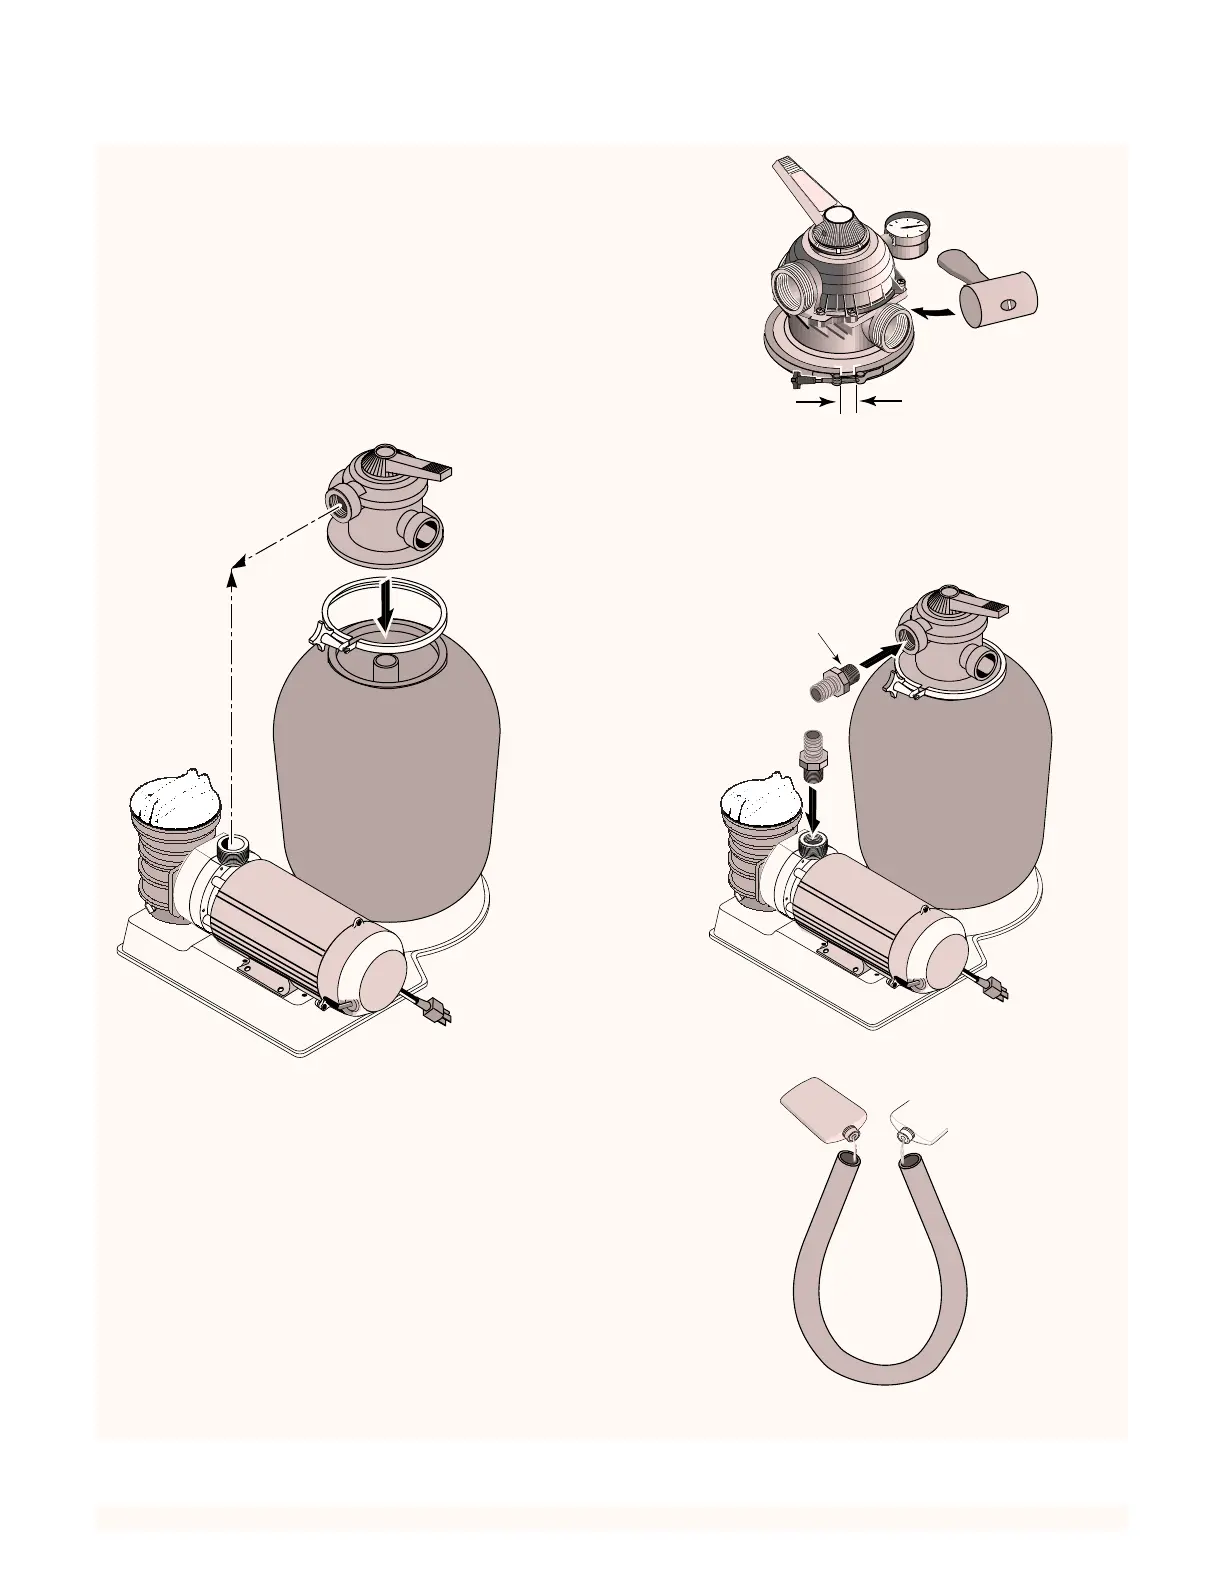
NOTICE: If there are leaks from beneath valve/clamp
area, STOP PUMP, release all pressure, remove clamp
and valve and clean sealing surfaces.
Follow directions under “Valve Installation”, Page 6,
when reinstalling valve. See Figures 6 and 7.
3114 1197
Align
Ports
R
E
C
I
R
C
U
L
A
T
E
B
A
C
K
W
A
S
H
E
W
A
S
T
E
F
I
L
T
E
R
Port labeled "PUMP"
should align with pump
discharge port.
Install clamp
and tighten
until clamp
ends (under
bolt) are 1/4"
apart.
If unable to
close gap
to 1/4" or less,
wait 15-30
minutes and
retighten.
Tap around
clamp while
tightening to
help seat
clamp.
Aquatools
.WATERFORD, WI.
53185
USA
3119 1197
1/4" Max.
Figure 6
Figure 7
3115 1197
Tape Threads with
teflon tape
Figure 8
Dishwashing
Soap
Dishwashing
Soap
3116 1197
Figure 9