Making Success Simple
Drip Loop
See reverse for additional information.
3.
add
Plants, Décor
Rinse plants and décor items
IMPORTANT SAFETY INSTRUCTIONS
WARNING - To guard against injury, basic safety precautions should be observed including
the following:
1.
READ AND FOLLOW ALL SAFETY
INSTRUCTIONS.
2. DANGER - To avoid possible electric shock, special care should be taken since water is
employed in the use of aquarium equipment. For each of the following situations, do not
attempt to repair yourself; return the appliance to an authorized service facility for service
or discard the appliance.
A. If the appliance falls into the water, DO NOT reach for it! First unplug it and then retrieve
it. If electrical components of the appliance get wet, unplug the appliance immediately.
B. Carefully examine the appliance after installation. It should not be plugged in if there is
water on parts not intended to be wet.
C. Do not operate any appliance if it has a damaged cord or plug, if it is malfunctioning
or if it is dropped or damaged in any manner.
D. To avoid the possibility of the appliance
plug getting wet, position aquarium
stand and tank to one side of a wall
mounted receptacle to prevent water
from dripping onto the receptacle or
plug. A “drip loop”, shown in the gure
below, should be arranged by the user
for each cord connecting an aquarium
appliance to the receptacle. The “drip
loop” is the part of the cord below the
level of the receptacle, or the connector
if an extension cord is used, to prevent
water traveling along the cord and
coming in contact with the receptacle.
If the plug or receptacle does get wet,
DO NOT unplug the cord. Disconnect
the fuse to the circuit breaker that
supplies power to the appliance.
Then unplug and examine for the
presence of water in the receptacle.
3. Close supervision is necessary when any
appliance is used by or near children.
4. To avoid injury, do not contact moving parts or hot parts such as heaters, reectors, lamp
bulbs, and the like.
5. Always unplug the appliance from the outlet when not in use, before putting on or taking off
parts, and before cleaning. Never yank the cord to pull plug from outlet. Grasp the plug and
pull to disconnect.
•
Place plants and décor items
into aquarium in desired
location
•
Cover base of plants and
bottom of décor items with
gravel to hold securely
in place
Whenever you plug in any electrical
appliance, it's important to utilize
a "drip loop". This prevents water droplets
from reaching the electrical outlet, which
can cause a severe hazard.
To make a drip loop, follow the diagram to the right.
Simply drop the power supply cord below the level
of the outlet you're plugging it into. This way, if any
water should get on the cord, it will drip off before
it reaches the electrical outlet.
Power Supply
Cord
Drip Loop
Aquarium
Light Appliance
Making Success Simple
Drip Loop
See reverse for additional information.
3.
add
Plants, Décor
Rinse plants and décor items
•
Place plants and décor items
into aquarium in desired
location
•
Cover base of plants and
bottom of décor items with
gravel to hold securely
in place
Whenever you plug in any electrical
appliance, it's important to utilize
a "drip loop". This prevents water droplets
from reaching the electrical outlet, which
can cause a severe hazard.
To make a drip loop, follow the diagram to the right.
Simply drop the power supply cord below the level
of the outlet you're plugging it into. This way, if any
water should get on the cord, it will drip off before
it reaches the electrical outlet.
Power Supply
Cord
Drip Loop
Aquarium
Light Appliance
Making Success Simple
Drip Loop
See reverse for additional information.
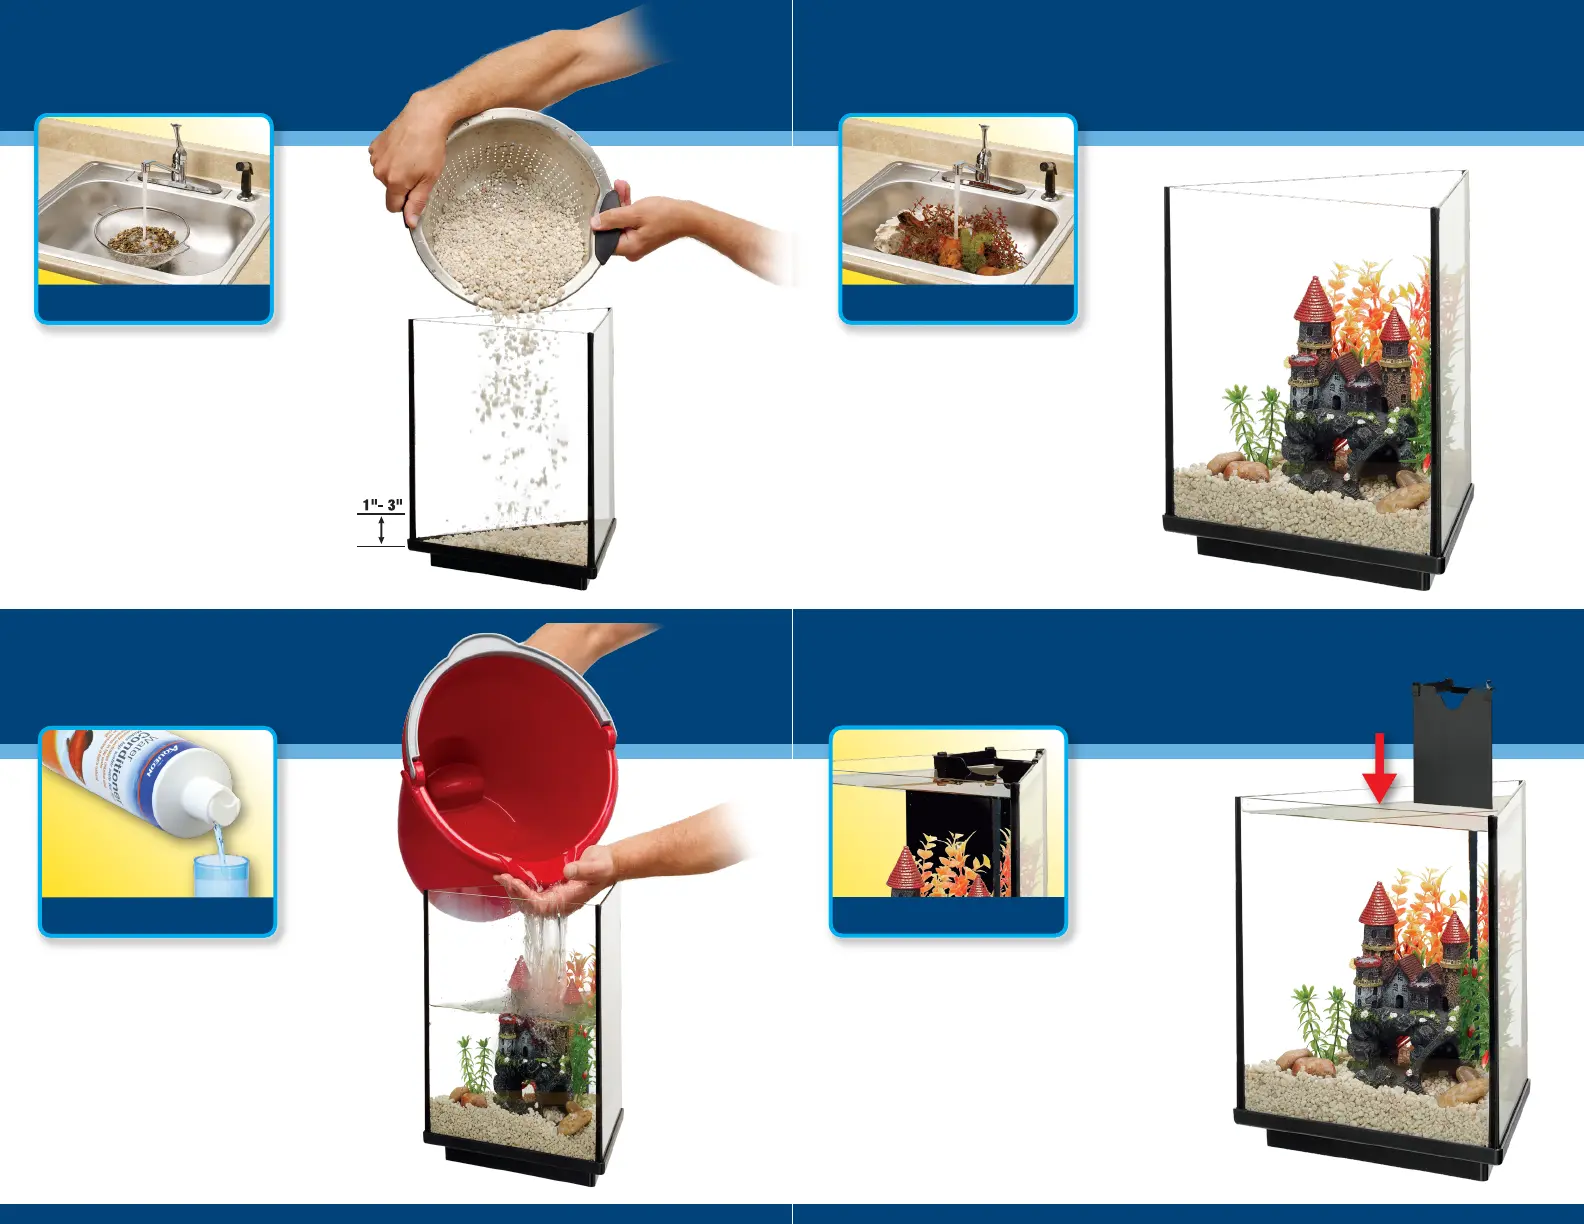
2.
add
Gravel 3.
add
Plants, Décor
Rinse plants and décor items
Rinse gravel in colander
•
Carefully pour rinsed gravel
into middle of aquarium
•
Spread gravel evenly around
aquarium bottom
•
Gravel depth should measure
1" - 3" from the bottom
•
Place plants and décor items
into aquarium in desired
location
•
Cover base of plants and
bottom of décor items with
gravel to hold securely
in place
Whenever you plug in any electrical
appliance, it's important to utilize
a "drip loop". This prevents water droplets
from reaching the electrical outlet, which
can cause a severe hazard.
To make a drip loop, follow the diagram to the right.
Simply drop the power supply cord below the level
of the outlet you're plugging it into. This way, if any
water should get on the cord, it will drip off before
it reaches the electrical outlet.
Power Supply
Cord
Drip Loop
Aquarium
Light Appliance
Success Tip
1 Success Tip
2 Success Tip
3
Feeding
Give your fish one
small pinch of food
2 or 3 times per day.
Water Changes
Only change 25% of the
water once per month.
Never empty all the
water at once.
Lighting
Only keep aquarium
lights on for 8-10 hours
during the day, then
turn off at night.
8-10
Hours of Light
per day
25
%
Water Change
monthly
1 Pinch
of Food
2-3 times per day
5.
install
Filter Hanging Bracket 6.
add
Filter
2.
add
Gravel
3.
add
Plants, Décor
Make sure all clips attach to tank
Rinse plants and décor items
Rinse gravel in colander
•
Clear any decorations from back
corner of aquarium
•
Place filter hanging bracket in
back corner of aquarium, making
sure it is pushed back as far as
possible
•
More assembly instructions
on reverse side of setup guide
Rinse filter cartridge before use
•
Assemble filter and insert
filter cartridge according to
included instructions
•
Hang filter from back of filter
hanging bracket using included clips
•
Carefully pour rinsed gravel
into middle of aquarium
•
Spread gravel evenly around
aquarium bottom
•
Gravel depth should measure
1" - 3" from the bottom
•
Place plants and décor items
into aquarium in desired
location
•
Cover base of plants and
bottom of décor items with
gravel to hold securely
in place
1.
place aquarium on
Strong, Stable Surface
4.
add
Water
5.
install
Filter Hanging Bracket
2.
add
Gravel
Make sure all clips attach to tank
Add Water Conditioner as directed
Rinse gravel in colanderMake sure surface is level
•
Place aquarium on a flat, level
surface so the weight of the
aquarium is completely supported
•
Surface should be able to easily
support more than 50 lbs
•
Pour room-temperature water
into aquarium over hand to
avoid moving gravel, plants
and décor
•
Fill aquarium with water to 1"
from top of frame
•
Add water conditioner
•
Clear any decorations from back
corner of aquarium
•
Place filter hanging bracket in
back corner of aquarium, making
sure it is pushed back as far as
possible
•
More assembly instructions
on reverse side of setup guide
•
Carefully pour rinsed gravel
into middle of aquarium
•
Spread gravel evenly around
aquarium bottom
•
Gravel depth should measure
1" - 3" from the bottom
1.
place aquarium on
Strong, Stable Surface
4.
add
Water
5.
install
Filter Hanging Bracket
Make sure all clips attach to tank
Add Water Conditioner as directed
Rinse gravel in colanderMake sure surface is level
•
Place aquarium on a flat, level
surface so the weight of the
aquarium is completely supported
•
Surface should be able to easily
support more than 50 lbs
•
Pour room-temperature water
into aquarium over hand to
avoid moving gravel, plants
and décor
•
Fill aquarium with water to 1"
from top of frame
•
Add water conditioner
•
Clear any decorations from back
corner of aquarium
•
Place filter hanging bracket in
back corner of aquarium, making
sure it is pushed back as far as
possible
•
More assembly instructions
on reverse side of setup guide
•
Carefully pour rinsed gravel
into middle of aquarium
•
Spread gravel evenly around
aquarium bottom
•
Gravel depth should measure
1" - 3" from the bottom
4.
add
Water
7.
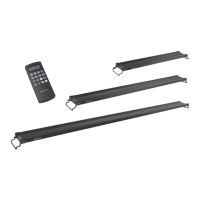
add
Light Hood 8.
add
Fish
5.
install
Filter Hanging Bracket
Make sure all clips attach to tankAdd Water Conditioner as directed
Wait 24 hours before adding sh
Place plastic panel on light hood
•
Pour room-temperature water
into aquarium over hand to
avoid moving gravel, plants
and décor
•
Fill aquarium with water to 1"
from top of frame
•
Add water conditioner
•
Place light hood on aquarium
making sure filter (and heater)
cords flow through opening
in back for proper fit
•
Plug in filter and light hood
using the "drip loop" method
(see above)
•
Touch power button to turn on light
•
Turn off light, unplug and remove light hood
•
Place fish, while in bag from store, into
aquarium, and let sit for 20 minutes
•
Open bag and add about 1/2 cup
of aquarium water, wait five minutes
and repeat
•
Carefully allow fish to enter aquarium,
top off with conditioned water, replace
light hood and plug in
•
Clear any decorations from back
corner of aquarium
•
Place filter hanging bracket in
back corner of aquarium, making
sure it is pushed back as far as
possible
•
More assembly instructions
on reverse side of setup guide
4.
add
Water
7.
add
Light Hood
Add Water Conditioner as directed
Place plastic panel on light hood
•
Pour room-temperature water
into aquarium over hand to
avoid moving gravel, plants
and décor
•
Fill aquarium with water to 1"
from top of frame
•
Add water conditioner
•
Place light hood on aquarium
making sure filter (and heater)
cords flow through opening
in back for proper fit
•
Plug in filter and light hood
using the "drip loop" method
(see above)
•
Touch power button to turn on light
 Loading...