4
1.2.
Attaching the mounting rails and Ladder
1.
Remove mounting extrusion from the carton (cut as per Diagram 1 if you intend opening the
rooftop tent off the rear of your vehicle.)
2.
Place the tent on its side on the ground onto a clean surface.
3.
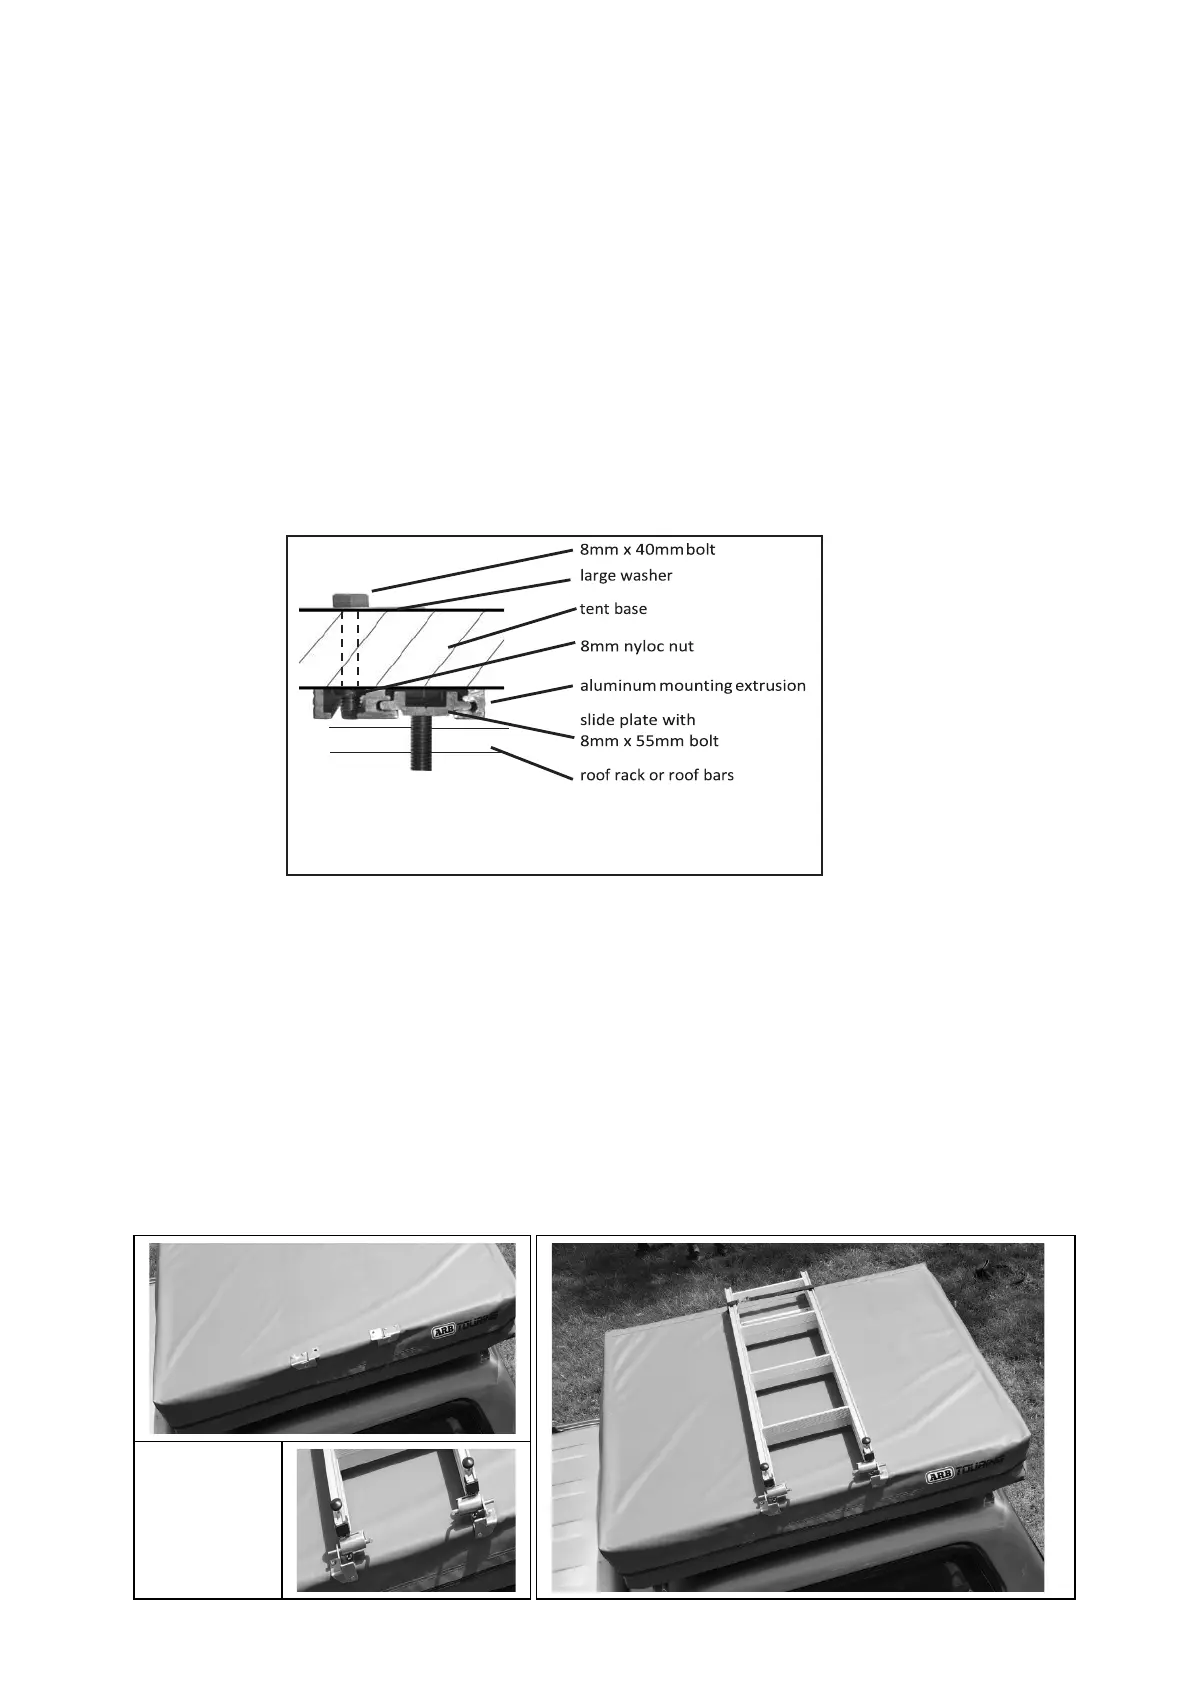
Using the supplied 8mm x 40mm bolts and large washers, slide your hand in between the inside of
the base and the mattress and insert the bolts into the pre-drilled holes. See Diagram 2.
4.
Place the mounting extrusion into position over the bolts.
5.
Slide the 8mm nuts into the mounting extrusions and tighten the bolts from inside the tent. See
Diagram 2.
6.
Near the outside edges of the mounting extrusion you will find holes for the self drilling screws
supplied. Use the self drilling screws to attach the outside edge of the mounting extrusion to the
base of the tent through the pre-drilled holes. on the outer most edge of the extrusion.
Diagram 2
1.
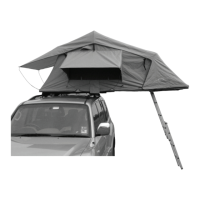
Fold open the Ladder Mounting brackets attached to your Rooftop Tent. Mount the Ladder to the
folding brackets on the top of the Rooftop tent, the spring-loaded pins on the ladder will align with the
holes on the folding brackets. Once installed, the ladder should appear the same as the image below.
2.
The ladder, when not in use, will sit flat in its non-operational position on top of the Rooftop Tent.
See image below. The strap holding the foot end of the ladder when it is stowed on top of the
Rooftop Tent must be securely tightened. This strap will hold the ladder in place when the vehicle is
in motion. Failure to secure the ladder can cause injury or damage to the roof top tent. – Note the
ladder can be mounted to the Tent after you have finished mounting the tent to the roof of the
vehicle.
3.
Note: Removing the ladder from the Rooftop Tent when the tent is not being used, will reduce the overall
height of the vehicle and may make access to height restricted carparks easier. Figure 1
assembly
The mounting extrusion fitted to the base of the tent with the
slide plate and bolt fitted.