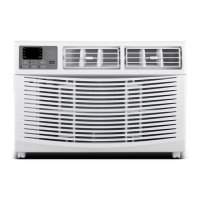
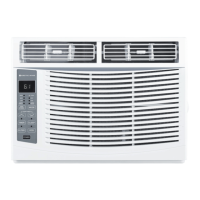
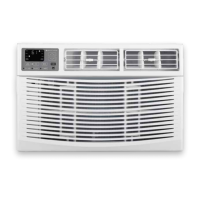
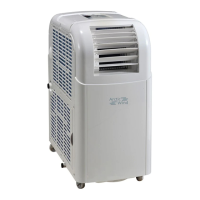
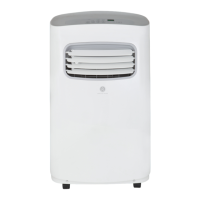
This document is an owner's manual for an ARCTIC WIND® Window Air Conditioner, covering models 2AWH8000A and 2AWH12000A. It provides comprehensive instructions for installation, operation, and maintenance of the unit.
Function Description:
The ARCTIC WIND® Window Air Conditioner is designed to cool and dehumidify a room, and for some models, also provide heating. It can be installed in a standard double-hung window or optionally through-the-wall. The unit features an electronic control panel and a remote control for convenient operation.
Important Technical Specifications:
- Models Covered: 2AWH8000A, 2AWH12000A
- Power Requirements:
- 115 volt (103min.-127max)
- 8K heating models: 15A time-delay fuse or circuit breaker
- 12K heating models: 20A time-delay fuse or circuit breaker
- Requires a grounded 3-prong outlet and must be on a single outlet circuit only.
- LCDI Power Cord: Equipped with a Leakage Current Detection and Interruption (LCDI) power cord for safety, which senses leakage current and disconnects power if detected. It includes TEST and RESET buttons.
- Window Installation Dimensions: Designed for double-hung windows with widths between 23" and 36" (660mm-914mm). The lower sash requires 16" (406mm) of vertical clearance when open.
- Through-the-Wall Installation Dimensions (Optional):
- Frame Max. Thickness: 8 9/10" (225 mm)
- Inside Frame Width: 20" (508 mm)
- Inside Frame Height: 15-1/5" (385 mm)
- Maximum wall thickness allowed is less than 8 9/10" to prevent blocking the outdoor air inlet.
- Temperature Range: 61°F~88°F or 16°C~31°C.
Usage Features:
- Control Panel & Remote Control: The unit can be operated using either the electronic control panel on the unit or the provided remote control.
- Digital Display: Shows the set temperature or time when the timer is active.
- Temperature Adjustment: "+" and "-" buttons allow increasing or decreasing the set temperature or timer.
- Power Button: Turns the air conditioner on and off.
- Mode Button: Cycles through various operating modes:
- Cool Mode: Cools the room and reduces humidity. Temperature and fan speed are adjustable.
- Dry Mode: Reduces room humidity through alternating cooling cycles and fan operation.
- Fan Mode: Provides ventilation only. Fan speed can be set to Hi, Med, or Lo.
- Auto Mode: Automatically selects fan speed and operation mode (COOL, HEAT, DRY, or FAN) based on room temperature.
- Heat Mode (for heating models): Heats the room. Temperature and fan speed are adjustable. (Note: This mode can be enabled/disabled by pressing the MODE button for more than 5 seconds).
- Fan Speed Button: Selects fan speed (Hi, Med, Lo, or Auto) in COOL or HEAT mode, and Hi, Med, or Lo in FAN mode.
- Timer Function: Allows setting the unit to automatically turn off or on within 0.5-24 hours. Increments are 0.5 hours below 10 hours and 1 hour at or above 10 hours. The SET light illuminates during setting. The function can be canceled by pressing the TIMER button again.
- Filter Button: Activates the Filter Check light after 500 total fan motor hours to remind the user to clean the filter. Pressing the button turns off the light.
- Directional Louvers: Horizontal wheels control horizontal airflow, and air deflectors control vertical airflow.
- Eco Mode: When activated, the unit turns off once the room reaches the user-set temperature and turns back on when the temperature rises above it. The fan motor runs intermittently before the compressor starts to provide comfort and save energy.
- Sleep Mode: Dims display lights (SLEEP light remains on) and automatically adjusts temperature and fan speed for comfortable nighttime operation. Set temperature changes every 30-60 minutes, up to 81°F/82°F for cooling or 75°F/76°F for heating.
- TURBO Function (Remote Control): Activates the TURBO function under AUTO/COOL/FAN/HEAT modes.
- °F/°C Display Change (Remote Control): Pressing the TURBO button for more than 5 seconds within 3 minutes of inserting batteries switches between Fahrenheit and Celsius.
- DISPLAY Button (Remote Control): Toggles all lights or LED display on/off.
- I FEEL Function (Remote Control): Activates a remote thermostat function, allowing the remote to measure temperature at its location and send a signal to the AC to optimize the temperature around the user.
Maintenance Features:
- Air Filter Cleaning: The air filter should be checked monthly. It can be removed by pulling down on the indents of the filter door. Clean with liquid dish soap and warm water, rinse thoroughly, and let dry completely. Alternatively, vacuum the filter to remove dust.
- Cabinet Cleaning: Unplug the unit before cleaning. The cabinet and front panel can be dusted with an oil-free cloth or washed with a cloth dampened in a solution of warm water and mild liquid soap. Rinse with a damp cloth and wipe dry. Avoid harsh cleaners, wax, or polish. Wring excess water from the cloth when cleaning around controls to prevent damage.
- Winter Storage: For extended periods of non-use, remove the unit from the window (following installation instructions) and cover it with plastic or store it in its original box.
- Compressor Protection: Always wait at least 3 minutes before changing modes to prevent compressor overheating and circuit breaker tripping.
Normal Operating Sounds:
- Pinging Noise: May occur from water hitting the condenser on rainy or humid days, which helps remove moisture and improve efficiency.
- Thermostat Click: Audible when the compressor cycles on and off.
- Water Collection/Drip: Water will collect in the base pan during rain or high humidity and may overflow and drip from the outside of the unit.
- Fan Operation: The fan may continue to run even when the compressor is off.
Installation Notes:
- The unit requires a slight downward tilt towards the rear for proper condensation drainage, even when side panels are not used.
- Through-the-wall installation requires a wooden frame and must ensure side or top louvers are not obstructed. The unit should project into the room sufficiently for balance.
- If a storm window frame prevents proper tilt, attach a board or wood piece at least 1/2" deep and 1/2" higher than the storm window frame to the sill to allow for drainage.