This document is a user manual for the Arctic APL61015XLW3 automatic washing machine. It provides instructions for safe operation, technical specifications, usage guidelines, and maintenance procedures.
Function Description
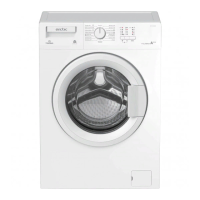
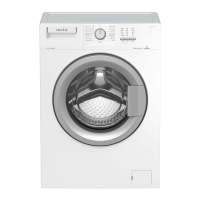
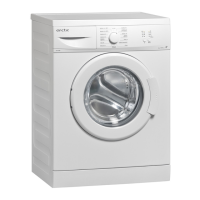
The Arctic APL61015XLW3 is an automatic washing machine designed for domestic use. Its primary function is to wash and rinse laundry. The machine offers various washing programs tailored to different fabric types, soiling levels, and temperatures, ensuring efficient and effective cleaning. It incorporates features to enhance user convenience and safety, such as a child lock, door lock, and an automatic unbalanced load detection system. The product is manufactured using environmentally friendly conditions and is designed for a service life of 10 years, with original spare parts available during this period.
Important Technical Specifications
- Model Name: APL61015XLW3 (7000040059)
- Rated Capacity: 6 kg
- Maximum Spin Speed: 1000 rpm
- Built-in: No
- Dimensions:
- Height: 84 cm
- Width: 60 cm
- Depth: 44 cm
- Water Inlet: Single Water inlet / Double Water inlet (Available)
- Electrical Input: 230 V / 50Hz
- Total Current: 10 A
- Total Power: 1550 W
- Main Model Code: 9213
The machine complies with EU WEEE Directive (2012/19/EU) and RoHS Directive (2011/65/EU), indicating its adherence to environmental and material safety standards.
Usage Features
The washing machine offers a comprehensive control panel for program selection and adjustments.
Control Panel Elements:
- Programme Selection Knob: Used to select various washing programs (e.g., Cotton, Synthetics, Wool, Eco 40-60, Rapid Wash). The uppermost position is On/Off.
- Spin Speed Indicator LEDs: Display the selected spin speed.
- Child Lock Enabled LED: Illuminates when the child lock is active.
- Door Lock Enabled LED: Indicates the status of the loading door lock.
- Delayed Start Indicator LEDs: Show the remaining time for a delayed start.
- Programme Follow-up LEDs: Track the progress of the washing cycle.
- Start/Pause Button: Initiates or pauses the selected program.
- Delayed Start Setting Button: Configures a delayed start for the program (up to 3, 6, or 9 hours).
- Spin Speed Adjustment Button: Allows modification of the spin speed.
Preparation for Use:
- Ensure all hoses are connected tightly.
- Plug in the machine.
- Turn on the water tap completely.
- Load laundry into the machine.
- Add detergent and fabric softener to the appropriate compartments.
Program Selection and Tips for Efficient Washing:
- Select programs based on fabric type, laundry quantity, and soiling degree, referring to the "Programme and consumption table" and temperature guidelines.
- The detergent drawer has three compartments: prewash (1), main wash (2), and softener (3), with a siphon piece in the softener compartment.
- Detergent Usage: Add detergent and softener before starting. Do not open the dispenser during a cycle. Use liquid detergent in the main wash compartment (2) for programs without prewash. For programs with prewash, do not use liquid detergent in the prewash compartment (1). Detergent bags or dispensing balls should be placed directly in the drum.
- Detergent Type: Use specific detergents for colored/white laundry, delicate items, dark clothes, and woolens. Avoid soap powder.
- Detergent Amount: Adjust detergent quantity based on laundry amount, soiling, and water hardness to prevent excessive foam, poor rinsing, and environmental impact.
- Softener Usage: Pour softener into compartment (3), ensuring it doesn't exceed the max level. Dilute viscous softener with water.
- Gel/Tablet Detergent: If fluidal and no special cup, add to main wash compartment during first water intake. If not fluidal or in capsule form, place directly in the drum.
- Starch: Add liquid/powder starch or fabric dye to the softener compartment. Do not mix with softener.
- Bleaches: Add bleach at the start of a prewash program or during the first rinse of an extra rinse program. Do not mix bleach with detergent or pour directly onto colored laundry. Use oxygen-based decolorant with detergent for low-temperature washes.
Operating Features:
- Delayed Start: Set a delay for the program to start.
- Child Lock: Prevents accidental program changes. Activated by pressing and holding the Spin Speed and Delayed Start buttons for 3 seconds.
- Door Lock: The loading door locks during operation and can only be opened a few minutes after the cycle ends if the water level is suitable.
- Changing Selections: Spin speed can be adjusted during a running program if the change is compatible with the current step.
- Adding/Removing Laundry: Possible if the water level allows, by pausing the machine.
- Canceling Program: Turn the program selection knob to a new program. The previous program will be canceled, and the End/Cancel light will flash.
- End of Program: The "End" LED illuminates, and the "Door Lock Enabled" LED turns off.
Maintenance Features
Regular maintenance extends the product's lifespan and prevents common issues.
Cleaning the Detergent Drawer:
- Clean regularly (every 4-5 washing cycles) to prevent residue buildup.
- Remove the siphon from the softener compartment and clean it if water/softener mixture accumulates.
- Wash the drawer and siphon with lukewarm water and a brush, wearing gloves.
- Reinsert the drawer securely.
Cleaning the Loading Door and Drum:
- For models with a drum cleaning program, run it every two months.
- If no drum cleaning program is available, perform a wash with an anti-limescale detergent.
- After each wash, check the drum for foreign substances.
- Clear any blockages in the bellow holes with a toothpick.
- Remove rust stains from the drum surface using stainless steel cleaning agents. Do not use steel wool or wire wool.
Cleaning the Body and Control Panel:
- Wipe the machine body with soapy water or mild gel detergent, then dry with a soft cloth.
- Use only a soft, damp cloth for the control panel.
Cleaning the Water Intake Filters:
- Filters are located at the end of the water intake valves at the rear of the machine and at the tap connections of the hoses.
- Close the taps.
- Remove the nuts of the water intake hoses to access and clean the filters with a brush. Use pliers if filters are very dirty.
- Clean the filters and gaskets from the flat ends of the hoses under running water.
- Carefully replace seals and filters and hand-tighten the nuts.
Draining Remaining Water and Cleaning the Pump Filter:
- The pump filter prevents blockages from solid objects. Clean it every 3 months or when the machine fails to drain water.
- Before cleaning, unplug the machine and allow the water to cool if it's hot.
- Open the filter cover.
- Place a large vessel in front of the filter to collect water.
- Unscrew the pump filter counter-clockwise until water starts flowing.
- Completely remove the filter once all water has drained.
- Clean residues and fibers from the filter and pump rotor.
- Reinstall the filter and close the cover.
- If transporting the machine in cold temperatures, drain all water to prevent freezing.