Eskimo, Division of Ardisam, Inc.
800-345-6007
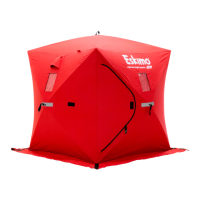
OMQUICKFISH07
WARNING
!
READ AND UNDERSTAND ALL ASSEMBLY, INSPECTION,
& USE INSTRUCTIONS PROVIDED BEFORE EACH USE.
FAILURE TO FOLLOW INSTRUCTIONS COULD RESULT IN
SERIOUS INJURY OR DEATH.
DO NOT USE OPEN FLAME HEATERS IN YOUR ICE SHEL-
TER.
! AVERTISSEMENT
LISEZ BIEN ET MAÎTRISEZ TOUTES LES INSTRUCTIONS
FOURNIES CONCERNANT LE MONTAGE, L’INSPECTION
ET L’UTILISATION DE CE PRODUIT AVANT CHAQUE
UTILISATION. UN NON-RESPECT DES INSTRUCTIONS
POURRAIT AVOIR COMME CONSÉQUENCE DES BLES-
SURES GRAVES OU MÊME LA MORT.
N’UTILISEZ PAS D’APPAREIL À CHAUFFAGE À FEU NU
DANS VOTRE ABRI POUR LA PÊCHE SUR GLACE.
Eskimo Ice Shelters are engineered with you the fisherman in mind. We ap-
preciate your purchase of one of our portable hub system ice shelters. Follow
these simple instructions and your ice shelter will provide you many years of
trouble-free pleasure. Save these instructions for future reference.
QUICKFISH SERIES
ASSEMBLY AND USE INSTRUCTIONS
SET-UP INSTRUCTIONS:
1. Remove the ice shelter from backpack carrying bag by unzipping the bag completely.
2. Lay the ice shelter flat on the ground and be completely sure there is no material twisted or
overlapping the ends of any poles.
SEE FIGURE 1. DO NOT force shelter when folding.
Watch for entanglement of poles.
NOTE: In windy conditions and before pulling outward on the roof or walls to pop
open the shelter, securely anchor all corners with provided ice anchors, see step
6 for instructions. This will prevent shelter from blowing away when setting up in
windy conditions.
3. Grasp the webbing loop sewn onto the eyelet located in the center of the roof and pull
outward until the roof section pops open. For the QUICKFISH 6, do the same for the other
roof section. Both roof sections should now be popped open.
SEE FIGURE 2.
4. Grasp the webbing loop sewn onto the eyelet located in the center of one of the walls and
pull outward so that wall pops open.
SEE FIGURE 3.
NOTE: Place your foot on the ground skirt to help hold the shelter in place when
popping open the walls.
5. Proceed by walking around entire shelter and pulling on each wall webbing loop to pop out
each wall until all sides are popped out.
SEE FIGURE 4.
NOTE: There are (4) wall sections on the QUICKFISH 2 & 3 and (6) wall sections on
the QUICKFISH 6.
6. Your shelter should be standing up completely as in
FIGURE 5. You may now proceed by
anchoring the shelter to the ice using the provided ice anchors and rope. QUICKFISH 2 &
3 - Screw (4) anchors through the grommets located in each corner completely. Use the
(2) provided ropes and tie one end to the hub eyelet on each wall, and the other end to an
anchor that is already screwed completely into the ice several feet away. Use adjustment
slides on rope to achieve proper tension. QUICKFISH 6 - Screw (6) anchors through the
grommets located in each corner and on the long sides of shelter completely. Use the (3)
provided ropes and tie one end to the hub eyelet on each wall section, and the other end to
an anchor that is already screwed completely into the ice several feet away. Use adjustment
slides on rope to achieve proper tension.
GAMME QUICKFISH MONTAGE ET INSTRUCTIONS
Les abris pour la pêche sur glace Eskimo sont conçus en pensant aux pêcheurs.
Nous apprécions le fait que vous ayez acheté un de nos abris transportables à
moyeu central pour la pêche sur glace. Suivez ces instructions simples et votre
abri pour la pêche sur glace vous offrira des années de plaisir sans problème.
Conservez ces instructions pour vous y référer plus tard.
INSTRUCTIONS POUR LE MONTAGE:
1. Sortez l’abri du sac à dos qui sert au transport en ouvrant complètement la fermeture
éclair.
2. Placez l’abri pour la pêche sur glace à plat sur le sol et assurez-vous que le tissu n’est
pas tordu ou ne déborde pas sur les extrémités des perches.
VOIR ILLUSTRATION 1.
N’UTILISEZ PAS une trop grande force lorsque vous pliez l’abri. Assurez-vous que
les perches ne sont pas mêlées.
NOTEZ BIEN: Lorsqu’il y a du vent et avant de tirer sur les murs et le toit pour
mettre l’abri en place, fixez tous les coins de l’abri à l’aide des ancres à glace, voir
l’étape 6 pour les instructions. Cette manœuvre empêchera l’abri d’être emporté
lorsqu’il y a du vent.
3. Saisissez la ganse de filet cousue à l’œillet situé au centre du toit et tirez vers le haut jusqu’à
ce que le toit de l’abri se place en position. Pour l’abri QUICKFISH 6, effectuez la même
opération pour l’autre section de toit. Les deux sections de toit devraient maintenant être
en place.
VOIR ILLUSTRATION 2.
4. Saisissez la ganse de filet cousue à l’œillet situé au centre de l’un des murs et tirez vers
l’extérieur pour que le mur se place en position.
VOIR ILLUSTRATION 3.
NOTEZ BIEN: Placez votre pied sur la jupette de la toile de fond pour tenir l’abri en
place lorsque vous placez les murs en position.
5. Faites le tour de l’abri en tirant sur chacune des ganses fixées aux murs pour mettre ceux-ci
en position.
VOIR ILLUSTRATION 4.
NOTEZ BIEN: Les modèles QUICKFISH 2 et 3 possèdent quatre (4) murs et le
QUICKFISH 6, possède 6 murs.
6. Votre abri devrait être érigé comme le montre
L’ILLUSTRATION 5. Vous pouvez maintenant
fixer l’abri à la glace à l’aide des ancres à glace et de la corde fournis. QUICKFISH 2 et 3
- Vissez complètement les ancres (4) dans les rondelles situées dans chacun des coins.
Utilisez les cordes (2) fournies et nouez une extrémité à l’œillet au milieu de chaque mur et
l’autre extrémité à une ancre à glace déjà vissée complètement dans la glace à quelques
pieds de distance. Utilisez les tendeurs sur la corde pour obtenir la tension idéale.
QUICK-
FISH 6 - Vissez complètement les ancres (6) dans les rondelles situées dans chacun des
coins et sur les côtés les plus longs de l’abri. Utilisez les cordes (3) fournies et nouez une
extrémité à l’œillet au milieu de chaque mur et l’autre extrémité à une ancre à glace déjà
vissée complètement dans la glace à quelques pieds de distance. Utilisez les tendeurs sur
la corde pour obtenir la tension idéale.
INCLUDES THE FOLLOWING MODELS:
COMPREND LES MODÈLES SUIVANTS:
QUICKFISH 2 (69151)
QUICKFISH 3 (69143)
QUICKFISH 6 (69149)
QUICKFISH 6QUICKFISH 2 & 3
FIGURE 1
FIGURE 2
FIGURE 3
FIGURE 4
FIGURE 5