Step 1: Getting Started
Touch-up Paint
Warranty/Care Form
Keys/Instructions
Clamp Spacers
Covers
.125" (1/8") “T” Wrench
.50" (1/2") Box Wrench
4mm Hex Driver
.50” (1/2") Socket Wrench
Box Knife
1.5" Cap Tape
Grease
Spray Lube
Accessories Package
Contents
Tools RequiredSupplies Required
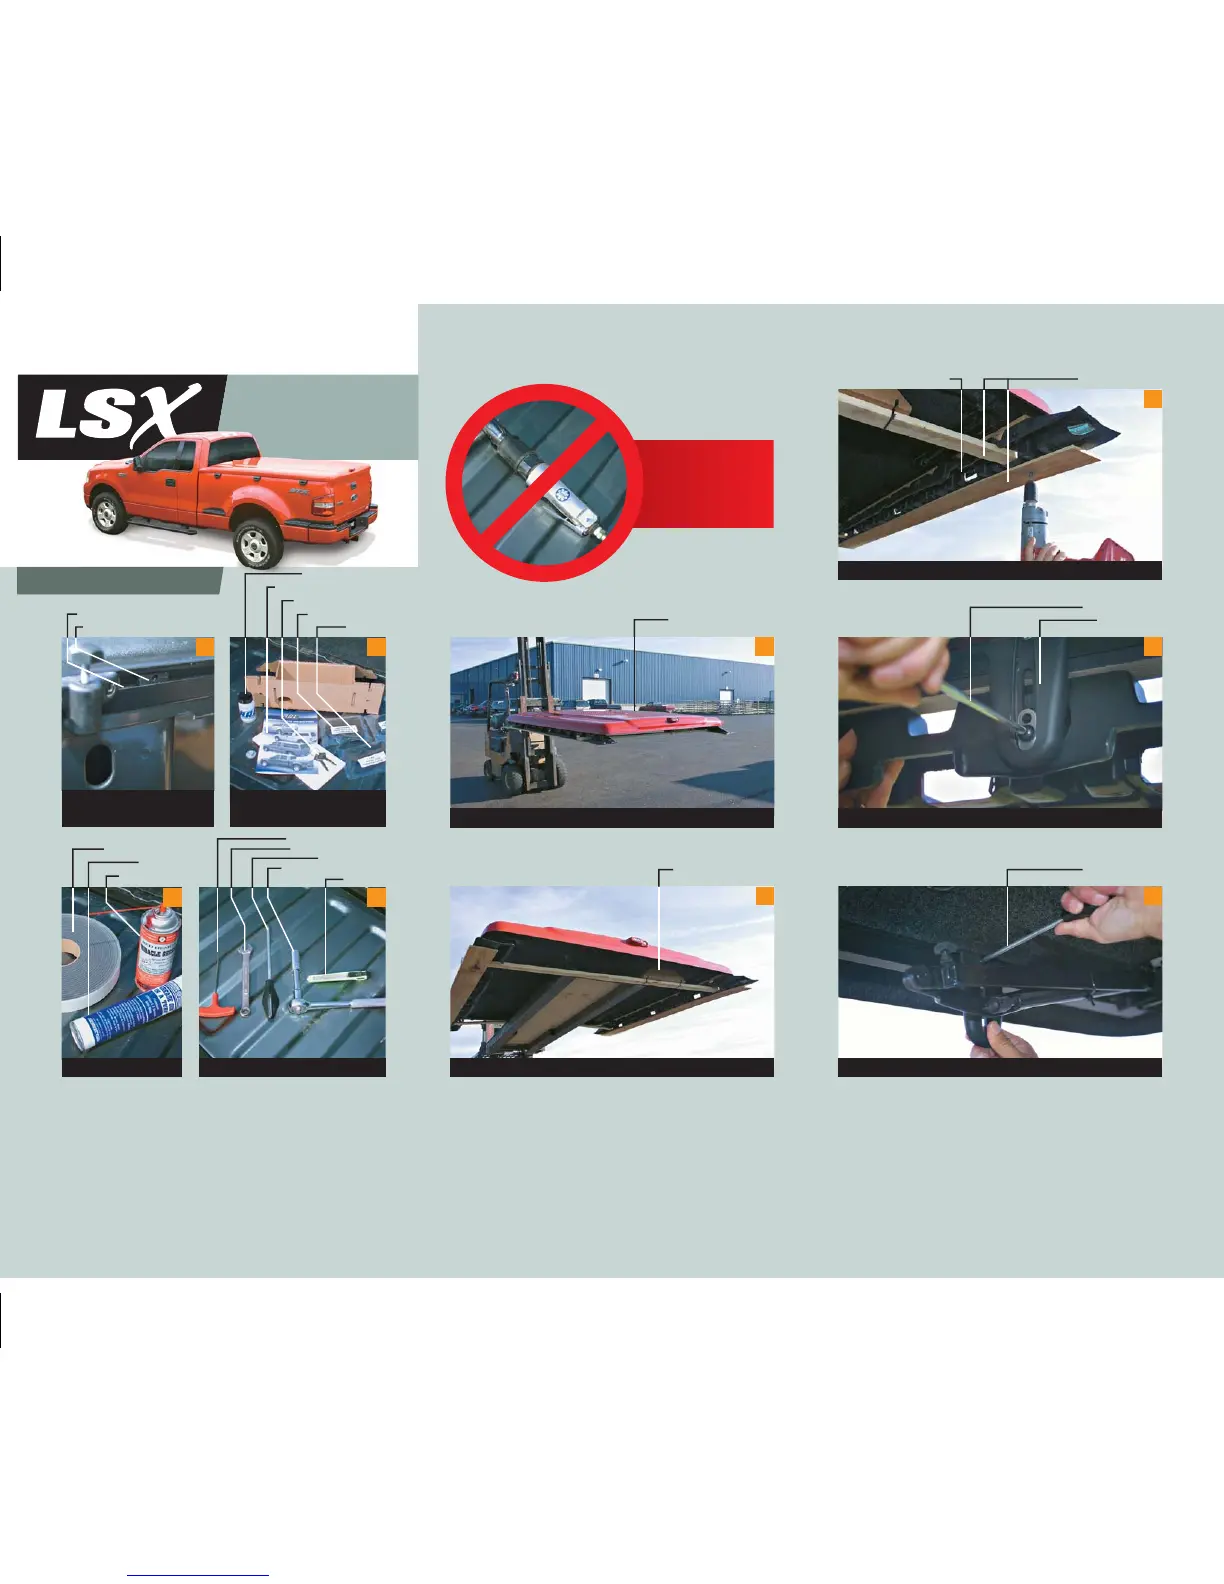
DO NOT
USE IMPACT
WRENCH
2
3 4
Aluminum Side Rail
Moveable “T” Nut
Position “T” nuts at desired
clamp locations.
1
Paint
LSX Tonneau Cover
Raise LSX above head level.
Locate and remove accessory package.
Accessory Package
5
6
Shipping WoodReturnable Dunnage
Remove screws from dunnage.
Remove dunnage by loosening clamp bolt.
4mm Hex Tool
Clamp Body
7
8
Remove clamp from aluminum rail.
4mm Hex Tool
9
Installation
Instructions