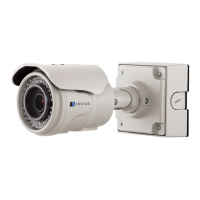
Arecont Vision MegaView
®
2 Installation Manual
Page | 7 support@arecontvision.com
Optional: Connecting Digital I/O:
9. To use digital I/O, connect digital I/O with
pigtail cable connector as shown in Image
8.
NOTE 1: MegaView
®
2 only supports digital
input but no digital output.
NOTE 2: Table 1 shows electrical
characteristics
Electrical
Characteristics:
Min Max
Input voltage (V)
(measured between
+ and – terminals)
ON 2.9 6.3
OFF 0 1.3
OFF - 0.1
Table 1
NOTE 3: The digital input is electrically isolated
from the rest of the camera’s electrical circuitry
via general-purpose photo couplers. The input
is additionally protected with a serial 250 Ohm
resistor, and a debouncing circuit. Duration of
any input signal should be at least 5 ms to
comply with the requirements of the debouncing
circuit.
NOTE 4: Table 2 shows cable color for digital
input
Green Digital IN +
Black Digital IN -
Table 2
Adjusting the Remote Focus and
Remote Zoom:
NOTE: MegaView
®
2 camera operating
temperature is -40˚C (-40 °F) to +50˚C (122 °F),
however, motorized lens operating temperature
is -20˚C (-4°F) to +50˚C (122 °F).
10. To adjust focus or zoom, open the camera
web interface and click the “Focus” tab as
shown in image 9.
11. To manually adjust zoom, click the “+20”,
“+5”, “+1”, “-20”, “-5”, “-1” buttons to zoom in
and out, adjusting the field of view.
NOTE 1: “+20” zooms in 20x further than “+1”
NOTE 2: If the “Enable Auto Focus after zoom”
option is checked as shown in image 8, the
focus will automatically be adjusted when zoom
is changed.
12. Set up a focus area (if necessary) by
drawing a rectangle with the mouse (by left-
clicking and dragging the mouse to a
desired zoom size) shown in Image 8.
13. To automatically adjust focus, choose “Full-
range Focusing” or “Fast Focusing”
depending on the image clarity as shown in
image 8.
14. If the image is completely out of focus,
choose “Full-range Focusing” to scan the
full focus range and find the best focus
position.
15. If the image is slightly of out of focus,
choose “Short-rang Focusing” to fine tune
and quickly get a precise focus position to
save time.

 Loading...