Do you have a question about the Argos Newport and is the answer not in the manual?
General guidance for safe and effective assembly, including lifting, preparation, and securing the unit.
Instructions for cleaning the unit using a damp cloth and mild detergent, avoiding harsh chemicals.
Lists essential tools needed for assembly, such as a rule, spirit level, screwdrivers, and hammer.
Attaching dowels, locking nuts, and rail holders to the left side panel.
Attaching dowels, locking nuts, and rail holders to the right side panel.
Inserting locking nuts into the base panel in preparation for assembly.
Connecting the base panel to the right side panel using locking nuts.
Fitting hinge plates and a rail holder to the divider panel.
Attaching the divider panel to the base using screws.
Inserting wooden dowels and locking nuts into the plinth.
Attaching the plinth to the right side panel using locking nuts.
Connecting the left side panel to the base and plinth.
Screwing metal dowels into the top panel.
Attaching the top panel to the left side, right side, and divider.
Tightening locking nuts to secure the top panel to the sides.
Squaring the unit and attaching the back panels using nail screws.
Tapping plastic nails into the bottom edge of the side panels.
Installing the hanging rail and shelves using shelf studs.
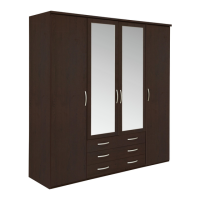
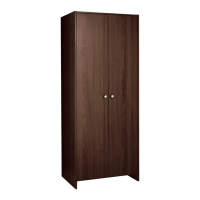
Fitting hinges to the two outer doors using screws.
Fitting hinges to the centre door using screws.
Attaching the outer doors to the unit and fitting handles.
Attaching the centre door to the unit and fitting its handle.
Adjusting door height, forward/back position, and sideways alignment.
Securing the unit to the wall using the provided overbalance protector kit for safety.
| Brand | Argos |
|---|---|
| Model | Newport |
| Category | Indoor Furnishing |
| Language | English |