EasyManua.ls Logo

Argos Puerto Rico User Manual

Argos Puerto Rico
12 pages
To Next Page IconTo Next Page
Page #1 background imageLoading...
Page #1 background image
PuertoRico- Nook 3 Corner Set
603/1028
AssemblyInstructions - Please keep for future reference
If you need help or have damaged or missing parts, call the Customer Helpline: 08456 400 800
Important Please read these instructions fully before starting assembly
Dimensionsof
thecornernook
Width-161.5cm
Width-123.5cm
Height-85cm
Issue 1 - 18/08/10
Dimensions
ofthetable
Width-109cm
Depth-65cm
Height-73.5cm
Dimensions
ofthebench
Width-102cm
Depth-28cm
Height-43cm
603/0366
Question and Answer IconNeed help?

Do you have a question about the Argos Puerto Rico and is the answer not in the manual?

Argos Puerto Rico Specifications

General IconGeneral
BrandArgos
ModelPuerto Rico
CategoryIndoor Furnishing
LanguageEnglish

Summary

Safety and Care Advice

Important Assembly Precautions

Key safety and preparation advice before starting assembly.

Care and Maintenance Guidelines

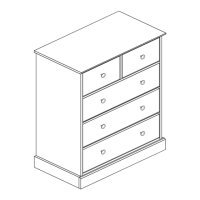
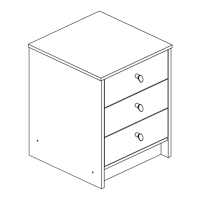
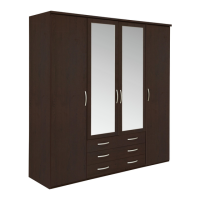
Instructions for cleaning and maintaining the furniture.

Components - Panels

Components - Fittings

Assembly Instructions

Step 1: Inserting Dowels

Insert dowels into indicated parts for initial assembly.

Step 2: Fixing Blocks

Attach blocks to seat panels using screws as per diagram.

Step 3: Fixing Panels

Connect side panels to back panels and cross rails using bolts.

Step 4: Fixing Corner Seat

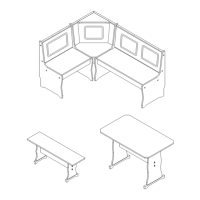
Attach the corner seat to the bench sections with screws.

Step 5: Fixing Top Rails and Corner Back Panels

Install top rails and small corner back panels on the benches.

Step 6: Securing Corner Back Panels

Attach screws to small corner back panels and place the main corner back panel.

Step 7: Fitting Top Corner and Metal Studs

Mount the top corner piece and secure metal studs to side panels.

Step 8: Fixing Corner Back Panel

Fasten the corner back panel, ensuring top screws are fixed first.

Step 9: Placing Seat Panels

Position the seat panels correctly, ensuring wooden blocks face downwards.

Step 10: Fixing Seat Panels and Side Blocks

Secure seat panels and side blocks after turning the unit upright.

Step 11: Attaching Rails

Connect the corner rail to the seat and side rails to the unit.

Step 12: Assembling Table and Bench Frames

Assemble table and bench frames using centre rails and legs.

Step 13: Fitting Top Rails

Install top rails onto the assembled structure using dowels and screws.

Step 14: Fitting Base Rails

Attach base rails to the structure using dowels and screws.

Step 15: Fixing Table Top and Seat Panel

Secure the table top and bench seat panel using dowels and screws.

Related product manuals