Only
one
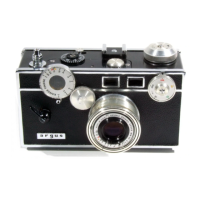
screw still
holds the upper
geqr
troin
ossembly,
Fig. 27
,
ot
the
wind-knob
end of the
pomero
body. The
two screws
holding
the wind leverseot
(which
you removed eorlier)olso
threod
through
the upper
geor
troin ossembly. By
iust
loosening the re-
mo in ing
screw,
you con slide the complete upper
geor
troin
ossembly in
position
--
this is
o
depth-of-engogementodiustment
which influences
the
"feel"
of the wind
stroke.
ln
other words,
if
the comero winds
too hord, the depth of engogement moy be
too deep.
Moke
o note
of
(or
scribe) the
positioning
of the upper
geor
troin ossembly
--
then, toke out the one
remoining screw ond lift
off the complete ossembly. The
idler
geor,
which is now loose,
sits collor-up over the
post on the upper
geor
trqin mechonism
plote.
NOTE: Turnins
thewind knob tocock
theshutter
rotoles
the iprocket through the upper
geor
troin. So,
with
the
wind knob
removed, you con cock the
shutter
iust
by
turning the sprocket. You'll
see how the sprocket cocks
the
shutter o
little
Ioter in the disossembly.
Turn
the
bose
lockon the bottomof
thecomero
in
the"open"
direction
ond remove the
comero
bock. Next,
remove the
pin
screw shown
in
figure 28
--
this
screw holds the
lens ossembly to
the FOCUSING RING.
After removing the
pin
screw,
simply
unscrew the
lens ossembly in
o counterclockwise direction.
LENS
ADJUSTING
RING
PIN SCREW
FOCUSING
RING
SLOT IN
FOCUSING
RING
FIGURE 28
L_
 Loading...