EN - 28
BATTERY
Models 911179, 190
See Figure 27.
NOTICE: Unit comes equipped with a
maintenance-free battery that requires no
regular maintenance except charging and
cleaning the terminals.
To remove battery:
1. Disconnect battery connectors.
2. Remove battery bracket and battery.
Save bracket and mounting hardware
for reinstallation.
To install battery:
1. Reinstall battery into unit.
2. Connect black, negative (–) connector to
black, negative (–) battery terminal.
3. Connect red, positive (+) connector to
red, positive (+) battery terminal.
Charge Battery
NOTICE: Engine does not charge the battery.
Battery will require periodic charging to
ensure proper starting. It is recommended to
charge battery on a monthly basis for 6 hours
even if mower is not used.
IMPORTANT: DO NOT attempt to jump start
mower.
IMPORTANT: DO NOT start engine while the
charger is connected to wiring harness.
1. Connect battery charger to the wiring
harness. See Figure 27.
2. Plug charger into 120 VAC outlet.
IMPORTANT: Battery charger supplied with
unit is for 120 volt Alternating Current (AC)
outlets only.
3. Charge for 16 – 24 hours.
IMPORTANT: DO NOT overcharge battery.
Disconnect battery after 24 hours.
WARNING: AVOID INJURY. Read
and understand the entire Safety
section before proceeding.
WARNING: Battery posts,
terminals and related accessories
contain lead and lead compounds,
chemicals known to the State of
California to cause cancer and
reproductive harm. Wash hands
after handling.
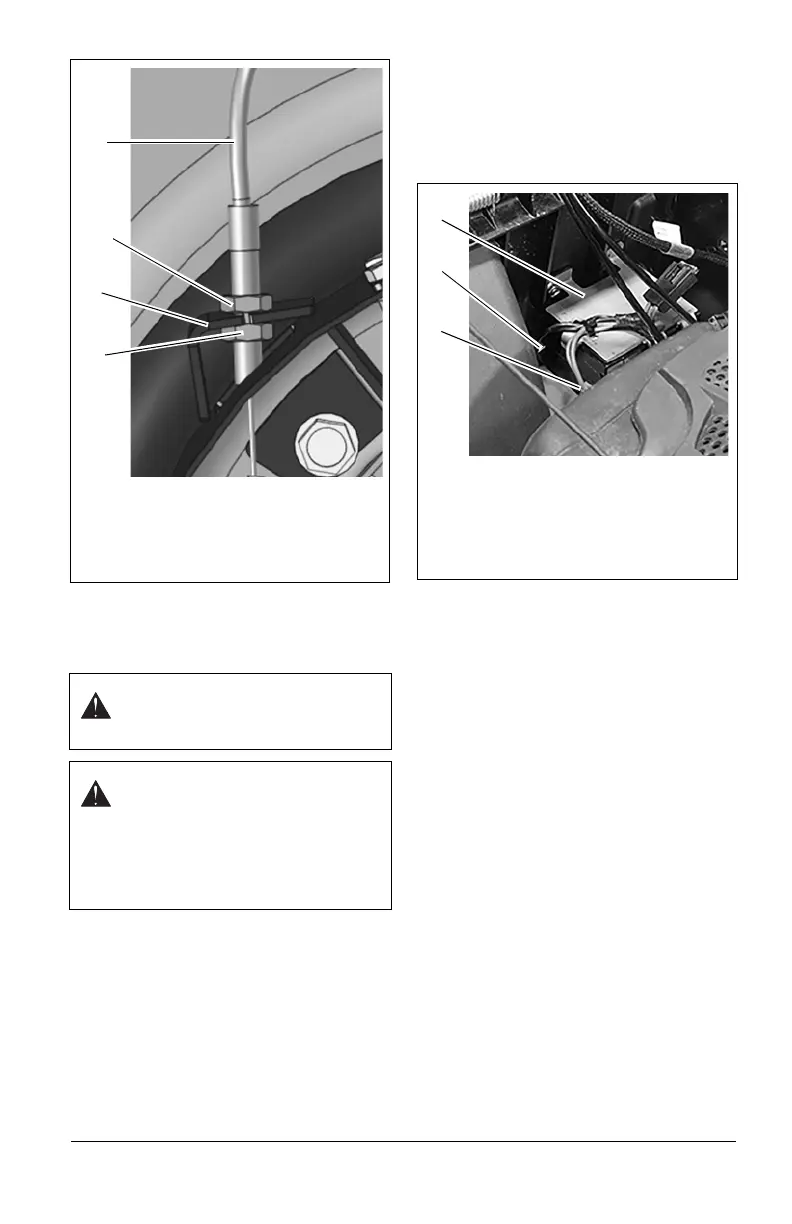
Figure 26
1
2
3
1. Front Adjustment Nut
2. Cable Bracket
3. Rear Adjustment Nut
4. Cable
4
Figure 27
1. Battery Bracket
2. Black, Negative (–) Connector and
Battery Terminal
3. Red, Positive (+) Connector and Battery
Terminal
1
2
3




 To Next Page