After cooking
:hen cooking is complete the appliance beeps a few times Fig. 29.
,f the ingredients are not ready put the basket back into the cooking compartment and set the timer
to a few more minutes.
- 7o manually stop the cooking process press the 67A57PAU6E button . After a few sec-
onds the appliance turns off.
1 Grab the handle E and remoYe the basket F from the cooking compartment C Fig. 30.
2 Put the food on a plate Fig. 31. 6erYe out.
Warning
Do not touch the basket the cooking compartment the non-stick plate and the internal metal
parts of the appliance when the appliance is operational or in the minutes following its shut-
down. :ait for the cooling of hot parts Fig. 32.
Do not turn the basket upside down when remoYing food hot oil residues may leak out of
the basket.
Warning
Make sure that the ingredients cooked into the appliance are golden brown and not black or
dark. 5emoYe the possible burned parts from the ingredients.
Do not use metal tools to remoYe food from the basket.
An\ oiO resiGXe ZiOO Ee coOOecteG at tKe EottoP oI tKe EasNet.
At tKe enG oI tKe cooNinJ Srocess tKe aSSOiance can Ee XseG iPPeGiateO\ to SreSare otKer
IooG.
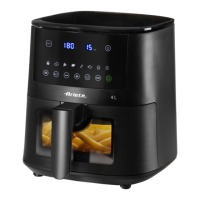
Grill mode
7he grill mode is ideal for grilling meat ¿sh and Yegetables. Place the non-stick plate D into the
basket Fig. 8 before placing the food. Press the G5,LL button to actiYate the grill mode.
Auto-off function
7his appliance is eTuipped with an auto-off function. 7he appliance turns off automatically when
not in use for a few minutes.
Delayed start function
7he appliance is eTuipped with a delayed start function that allows the user to set a speci¿c time
for the start of the cooking process.
7o actiYate the function
1 Press the ME1U button to set the desired cooking time.
2 Press the DELA<ED 67A57 button . 7he button lights up.
7he pre-set setting of the delayed start function is 90 min. Press the + or - buttons to increase or
decrease the delayed time from a minimum of 10 min to a maximum of 180 min.
3 Press the 67A57PAU6E button to start the function.
Press once the 67A57PAU6E button to pause the delayed start. Press the 67A57PAU6E
button again to cancel the delayed start function.
28
EN