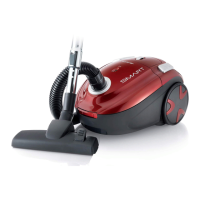
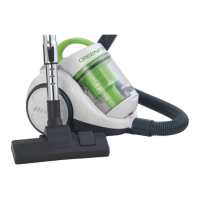
Valve adjustment depends on the type of surface:
- Minimum power for curtains and delicate materials.
- Medium power for pillows and cushions, mattresses and carpets.
- Maximum power for oors in tiles, wood or other strong, hardwearing and heavily soiled materials.
CAUTION: Switch off the vacuum cleaner immediately if the air openings, brushes or telescopic tubes
become blocked. Remove the obstruction before switching the vacuum cleaner on again.
After using the cleaner
After use, switch off the vacuum cleaner using the pedal switch (F), unplug it from the mains power
and wind in the cord by pressing the cord winder pedal (C) on the appliance. The cord will wind inside
the appliance container.
IMPORTANT: While winding the power cord, guide it with one hand so as to prevent injury and take
care in the presence of children or pets.
- The appliance can be stored using the special rear hook for the oor brush (FIG. 6).
CLEANINg AND MAINTENANCE
CAUTION: Before carrying out any cleaning or maintenance operation, switch off the appliance and
remove the plug from the mains socket.
Dust bag replacement/cleaning
When the indicator light turns red, the paper dust bag (H) needs changing or, according to use, the
fabric dust bag (S) needs to be emptied and cleaned.
- open the bag compartment by pushing the relevant lever outwards (FIG. 7).
- Take out the bag, being careful not to tear it; slide the stiff cardboard section (or plastic section on
fabric bags) along the special guides (FIG. 8). Throw away the paper dust bag or empty the fabric
bag and wash it in water and a mild detergent, if necessary.
CAUTION: Always make sure that fabric dust bags are perfectly dry before retting them.
- Insert a new bag by sliding the stiff card section in along the guides and then place the container
in its seat;
- close the dust compartment lid.
Cleaning/replacing the pre-motor lter
The pre-motor lter needs cleaning on a regular basis and it should be replaced every 6 to 9 months,
depending on use.
- Remove the bag (FIG. 8).
- Slide the lter out from the compartment (FIG. 9).
- Remove the lter, and then shake it vigorously to clean it. If the lter is extremely soiled, wash it
with lukewarm soapy water, rinse it well and leave it to dry. NEVER use articial means to dry the
lter. To replace the lter, contact an Assistance Centre.
- Replace the lter in its compartment and ret it. When you ret the compartment, make sure that
the rough surface of the lter is visible.
- Lastly, ret the dust bag and make sure that the lter compartment is correctly in place before us-
ing the cleaner.