Do you have a question about the Ariston LI 680 PLUS and is the answer not in the manual?
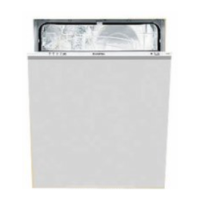
This document describes a dishwasher, likely from the Ariston brand, with models LI 680 PLUS, LI 700 PLUS, and LIQ 700 PLUS. It provides comprehensive instructions for installation, use, maintenance, and troubleshooting.
The dishwasher is designed for non-professional use in a domestic environment, specifically for washing household dishes. It features various wash cycles and options to accommodate different types of loads and soil levels. The appliance is equipped with a water softening system that uses regenerating salt to prevent limescale deposits on dishes and glassware. It also uses rinse aid to facilitate drying and prevent streaks. Safety features include an anti-flood system and warnings against improper use.
The dishwasher has a width of 59.5 cm, a height of 82 cm, and a depth of 57 cm. It can accommodate 12 standard place settings. The water supply pressure should be between 30 Kpa and 1 Mpa (0.3 to 10 bar), which translates to 4.3 to 145 psi. Electrical specifications, including power supply voltage and total absorbed power, are indicated on the data plate located on the inner door. The appliance complies with several European Directives, including those for Low Voltage (73/23/EEC), Electromagnetic Compatibility (89/336/EEC), and Waste Electrical and Electronic Equipment (2002/96/CE).
Installation: The dishwasher should be unpacked carefully and inspected for any transport damage. It needs to be placed on a flat, rigid surface and leveled by adjusting its feet. The rear feet's height can be adjusted from the front using a screwdriver. Both water inlet and outlet hoses, as well as the electrical cable, can be oriented to the right or left for optimal installation. The water inlet hose should be connected to a ¾ gas threaded tap, ensuring clean water flow before connection. For hot water connections, the temperature should not exceed 60°C. An anti-flood system, potentially a "Water Stop" device with a transparent outer hose and a red inner hose, is integrated for safety. The discharge hose should be connected to a drain pipe with a minimum diameter of 4 cm, positioned between 40 and 100 cm from the floor, without kinks. The electrical connection requires a grounded socket that matches the appliance's power specifications.
Control Panel: The control panel includes buttons for "WASH CYCLE SELECT," "EXTRA DRYING," "HALF LOAD," "DELAYED START," and "ON/OFF." Indicator lights correspond to the selected program, "LOW SALT," "LOW RINSE AID," "HALF LOAD ON UPPER RACK," "HALF LOAD ON LOWER RACK," and "DELAYED START."
Loading the Racks: Before loading, food residues should be removed, and heavily soiled pots should be pre-soaked. Dishes should be arranged to allow free rotation of the spray arms. The lower rack is for more difficult-to-wash items like plates, pots, and serving dishes, with foldable supports available. Cutlery should be placed in the cutlery basket, with knife points facing downwards. The upper rack is for delicate and lighter items like glasses, cups, and small bowls. The height of the upper rack can be adjusted to accommodate taller items in either rack by opening the rack guides and sliding it up or down. Specific "Baby" baskets are provided for washing baby bottles and accessories in models with the Baby Cycle. Wooden, aluminum, copper, brass, pewter, tin, non-heat-resistant plastic, antique porcelain, and antique silver items are not suitable for dishwasher washing.
Starting the Dishwasher:
Modifying a Wash Cycle: A cycle can be changed if it has just started by opening the door, pressing and holding "WASH CYCLE SELECT" for 4 seconds, then selecting a new program and closing the door.
Adding Extra Crockery: Open the door, add items, and close the door; the cycle will resume from where it left off.
Accidental Interruptions: If the door is opened or there's a power cut, the cycle pauses and resumes when the door is closed or power is restored.
Detergent Loading: The correct amount of detergent is crucial for effective washing and environmental protection. Compartment A is for main wash detergent, and B is for pre-wash.
Wash Options:
Rinse Aid and Regenerating Salt: Use only specific dishwasher products. Rinse aid prevents streaks and facilitates drying. The rinse aid dispenser should be refilled when the indicator (H) is clear or the "LOW RINSE AID" indicator light flashes. The dosage can be adjusted from 1 to 6 (factory setting is 4). Regenerating salt prevents limescale. The salt dispenser should be refilled when the green float is not visible, the "LOW SALT" indicator light flashes, or approximately every 30 cycles if no indicator is present. The salt dosage can be adjusted based on water hardness. After adding salt, run a wash cycle without dishes to remove any spilled saline solution and prevent corrosion.
Shutting Off Water and Electricity: Close the water tap after each wash and unplug the appliance before cleaning or maintenance.
Cleaning the Dishwasher: The exterior and control panel can be cleaned with a damp cloth and mild soap. Internal stains can be removed with a damp cloth and a little vinegar.
Preventing Unpleasant Odors: Leave the door slightly ajar to prevent humidity stagnation. Regularly clean the door seals and detergent dispensers with a damp sponge to prevent food residue buildup, which causes odors.
Cleaning the Spray Arms: Periodically check and clean the spray arm holes to remove any food residues that might obstruct them, using a non-metallic brush.
Cleaning the Filters: The filters remove food residues from the wash water. They should be cleaned regularly.
Long Periods of Absence: Run an empty wash cycle, disconnect the appliance from water and electricity, and leave the door slightly ajar.
Precautions and Advice: The appliance is designed for domestic use only. Do not install it outdoors or expose it to rain. Avoid touching the appliance with bare feet or pulling the power cord. Always close the water tap and unplug the appliance before maintenance. Do not attempt internal repairs. Keep detergents and packaging out of reach of children.
Saving Energy and Respecting the Environment: Use the dishwasher with a full load. For partial loads, use the "Half Load" option. Select appropriate programs based on soil level (e.g., "Eco" for normally soiled dishes). If your electricity contract offers off-peak hours, use the "Delayed Start" option to run cycles during those times. Using phosphate-free, chlorine-free, enzyme-based detergents is recommended for environmental protection. Enzymes are effective at 50°C, allowing for lower temperature washes. Dose detergents correctly to avoid waste.
Troubleshooting: The manual provides a detailed troubleshooting guide for common issues such as the dishwasher not starting, not filling/draining water, excessive noise, poor drying, or dirty dishes. It also lists error codes indicated by flashing lights for issues like a closed water tap, clogged filters, or a faulty water inlet solenoid valve, with corresponding solutions. If issues persist, contact authorized technical assistance, providing the appliance model and serial number.
| Brand | Ariston |
|---|---|
| Model | LI 680 PLUS |
| Category | Dishwasher |
| Language | English |