This document is a Daily Reference Guide for an Ariston dishwasher, providing essential information for its operation, maintenance, and troubleshooting.
Function Description
The Ariston dishwasher is designed to clean crockery, cutlery, and other kitchen items. It features various wash programs tailored for different soiling levels and item types, along with options to customize cycles. The appliance incorporates a water softener system that requires salt to prevent limescale buildup and a rinse aid dispenser to improve drying results. Detergent is dispensed automatically at the appropriate time during a wash cycle.
Important Technical Specifications
The guide outlines several programs with their respective drying levels, available options, detergent container usage (tub or dispenser B), duration, water consumption, and energy consumption.
Program Table Highlights:
- Eco (ECO 50°): Standard program for normally soiled crockery, offering the most efficient combined energy and water consumption. Duration: 4:00 h:min, Water: 11.5 litres, Energy: 0.83 kWh.
- Intensive (65°): For heavily soiled crockery, pans, and saucepans. Duration: 2:30 h:min, Water: 15.0 litres, Energy: 1.50 kWh.
- Normal (55°): For mixed soil and dried food residues. Duration: 2:25 h:min, Water: 15.0 litres, Energy: 1.35 kWh.
- Delicates (45°): For delicate items like glasses and cups. Duration: 1:30 h:min, Water: 11.0 litres, Energy: 1.00 kWh.
- Express 30' (50°): For lightly soiled dishes with no dried food residues. Duration: 0:30 h:min, Water: 8.0 litres, Energy: 0.50 kWh.
- Half Load (50°): Ideal for washing a half load of lightly or normally soiled crockery. Duration: 1:15 h:min, Water: 11.0 litres, Energy: 0.90 kWh.
- Soak: To refresh crockery planned to be washed later, no detergent needed. Duration: 0:10 h:min, Water: 4.0 litres, Energy: 0.01 kWh.
Water Hardness Settings:
The dishwasher's water softener can be adjusted based on local water hardness, with settings ranging from 1 (Soft, 0-6 °dH / 0-10 °fH) to 5 (Very hard, 35-50 °dH / 61-90 °fH). The factory setting is for average (3) water hardness.
Standby Consumption:
Left-on mode consumption: 5 W. Off mode consumption: 0.5 W.
Usage Features
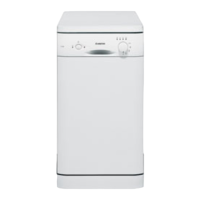
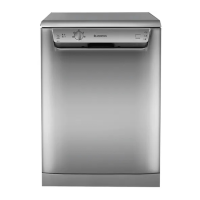
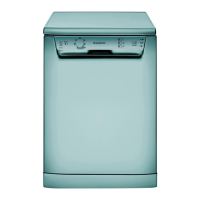
Control Panel:
The control panel includes an On-Off/Reset button, Tablet (Tab) button, Salt refill indicator light, Rinse Aid refill indicator light, Program selection knob, Delay indicator light, Delay button, and Start/Pause button with indicator light / Drain out function.
First-Time Use:
Before first use, stoppers must be removed from racks, and elastic elements from the upper rack. The salt reservoir needs to be filled with water and salt, and the water hardness must be set according to local supply. The rinse aid dispenser should also be filled.
Loading Racks:
- Upper Rack: Designed for delicate and light dishes (glasses, cups, saucers, low salad bowls). Its height can be adjusted using the Upper Rack height adjuster to accommodate bulky items in the lower rack or create more space for tip-up compartments. Foldable flaps allow for optimized arrangement, including safe placement of wine glasses.
- Lower Rack: Suitable for pots, lids, plates, salad bowls, and cutlery. Large plates and lids should be placed at the sides to avoid obstructing the spray arm.
- Cutlery Basket: Fitted with top grids for improved arrangement, positioned at the front of the lower rack. Knives and sharp utensils should be placed points downwards or horizontally in the upper rack's tip-up compartments.
Daily Use Cycle:
- Check water connection.
- Switch on the dishwasher.
- Load the racks.
- Fill the detergent dispenser.
- Choose a program and customize the cycle using the program selection knob and options.
- Start the wash cycle by pressing the START/Pause button.
- The end of the wash cycle is indicated by the ON/OFF LED. Switch off the appliance and open the door, waiting a few minutes before unloading to avoid burns.
Options and Functions:
- Tablet (Tab): Optimizes program performance for combined detergents in tablet form. Activated by pressing the TABLET button for 3 seconds. Should be off for powder or liquid detergents.
- Delay: Delays the program start time by 2, 4, or 8 hours. Selected by repeatedly pressing the DELAY button after choosing a program and options. Cannot be set once a program has started.
- Drain Out: Stops and cancels the active cycle, draining water from the dishwasher. Activated by a long press of the START/Pause button.
Modifying a Running Program:
If a program needs to be changed shortly after starting, press and hold the ON/OFF button to switch off, then switch back on, select the new program and options, and press START/Pause.
Adding Extra Crockery:
Open the door (carefully, due to hot steam), add items, close the door, and press START/Pause to resume the cycle.
Accidental Interruptions:
If the door is opened or there's a power cut, the cycle pauses. Close the door or restore power, then press START/Pause to resume.
Advice and Tips:
- Remove food residues from crockery before loading; pre-rinsing under running water is not needed.
- Arrange crockery firmly, with openings facing downwards, allowing water to flow freely.
- Ensure sprayer arms can rotate freely.
- Place very soiled dishes in the lower basket for stronger spray.
- Only use dishwasher-safe glasses and porcelain.
- Use delicate detergent for crockery.
- Unload glasses and cutlery once the wash cycle is over.
Unsuitable Crockery:
Wooden items, delicate decorated glasses, artistic handicraft, antique crockery, synthetic materials not resistant to high temperatures, copper, tin, and items soiled with ash, wax, lubricating grease, or ink. Colors of glass decorations and aluminum/silver pieces may change or fade.
Maintenance Features
Cleaning the Filter Assembly:
Regularly clean the filter assembly to prevent clogging and ensure proper wastewater flow. The assembly consists of three filters (cylindrical filter A, cup filter B, stainless-steel plate filter C).
- Turn cylindrical filter A anti-clockwise and pull it out.
- Remove cup filter B by pressing side flaps.
- Slide out stainless-steel plate filter C.
- Inspect the trap and remove food residues (do not remove the wash-cycle pump protection).
After cleaning with a non-metallic brush under running water, replace the filters correctly.
Cleaning the Spray Arms:
Check and clean spray arms periodically with a small non-metallic brush to remove encrusted food residues that may block holes.
- Upper Spray Arm: Turn the plastic locking ring anti-clockwise to remove. Replace with the side having more holes facing upwards.
- Lower Spray Arm: Remove by pulling it upwards.
Cleaning the Water Inlet Hose:
If water hoses are new or unused for an extended period, let water run until clear and free of impurities before connecting to prevent blockages and damage to the dishwasher.
Hygiene:
To prevent odor and sediment buildup, run a high-temperature program at least once a month with a teaspoon of detergent and no loading.