This document provides a comprehensive guide to the Ariston dishwasher, covering its functions, technical specifications, usage, and maintenance.
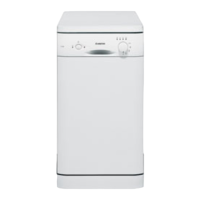
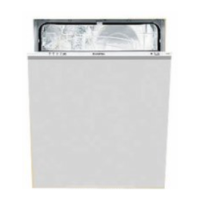
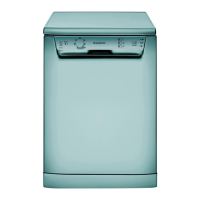
Product Description and Control Panel
The Ariston dishwasher features an upper rack, foldable flaps, an upper rack height adjuster, an upper spray arm, a lower rack with a Space Zone, a cutlery basket, a lower spray arm, and a filter assembly. Essential components for operation include a salt reservoir, detergent and rinse aid dispensers, a rating plate, and a control panel.
The control panel is equipped with several buttons and indicators for intuitive operation:
- On-Off/Reset button: Powers the appliance on or off and resets programs.
- Program selection button (P): Allows selection of various wash programs.
- Zone Wash 3D button: Activates a specialized wash for specific rack zones.
- Short Time button: Reduces program duration; also functions as a Key Lock activator.
- Eco program indicator light: Illuminates when the Eco program is selected.
- Key lock indicator light: Indicates when the control panel is locked.
- Display: Shows program number and remaining time.
- Tablet (Tab) indicator light: Indicates when the tablet detergent option is active.
- Closed water tap indicator light: Alerts if the water tap is closed or water supply is interrupted.
- Rinse Aid refill indicator light: Prompts for rinse aid refill.
- Salt refill indicator light: Prompts for salt refill.
- Extra Dry button: Enhances drying performance.
- Delay button: Delays the start of a program.
- Start/Pause button: Initiates or pauses a program; also functions as a Drain Out activator.
First Time Use: Salt, Rinse Aid, and Detergent
Before initial use, stoppers and elastic elements should be removed from the racks.
Filling the Salt Reservoir:
The salt reservoir prevents limescale buildup. It is crucial to keep it filled and to set the water hardness correctly. The salt refill indicator light on the control panel signals when a refill is needed. To fill, remove the lower rack, unscrew the cap, and use a funnel to add approximately 1 kg of dishwasher salt. After filling, ensure the cap is tightly screwed to prevent detergent ingress. A wash cycle without loading should be run immediately after adding salt to prevent corrosion.
Setting Water Hardness:
Water hardness should be set according to local water supply information to optimize the water softener's performance. The default setting is factory-set. To adjust:
- Turn the appliance ON and then OFF.
- Press and hold the START/Pause button for 5 seconds until a beep sounds.
- Turn the appliance ON.
- The current selection level and salt indicator light will flash.
- Press the P button to select the desired hardness level (refer to the Water Hardness Table provided in the manual, which ranges from Soft (0-6 °dH) to Very Hard (35-50 °dH)).
- Turn the appliance OFF to save the setting.
Filling the Rinse Aid Dispenser:
Rinse aid facilitates drying. The rinse aid refill indicator light signals when a refill is needed. To fill, open dispenser B, pour in up to 110 ml of rinse aid, and close the lid. Avoid pouring rinse aid directly into the tub.
Adjusting Rinse Aid Dosage:
If drying results are unsatisfactory, the rinse aid quantity can be adjusted.
- Turn the dishwasher ON and then OFF.
- Press the START/Pause button three times until a beep sounds.
- Turn the dishwasher ON.
- The current selection level and rinse aid indicator light will flash.
- Press the P button to select the desired rinse aid quantity (levels 1-5).
- Turn the dishwasher OFF.
Level 1 (ECO) supplies no rinse aid. Lower settings (2-3) are for bluish streaks, while higher settings (4-5) are for water drops or limescale marks.
Filling the Detergent Dispenser:
Open the dispenser C, add detergent to the dry dispenser D, and place pre-wash detergent directly inside the tub. Close the cover until it clicks. The dispenser opens automatically during the program. For all-in-one detergents, the TABLET button should be used to optimize washing and drying.
Programs Table and Description
The dishwasher offers a variety of programs tailored for different soiling levels and item types:
- Eco (50°C): Most efficient for normally soiled tableware in terms of energy and water consumption (4:00h, 9.0L, 0.74 kWh).
- Auto Intensive (65°C): Automatic program for heavily soiled dishes and pans (2:20-3:00h, 16.0-18.0L, 1.20-1.40 kWh).
- Auto Mixed (55°C): Automatic program for normally soiled pans and dishes (2:10-2:50h, 14.5-16.0L, 1.05-1.25 kWh).
- Delicates (45°C): For delicate items sensitive to high temperatures (1:40h, 12.0L, 1.00 kWh).
- Express 30' (50°C): For half-load, lightly soiled dishes without dried food residues; no drying phase (0:30h, 9.0L, 0.50 kWh).
- Good Night (50°C): Optimal for night-time operation with low noise emission (3:35h, 16.5L, 1.00 kWh).
- Sanitizing (70°C): For normally or heavily soiled crockery with an antibacterial wash; can be used for dishwasher maintenance (1:40h, 12.0L, 1.30 kWh).
- Soak: To refresh crockery planned for later washing; no detergent needed (0:10h, 4.5L, 0.01 kWh).
- Self Clean (65°C): For dishwasher maintenance when empty, using specific detergents (0:50h, 9.5L, 0.7 kWh).
Program durations and consumption values are indicative and may vary based on factors like water temperature, pressure, detergent amount, load type, and selected options.
Options and Functions
- Zone Wash 3D: Optimizes washing for a single rack. With additional 3D water jets, it can reduce energy consumption by up to 40% (with Normal cycle) or increase washing performance by up to 40% (with Intensive cycle). To activate, select a compatible cycle and press the Zone Wash 3D button repeatedly to choose between lower rack only, upper rack only, or all racks (OFF).
- Tablet (Tab): Optimizes program performance for all-in-one tablet detergents. This option should be off for powder or liquid detergents.
- Delay: Delays program start from 0:30 to 24 hours. Press the Delay button repeatedly to set the desired delay. The timer counts down, and the program starts automatically. The delay function cannot be set once a program has started.
- Short Time: Reduces main program duration while maintaining washing and drying performance.
- Extra Dry: Improves drying performance with a higher final rinse temperature and extended drying phase. This option lengthens the wash cycle.
- Drain Out: Stops and cancels the active cycle, draining water from the dishwasher. Activated by a long press of the START/Pause button.
- Water Tap Closed – Alarm: Flashes when there is no water inlet or the tap is closed.
- Keylock: Locks the control panel (except the ON/OFF button) by a long press (3 seconds) of the Short Time button.
Daily Use
- Check Water Connection: Ensure the dishwasher is connected to the water supply and the tap is open.
- Switch On: Press the ON/OFF button.
- Load Racks: Arrange crockery as per loading instructions.
- Fill Detergent Dispenser: Add detergent according to the chosen program.
- Choose Program and Customize Cycle: Select the appropriate program and desired options.
- Start: Press the START/Pause button. A beep indicates the program has started.
- End of Wash Cycle: Beeps and "END" on the display indicate completion. Open the door, switch off the appliance, and wait a few minutes before unloading.
Modifying a Running Program: If a wrong program was selected, it can be changed if it has just begun by pressing and holding ON/OFF, then restarting the machine and selecting a new program.
Adding Extra Crockery: Open the door (beware of hot steam), place crockery inside, close the door, and press START/Pause to resume the cycle.
Accidental Interruptions: If the door is opened or there is a power cut, the cycle stops. Close the door or restore power, then press START/Pause to resume.
Advice and Tips
- Loading: Remove food residues from crockery and empty glasses before loading. Pre-rinsing under running water is not necessary. Arrange crockery securely, with openings facing downwards for optimal water circulation. Small items should be placed in the cutlery basket. Heavily soiled items should go in the lower basket.
- Unsuitable Crockery: Avoid wooden items, delicate decorated glasses, artistic handicraft, antique crockery, synthetic materials not resistant to high temperatures, copper, tin, and items soiled with ash, wax, grease, or ink.
- Damage to Glass and Crockery: Use only dishwasher-safe items and delicate detergents. Unload glasses and cutlery immediately after the cycle.
- Energy Saving Tips: Dishwashers typically consume less energy and water than hand washing. For maximum efficiency, run the dishwasher when fully loaded. Manual pre-rinsing is not recommended.
- Hygiene: Run a high-temperature program at least once a month with a teaspoon of detergent and no loading to prevent odors and sediment.
Loading the Racks
- Upper Rack: For delicate and light dishes (glasses, cups, saucers, low salad bowls). Features tip-up supports for vertical or lower positioning.
- Adjusting Upper Rack Height: The upper rack height can be adjusted for bulky items in the lower basket or to maximize tip-up compartments. Lift the rack by holding its sides; press levers A to lower it. Avoid adjusting when loaded or raising/lowering one side only.
- Foldable Flaps: Can be folded or unfolded to optimize crockery arrangement. Wine glasses can be secured by inserting stems into slots.
- Cutlery Basket: Fitted with top grids for improved cutlery arrangement. Positioned at the front of the lower rack. Knives and sharp utensils should be placed with points downwards or horizontally in upper rack tip-up compartments.
- Lower Rack: For pots, lids, plates, salad bowls, cutlery. Large plates and lids should be placed at the sides to avoid spray arm interference. Features a Space Zone A, a pull-out support for vertical frying pans or baking pans. Tip-up supports C can be used for vertical plates or horizontal pans/salad bowls.
- Zone Wash 3D: Uses additional water jets in both upper and lower parts (marked orange) for intensive washing of heavily soiled items. Load pots and casseroles facing the lower Zone Wash 3D components and activate the option.
Care and Maintenance
- Cleaning the Filter Assembly: Regularly clean the filter assembly to prevent clogging and ensure proper wastewater drainage. The assembly consists of three filters (cylindrical A, cup B, stainless-steel plate C). Never use the dishwasher without filters or if they are loose. Clean at least monthly or after 30 cycles by turning cylindrical filter A anti-clockwise, removing cup filter B, and sliding out plate filter C. Remove foreign objects and food residues. Do not remove the wash-cycle pump protection.
- Cleaning the Spray Arms: Food residue can encrust and block spray arm holes. Check and clean arms periodically with a small non-metallic brush. To remove the upper spray arm, turn the plastic locking ring anti-clockwise. The lower spray arm can be removed by pulling it upwards.
- Water Softening System: Automatically reduces water hardness and regenerates with salt. Refill the salt container when empty. Regeneration frequency depends on water hardness setting (e.g., once per 6 Eco cycles with hardness level 3). A single regeneration consumes ~3.5L of water, takes up to 5 additional minutes, and consumes below 0.005 kWh of energy.
- Cleaning the Water Inlet Hose: If hoses are new or unused for a long time, let water run through them to ensure they are clear of impurities before connecting to prevent blockages or damage.
Troubleshooting
The manual provides a troubleshooting guide for common issues:
- Salt/Rinse Aid Indicator Lit: Refill the respective reservoirs and adjust water hardness/rinse aid dosage.
- Dishwasher Not Starting/Responding: Check power connection, ensure the door is closed, and reset if necessary.
- Dishwasher Not Draining (F3 error): Check for bent drain hose, blocked sink drain pipe, or clogged filter.
- Excessive Noise: Ensure crockery is arranged correctly and not rattling.
- Dishes Not Clean: Check crockery arrangement, spray arm rotation, selected wash cycle, detergent dosage, rinse aid dispenser cap, filter cleanliness, and salt reservoir.
- Dishwasher Not Filling Water (F6 error): Check water supply, open tap, ensure inlet hose is not bent, and clean the sieve in the inlet hose.
- Dishwasher Finishes Cycle Prematurely (F15 error): Check drain hose height and for siphoning into the sewage system.
- Air in Water Supply: Check for leaks or other issues.
For further assistance, users can consult the warranty booklet for authorized After-sales Service contact details. Spare parts are available for 7 to 10 years, depending on specific regulations. Product information, standard documentation, and spare parts ordering can be accessed via QR code, www.aristonchannel.com, or parts-selfservice.whirlpool.com.