20
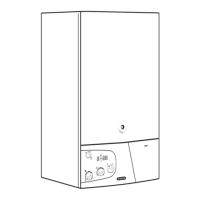
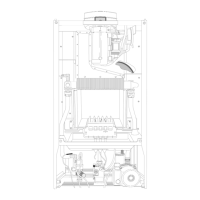
2.14 ELECTRICAL/SYSTEM DIAGRAMS
B - Summer/Winter Switch - Central Heating Temperature
Regulation
C - Connector for Remote Control (Climate Manager)
D - Domestic Hot Water Temperature Regulation
E - Soft-light Regulation
F - Maximum Central Heating Temperature Regulation
G - ON/OFF Selector
H - EEPROM
I - Time Clock Connector
L - Reset Push Button
M - Economy/Comfort Selector
N - EASY Teleservice (optional) P.C.B. Section
O - Display P.C.B. Connector
P - Transformer
Q- Modem Connection (optional - EASY Teleservice)
A01 - Circulation Pump
A02 - F
an
A03 - Spark Generator Power Supply
A04 - Gas Valve Power Supply
A05 -
Motor
ised
V
alve
A07 - Flame Sensor
A08 - Central Heating Flow NTC
A09 -
Domestic Hot
W
ater NTC
A10 - Domestic Hot Water Flow Switch
A11 - Low Water Pressure Switch
A12 -
Modulator
A13 - Air Pressure Switch
A14 - Overheat Thermostat
A15 -
Exter
nal
Timer/Room Thermostat
A16 - Central Heating Return NTC
COLOURS:
Gy - Grey
Wh - White
Rd
-
Red
Br - Brown
Bl - Blue
Blk
-
Black
Pk - Pink
A - Dip Switch:
1 -
Do Not Use (jumper is f
actor
y set in position B)
2 - Anti-Cycling Device Adjustment for Heating
Position A = 0 mins Position B = 2 mins
3 - Do Not Use (jumper is factory set in position B)
4 - Do Not Use (jumper is factory set in position B)
5 - Fan over-run selector (after D.H.W. is drawn)
Position A = ON Position B = OFF
6 - Do Not Use (jumper is factory set in position B)
 Loading...