Do you have a question about the Ariston PRO1 ECO Series and is the answer not in the manual?
Crucial instructions for safe installation, operation, and maintenance to prevent injury and ensure proper functioning.
Details on the thermal disinfection cycle to prevent Legionella growth and associated health risks.
Identification of the main components of the unvented water heater as shown in the diagram.
Detailed technical specifications including dimensions, power consumption, and performance metrics for different models.
Statutory requirements and byelaws for installing unvented hot water systems, including notification procedures.
Key installation procedures, safety checks, and warnings for qualified installers.
Guidance on plumbing connections, pressure requirements, and safe discharge pipework installation.
Safety requirements for electrical installation, including earthing, supply, and cable specifications.
Steps to follow for commissioning the appliance after installation, including safety checks and user demonstration.
Recommended maintenance tasks and their frequency, including descaling, anode replacement, and control checks.
Instructions for resetting the appliance, diagnosing faults, and understanding stall status indicators.
How to adjust temperature, activate/deactivate ECO, SHOWER READY, and MAX functions.
Guidance on common issues like cold water delivery or steam output, and general user advice.
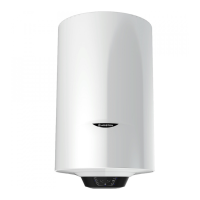
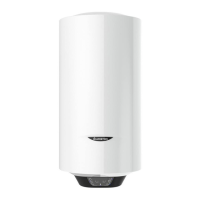
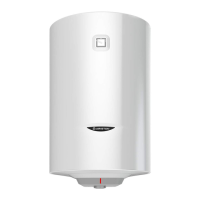
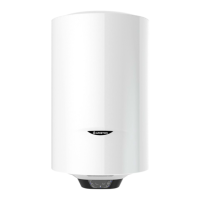
This document describes an unvented water heater, providing comprehensive instructions for its safe installation, use, and maintenance. The manual emphasizes that it is an integral part of the product and should be passed on to subsequent users or owners.
The manual begins with a series of general safety instructions, highlighting the importance of reading all warnings and instructions carefully. It states that the manufacturer is not liable for injuries or damages resulting from improper use or failure to follow instructions. Installation and maintenance must be performed by professionally qualified personnel using only original spare parts. Failure to comply with these instructions can compromise the appliance's safety and void the manufacturer's liability.
Users are warned not to leave packaging materials within reach of children due to potential injury. The appliance is not intended for use by persons under 8 years of age, or those with reduced physical, sensory, or mental capacities, unless supervised or instructed in safe use. Children should not be allowed to play with the appliance, and user cleaning and maintenance should not be performed by unsupervised children.
It is crucial not to touch the appliance with bare feet or wet body parts. Before initial use and after maintenance, the tank should be filled and drained completely to remove impurities. If the appliance has a power cord, its replacement must be carried out by an authorized service center or professional technician.
A safety valve, compliant with national regulations, must be screwed onto the water inlet pipe. For countries with EN 1487, the safety group must be calibrated to a maximum pressure of 0.7 bar and include a cock, check valve, control, safety valve, and hydraulic load cutout. Users are instructed not to tamper with the overpressure safety device and to trip it periodically to prevent jamming and remove scale deposits.
It is normal for water to drip from the overpressure safety device during heating, necessitating a drainage pipe installed with a continuous downward slope in a frost-free area. The appliance should be drained and disconnected from the power grid if it is out of service in subzero temperatures. Water heated above 50°C can cause severe burns, especially to children, disabled persons, and the elderly. Installing a thermostatic mixer valve with a red collar on the hot water delivery line is recommended. Flammable materials should not be left near the appliance, and nothing that could be damaged by a leak should be placed underneath it.
The water heater includes a Legionella bacteria function to prevent the growth of Legionella, which are naturally occurring bacteria in fresh water that can cause Legionnaires' disease. To avoid long periods of water stagnation, the heater should be used or flushed at least weekly. The European standard CEN/TR 16355 provides guidelines for preventing Legionella growth in drinking water installations.
The electronic storage water heater has a thermal disinfection cycle enabled by default. This cycle runs every time the product is switched on and every 30 days, heating the water to 60°C. A warning is provided that water temperature during this cycle can cause burns, and users should check the water temperature before bathing or showering.
The document provides a diagram and a list of components:
These regulations ensure a wholesome water supply and mandate the use of approved materials, pipes, and fittings.
Installation of unvented hot water systems over 15 liters is classified as a "Controlled Service" under Regulation G3. Such installations must be undertaken by a "competent installer" and notified to the relevant Local Authority. Installing systems over 15 liters without notification is a criminal offense.
The product is supplied with:
Dielectric junctions are mandatory to prevent electrolytic reactions and aggressive corrosion. Failure to fit them may void the warranty.
Installers must read the instructions fully and contact technical service if unsure. Installation must comply with all relevant Water Regulations/Byelaws and Building Regulations. The local water authority should be consulted for maximum water supply pressure.
The appliance should remain packed until installation. Care must be taken not to damage the temperature and pressure relief valve during unpacking. A drain must be provided for water discharged through safety valves. A cold water supply pressure between 1 and 3.5 bar is required; if mains pressure exceeds 3.5 bar, a pressure reducing valve must be installed. Turning down a stop-cock will reduce flow, not pressure. The outlet pressure from the reducing valve (if supplied) is 3.5 bar. A 240 VAC; 3 kW single phase electrical supply is needed.
The product must be installed vertically. After installation and before adding water or connecting power, a spirit level should be used to ensure it is perfectly vertical. The appliance heats water below boiling point and must be connected to a mains water supply according to its performance and capacity. Before connecting, verify that the characteristics meet customer requirements, the installation conforms to the IP degree of protection, and read all labels and data plates.
The appliance is designed for indoor installation only. Installers should avoid installing the appliance in closed, unventilated, or damp rooms. It should not be installed in areas prone to frost, direct sunlight, or in the presence of dangerous substances like acidic vapors, dust, or gas. Electrical supplies must be protected against sudden voltage jumps.
For walls made of bricks or perforated blocks, a preliminary static check of the supporting system is required. Wall-mounting hooks must support three times the weight of the water heater filled with water, with a minimum diameter of 12 mm recommended. For maintenance access, a clearance of at least 50 cm inside the enclosure is needed.
If a non-return valve, water meter, pressure reducing valve, or any fitting acting as a non-return valve is installed on the cold water mains, an expansion vessel must be installed to prevent expansion. If in doubt, always install a pressure reducing valve (limited to 3.5 bar) and an expansion vessel. The outlet from the temperature and pressure relief valve must not be used for any other purpose. Care must be taken to prevent swarf from entering pipework or fittings, which could impair safety valve operation.
The manual provides a diagram of a typical plumbing installation, including the pressure + temperature relief valve, cold mains inlet, combination valve, expansion vessel, expansion relief pipe, and tundish. Stop cocks or isolating valves should not be fitted within the expansion distance. If mains pressure exceeds 3.5 bar, an expansion control kit must be fitted. Dielectric junctions must always be connected to the heater first to prevent electrolytic reactions. Only copper pipe is recommended for connection, capable of withstanding 90°C at 7 bar. No valve should be fitted between the expansion/pressure relief valve and the water heater. All other safety components are supplied as a kit.
Guidelines for discharge pipe work refer to Building Regulation G3. The tundish must be vertical, within 600 mm of the temperature & pressure relief valve, visible to occupants, away from electrical devices, and terminate in a safe, metallic location. Discharge pipes from the temperature & pressure relief and pressure relief valve can be joined. The pipe diameter must be at least one size larger than the nominal outlet size of the safety device, considering equivalent hydraulic resistance. The discharge pipe must have a vertical section of at least 300 mm below the tundish before any elbows or bends, and it must be installed with a continuous fall.
The discharge must be visible at both the tundish and the final point of discharge, or at least one of these locations if not both. Examples of acceptable discharge points include below a fixed grating, into a trapped gully, downward discharges at a low level (with guards if children may contact), or high-level discharges into a metal hopper or downpipe. If a single pipe serves multiple discharges (e.g., in flats), the number should be limited to 6 systems, and the common discharge pipe should be at least one size larger than the largest individual discharge pipe. For dwellings occupied by blind, infirm, or disabled people, an electronically operated device to warn of discharge should be considered. The discharge will consist of scalding water and steam, which can damage asphalt, roofing felt, and non-metallic rainwater goods.
A table is provided for sizing copper discharge pipe "D2" for common temperature valve outlets, detailing minimum pipe sizes, maximum allowed resistance (expressed as pipe length), and resistance created by elbows or bends for different valve outlet sizes. A worked example illustrates how to calculate the appropriate pipe size based on length and number of elbows.
The appliance must be drained if inactive in a frost-prone room or for prolonged periods. The draining procedure involves:
The appliance must be earthed. Electrical installation must comply with I.E.E. wiring regulations, requiring a 240 VAC 3 kW (13 amps) supply. Heat-resisting, round 3-core 1.5 mm cable (BS 6141 table 8) should be used, connected via a 13 amp socket (BS 1363) or a double pole fused isolating switch with a minimum 3 mm contact separation on each pole. Flexible cables are color-coded: brown (live), blue (neutral), and green/yellow (earth).
A wiring diagram illustrates the electrical components, including safety relays, heating elements, sensors (NTC 1, NTC 2), and the user interface with CPU. To access the terminal compartment, two screws on the cover must be unscrewed (after removing decorative caps on the front control access panel).
Before installation, a thorough check of the electrical system is mandatory to ensure compliance with safety standards, adequate power for the water heater, and correct cable section. The manufacturer is not liable for damages caused by lack of grounding or anomalous power supply. The power rating must match the nameplate. Multiplugs, extensions, or adaptors are prohibited. Plumbing, heating, and gas systems should not be used for earthing. If the power supply cable needs replacement, a cable with the same characteristics must be used, routed through the hole in the back of the appliance and connected to the thermostat terminals. The appliance must be grounded with a yellow/green cable, longer than the phase cable.
Commissioning involves checking that all components are supplied and correctly fitted, that the water heater and components are undamaged, and that the discharge pipe is plumbed correctly (continuous fall, no obstructions, safe drainage, visible). Components not factory fitted must be marked as per the warning label. All outlet taps should be opened, mains water supply turned on, and taps closed as water flow stabilizes. Checks for leaks and proper safety valve operation (by lifting/turning the lever/knob) are required. Electricity should be switched on, and the thermostat set to 60°C to reduce scale buildup. The water heater's heating function should be checked. The "warning to user label" and related warning labels must be secure and visible. The user should be instructed on operation, including safety valve operation, and given the handbook. The entire system should be drained and refilled, flushed according to BS6700.
Before calling technical service, verify that the fault is not due to lack of water or power failure. Disconnect the appliance from the mains before any maintenance work.
To access electrical equipment, remove the enclosure. For the electronic thermostat, disconnect the power supply cable and control panel wire, then remove it from its slot, being careful not to bend the sensor support rod. For the control panel, disconnect the wire and loosen screws. During reassembly, ensure all components are returned to their original positions. To work on the heating element and anode, the appliance must be emptied. Undo the 5 bolts and remove the flange. The heating element and anode are attached to the flange. During reassembly, ensure the flange gasket, thermostat, and heating element are in their original positions. The flange gasket should be replaced every time it is disassembled. Only original parts from authorized service centers should be used.
The heating element should be descaled every two years (more frequently for very hard water). Deposits can be broken off carefully to avoid damaging the cladding, or a liquid descaler can be used (following safety data sheets). The magnesium anode must be replaced every two years; otherwise, the warranty may decay. In aggressive or chloride-rich waters, the anode's status should be checked annually. To remove the anode, disassemble the heating element and unscrew it from the support bracket.
Controls should be checked as follows:
If a malfunction occurs, all LEDs on the control panel will flash. To reset, switch the product off and on using the button. If the malfunction persists, contact technical assistance. To enable diagnostics, hold the button for 5 seconds. The type of fault is indicated by flashing LEDs:
This function is activated by default, heating water to 60°C for 1 hour to disinfect against bacteria. It starts with the first ignition and after each re-ignition following a mains power loss. If the product operates below 55°C, the cycle repeats every 30 days. It is inactive when the product is off. If switched off during the cycle, the function is not completed. After each cycle, the operating temperature returns to the user's previous setting. The cycle is displayed as a normal temperature setting at 60°C (LED Ref. 4). To permanently disable it, hold "ECO" and "+" buttons for 3 seconds; LED 40°C will flash rapidly for 4 seconds to confirm deactivation. To reactivate, repeat the operation; LED Ref. 4 will flash rapidly for 4 seconds to confirm.
Press the button to switch on. Use "+" and "-" buttons to select a temperature between 40°C and 65°C. During heating, LEDs corresponding to the reached temperature remain lit, and subsequent LEDs flash progressively. If temperature drops, heating reactivates automatically, and LEDs resume flashing. The initial temperature setting is 60°C (LED Ref. 4). The most recently set temperature is memorized after power failure or switching off. A slight noise may occur during heating. The LED remains ON during heating.
Activated/deactivated by pressing the corresponding button, indicated by a lit LED. The Eco function learns user habits to produce hot water. For the first week, it memorizes tapping times. In subsequent weeks, heating is performed based on learned patterns. To reset and start a new learning period, press the ECO button for 3 seconds (the ECO LED will blink). Pressing PLUS or MINUS buttons during Eco function deactivates it.
The Shower Ready LED indicates when there is enough hot water for at least one shower, determined by internal parameters and varying by model.
Activated/deactivated by pressing the corresponding button, indicated by a lit LED. The Max function temporarily sets the set-point temperature to 65°C, bypassing previous operating modes (e.g., Eco function is temporarily interrupted and deactivates once the set-point is reached). The Max function deactivates if there is a stall error, if "OFF" status is engaged, or if +/- buttons are pressed.
Use PLUS or MINUS buttons to choose the set-point temperature (indicated by temperature LEDs). Each press changes the set temperature by 10 degrees. After 5 seconds of no action, the set-point is confirmed and memorized.
Two types of stall statuses:
Before cleaning, turn off the external switch. Do not use insecticides, solvents, or aggressive detergents. If water delivery is cold, check if the device is connected to power and the external switch is ON, and if at least LED 40°C is turned on. If steam comes from taps, remove power and contact technical support. If hot water delivery is insufficient, check water mains pressure and for obstructions in inlet/outlet pipes. If the problem persists, do not attempt to repair the appliance; always contact a qualified technician.
The manufacturer reserves the right to modify data and specifications without notice. The product conforms to Directive WEEE 2012/19/EU. The crossed waste paper basket symbol indicates that the product must be disposed of separately from other waste at the end of its service life. Users can hand equipment over to a sorted waste disposal facility or return it to the retailer when purchasing a new equivalent appliance. Electronic equipment under 25 cm can be handed over to any electronics retailer with a sales area of at least 400 m2 for free disposal without obligation to purchase a new product.
| Heating Element | Copper |
|---|---|
| Maximum working pressure | 8 bar |
| ECO function | Yes |
| Capacity | 50, 80, 100 liters |
| Installation | Vertical |
| Type | Storage water heater |
| Warranty | 2 years |
| Voltage | 230 V |