Fig. 9
Template guide
1. To install simply clip into the base as shown in
fig. 10. Then using the screws provided tighten
in position.
Template Guide
Fig. 10
2. The template guide provides a sleeve where the
bit passes enabling use with template patterns.
3. Secure the template to the workpiece. Place the
base of the tool on the template. Plunge to the
required depth and lock in, then move the tool
with the template guide sliding along the side
of the template (fig.11).
Trimming
To use as a trimmer:
1. You must select a bit that has a bearing attached
(see Fig. 12).
Bit
Template Guide
Base
Workpiece
Template
Fig. 11
2. When trimming, follow router directions.
3. To sight work easier, dust extractor might need to
be removed. (Still wear eye protection).
4. Note: If the edge, where your bearing is running
along, is laminated or veneered, run some masking
tape along it to protect the surface.
5. The bearing changes the distance trimmed.
Different bearing sizes are available from your
retailer of router bits.
6. Always check that the trimming bit blade does not
damage other surfaces.
Dust extraction
1. The dust extraction is designed for use in
conjunction with a vacuum cleaner. The dust
extraction adaptor accepts most standard vacuum
cleaner hoses (35mm).
2. To fit the dust extraction adaptor simply attach it
to the router (fig.13).
3. Holding the adaptor turn the router upside down
and screw in place using the screws supplied.
Dust Extraction Adaptor
Fig. 13
Fig. 12
2. Ensure there is no damage to any part of the bit -
either cutters or shaft. If the bits cannot be
repaired or resharpened, they should be replaced.
3. Protect the bits from damage by storing them
carefully, do not allow them to strike other bits.
4. Bits with pilot bearings should occasionally have
the bearings removed, cleaned, and relubricated.
MAINTENANCE AND INSPECTION
1. Continued use of worn or damaged router bits
will result in reduced work efficiency and may
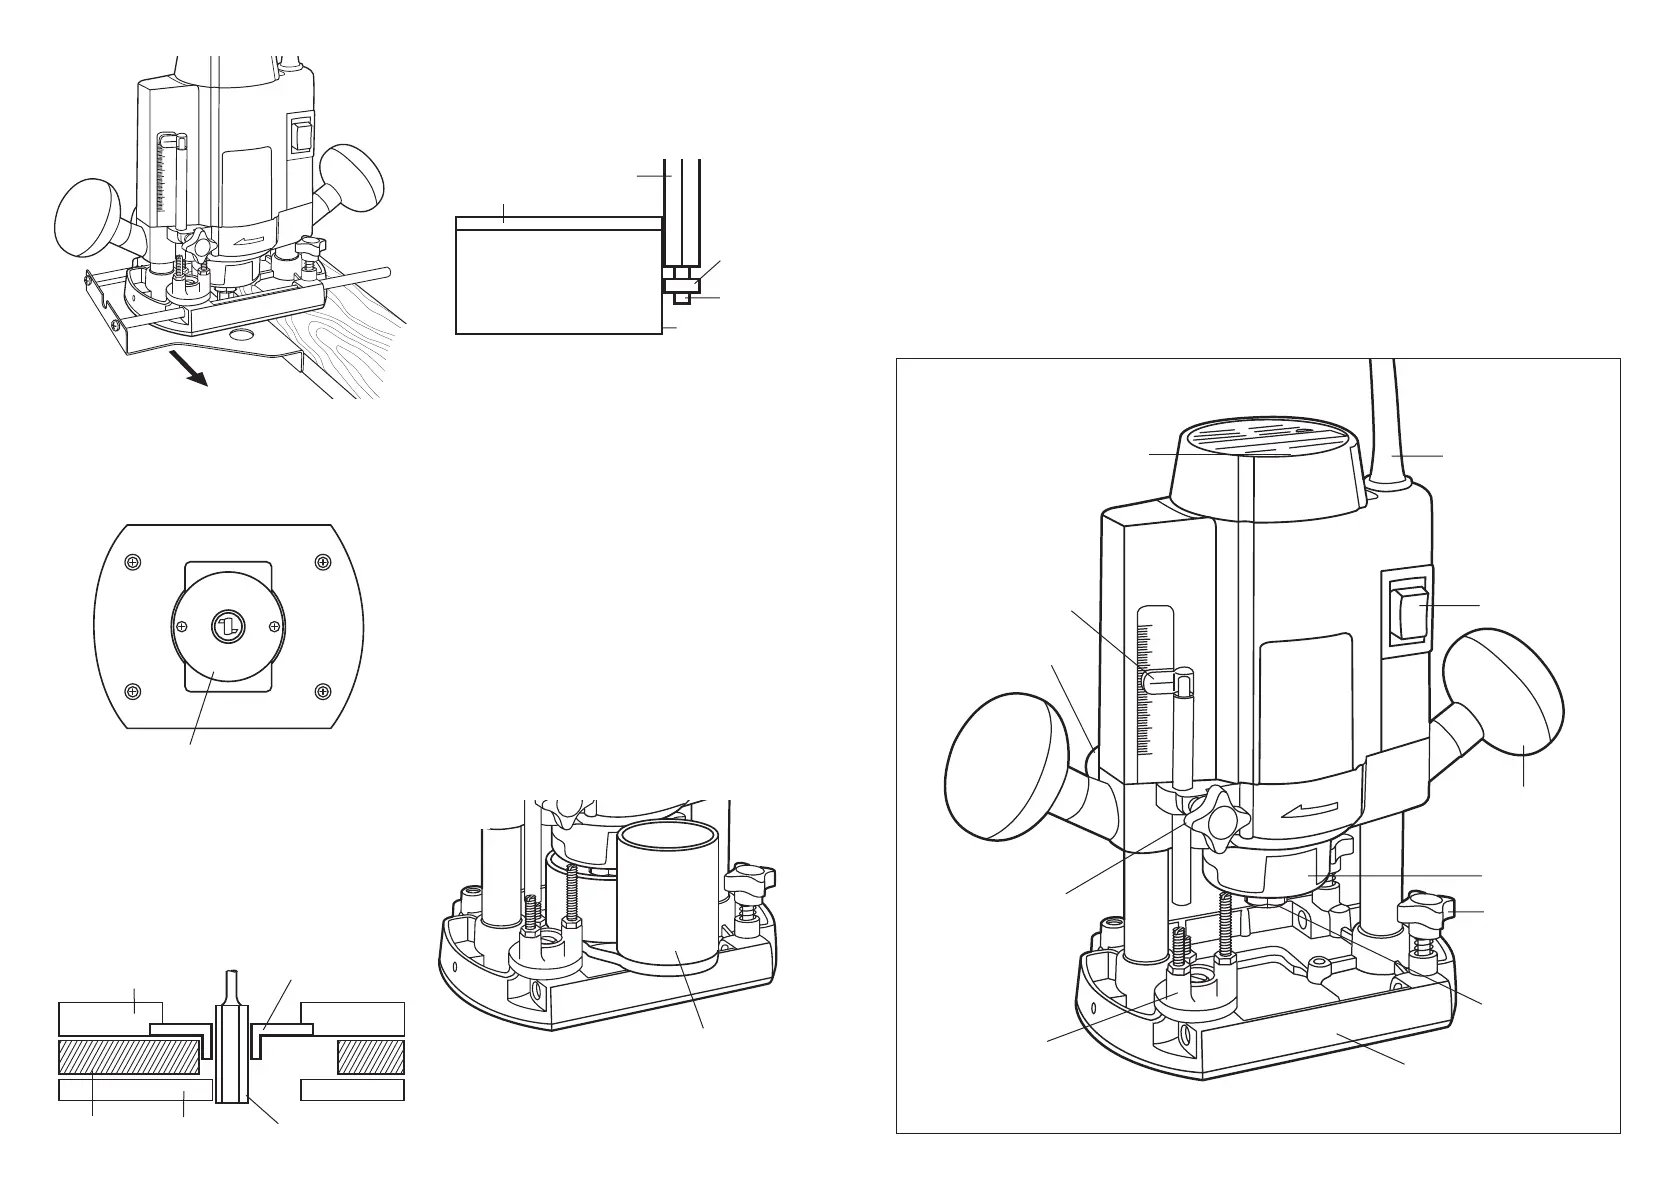
IDENTIFICATION
Fig. 14
On/Off Switch
Side Handles
Straight Guide
Support Screws
Spindle Lock
Power Cord
Base
Depth
Adjustment
Screw
Lock Lever
Depth
Stopper
Block
Chuck
Speed Control Dial
Depth Guide
seriously put undue overload on the motor. Inspect
the router bits often and replace where necessary.
2. The armature and stator (motor) are the heart of
the power tool. Exercise due care to ensure they
do not become damaged or affected by oil or
water.
3. Regularly inspect all mountings and screws and
ensure they are properly tightened. Should any of
the screws be loose, tighten them immediately.
Failure to do so may result in serious damage.
4. Consult an authorised Service Agent in the event
of failure.
Router bits
1. Router bits should always be clean and sharp.
Remove all accumulated materials from the cutters
after each use.
Cutting Blade
Laminate
Bench Top
Bearing
Bearing
Screw
Edge
76
 Loading...