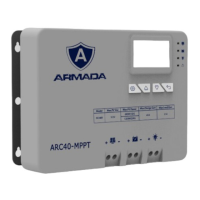
6. Wire Connection Sequences
During installation of your MPPT controller, please follow the order of connection below:
1. Connect the positive battery wire followed by the negative battery wire.
1. Connect the positive battery wire followed by the negative battery wire.
2. Make sure your solar panels are fully covered to prevent electrical shock.
3. Connect the positive solar array output wire followed by the negative solar array output wire.
4. Connect DC load wires to the DC load output (if applicable).
5. Connect the external temperature sensor to its terminal shown above.
6. Connect the mobile application module to the communication port (if applicable).
7. APP Connection Construction via BT
1. Download the APP “PVChargePro” in IOS APP Store or Google Play Store.
2. Connect the external BT module to the communication port in the controller, and turn on the BT function in your
mobile phone. (no need to connect any communication module if the controller has the inbuilt BT chip).
3. Click open the APP and pairing the controller BT by click on “+” in the upright corner.
4. To run your solar DC power system to test the APP operation and monitoring.
5. Password may be required in the APP for parameter settings, and it’s 123456. If you are not clear about your settings
and you can set it back to default in the APP.
6. Please contact ARMADA professions for technical help, if you require more operation information.