Page 4 For technical questions, please call 1-888-866-5797. Item 70199
SAFETY INSTALLATION PARTS LIST
Installation Instructions
Read the ENTIRE IMPORTANT SAFETY INFORMATION section at the beginning of this
manual including all text under subheadings therein before set up or use of this product.
TO PREVENT INJURY:
THIS BRACKET IS INTENDED FOR USE WITH A PRODUCT WEIGHING
NOT MORE THAN 77 POUNDS AND HAVING DIMENSIONS THAT WILL PERMIT IT TO MOUNT
EVENLY ON THIS BRACKET. (SEE INSTRUCTIONS.) USE WITH OTHER PRODUCTS MAY RESULT
IN THE COLLAPSE OF THE MOUNT AND ITS ACCESSORIES CAUSING POSSIBLE INJURY.
Mount Wall Mount
Wood Studs
1. Verify wood stud is at least 2" x 4" in size.
Use a stud finder (sold separately) to
find stud and mark its location.
WARNING! TO PREVENT SERIOUS INJURY:
Verify that mounting surface has no hidden
utility lines before drilling or driving screws.
2. Set Wall Mount (A) against wall at desired height.
Place a level (sold separately) on top of Wall Mount,
adjust until level. Mark locations of mounting holes.
3. Drill three 3/16" holes 2-1/4" deep
into stud at marked locations.
CAUTION! Only mount Wall Mount to wood studs.
Do not mount Wall Mount to drywall or plaster.
4. Use three Wall Lag Screws (W-A) and three
D6 Washers (W-C) to mount Wall Mount to
wood stud. Use a level to adjust the Wall Mount
until it is completely level (sold separately)
before final tightening of the Lag Screws.
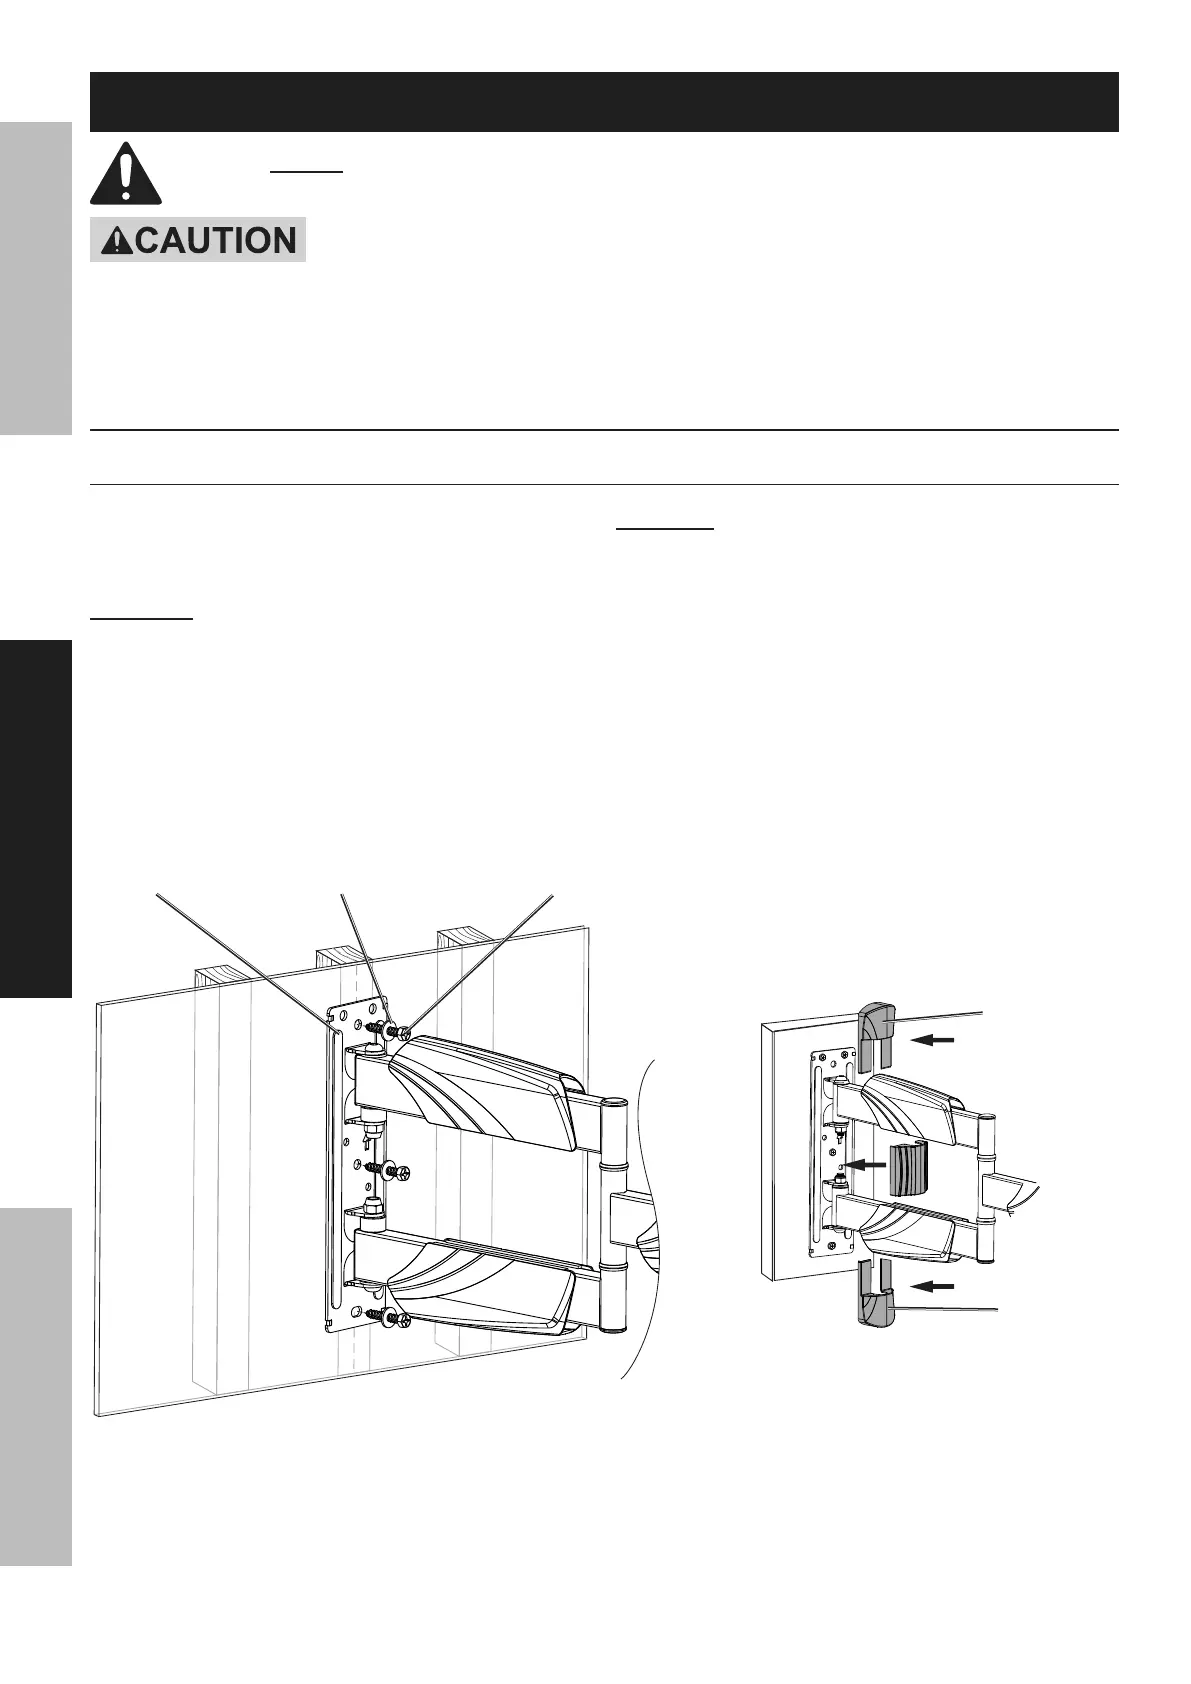
5. Attach Covers (B) to Wall Mount
and replace Middle Cover.
Cover (B)
Cover (B)
Wall Mount (A) Wall Lag Screw (W-A)D6 Washer (W-C)