Page 5For technical questions, please call 1-888-866-5797.Item 70199
SAFETYINSTALLATIONPARTS LIST
Concrete
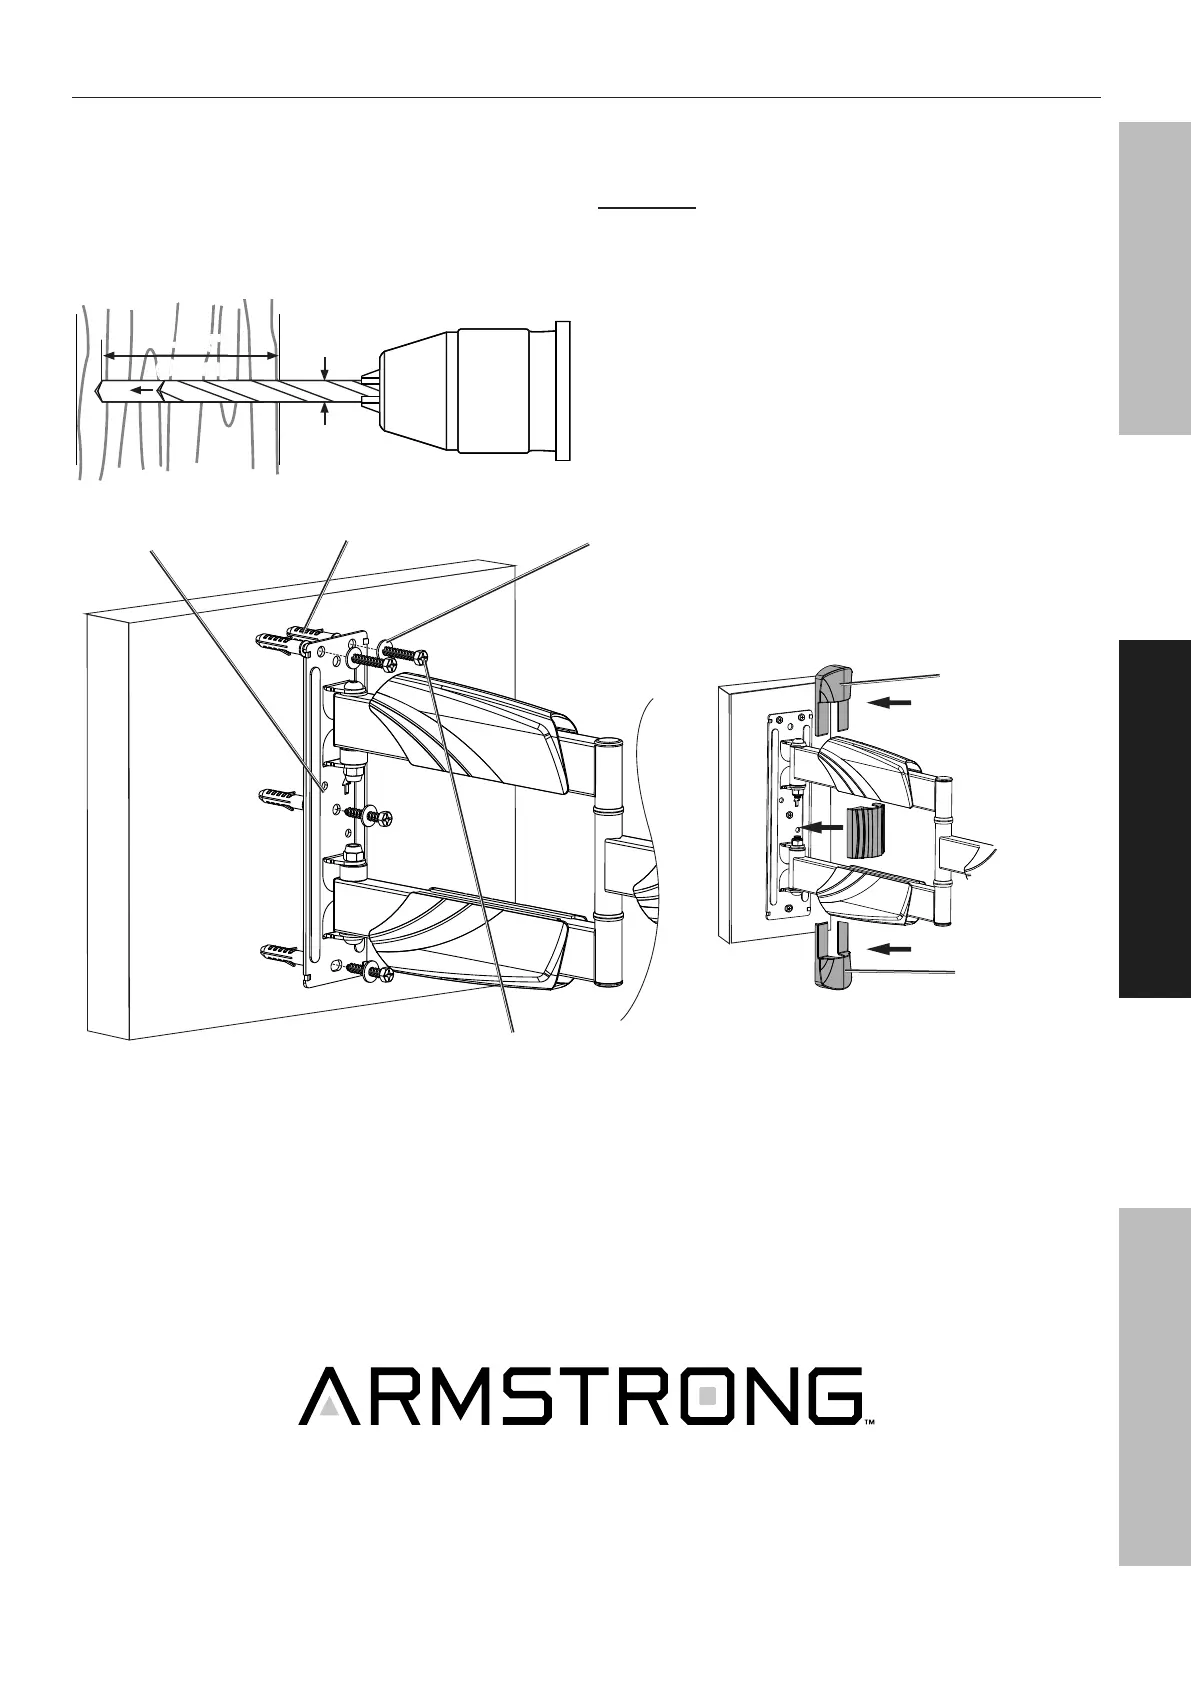
1. Set Wall Mount (A) against wall at desired
height. Place a level (sold separately) on
top of Wall Mount, adjust until level. Mark
locations of the four mounting holes.
2. Using a 3/8" carbide tip masonry bit, drill four
holes 2-7/16" deep at marked locations.
Ø 3/8"
(Ø 10mm)
2-7/16"
(61mm)
3. Insert four Wall Anchors (W-B) into holes,
making sure they are flush with wall surface.
CAUTION! Wall anchors must be
set firmly into concrete.
4. Use four Wall Lag Screws (W-A) and four
D6 Washers (W-C) to mount Wall Mount to
wall. Use a level (sold separately) to adjust
the Wall Mount until it is completely level
before final tightening of the Lag Screws.
5. Attach Covers (B) to Wall Mount
and replace Middle Cover.
Cover (B)
Cover (B)
Washer (W-C)Wall Mount (A)
Wall Lag Screw (W-A)
Wall Anchor (W-B)