Do you have a question about the Arnott P-2936 and is the answer not in the manual?
Reading this manual signifies agreement to terms and conditions available at www.arnottinc.com regarding product use.
Adhere to safety measures, including proper lifting, vehicle support, and power disconnection to prevent injury.
Turn off the air suspension switch and remove the air cleaner cover to begin the compressor removal process.
Remove nuts securing the lower air cleaner case and then detach the windshield washer reservoir.
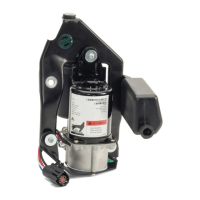
Unsnap the compressor cover, disconnect the power plug, and remove the air hose from the compressor fitting.
Raise the vehicle, unbolt the compressor from underneath, and carefully remove the unit from its mounting.
Installation is performed in the reverse order of the removal procedure. Tighten all fasteners to manufacturer specifications.
Cracked air springs must be replaced to validate the compressor warranty. Refer to invoice for details.
Turn off suspension, lift vehicle, and inspect air springs for cracks or wear that may cause compressor overheating.
| Type | Air Compressor |
|---|---|
| Model | P-2936 |
| Voltage | 12V |
| Condition | New |
| SKU | P-2936 |
| Brand | Arnott |
| Max Pressure | 150 PSI |
| Warranty | Limited Lifetime |