Do you have a question about the ARTEX ELT 110 Series and is the answer not in the manual?
Includes inspection recommendations and initial steps like disconnecting wires and removing the old battery pack.
Steps for applying silicone grease, installing the new battery pack, securing it with screws, and reattaching the ELT.
Procedures for testing the ELT, affixing the expiration date placard, and logging the replacement in the airframe logbook.
Guidance on safe battery disposal and referencing page 2 for assembly details and diagrams.
Illustrates the recommended pattern for tightening the four screws when installing the new battery pack.
Specific instructions for applying silicone grease to the gasket and replacing the expiration date label.
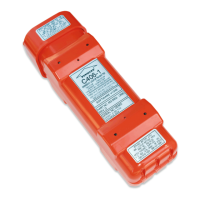
The ARTEX ELT 110/100 Series is an Emergency Locator Transmitter (ELT) designed for aircraft, with a primary function to aid in locating an aircraft in distress. This device relies on a battery pack, specifically part numbers 452-0130, 452-0130-01, and 452-0130-02, for its operation. The manual provides detailed instructions for the installation and maintenance of this battery pack, emphasizing its critical role in the ELT's functionality.
The core function of the ELT 110/100 Series is to transmit a distress signal in the event of an aircraft emergency. This signal, when activated, allows rescue services to pinpoint the location of the aircraft. The battery pack is the power source for this transmission, making its proper installation and regular maintenance paramount for the ELT to perform its life-saving function effectively. The ELT is designed to be installed within an aircraft, and its activation can be manual or automatic, depending on the specific setup and conditions. Once activated, it broadcasts on specific frequencies, such as 121.5 MHz, to facilitate detection by search and rescue teams.
While the manual primarily focuses on battery pack installation, it implicitly highlights several technical aspects. The battery pack itself is a critical component, identified by part numbers 452-0130, 452-0130-01, and 452-0130-02. The replacement schedule for this battery pack is crucial, as it must be replaced "on or before the expiration date shown on the battery label." This indicates a finite lifespan for the battery, likely due to self-discharge or degradation of its chemical components over time, which could compromise its ability to power the ELT during an emergency.
The manual also specifies the use of silicone grease, such as GE G-635, during battery pack installation. This is applied to the foam strip on the new battery pack and, for the 452-0130-02 battery pack, also to the top edge of the lip. The explicit instruction "DO NOT USE PETROLEUM BASED GREASE" is a critical technical detail, indicating that petroleum-based greases could be incompatible with the battery pack materials, potentially causing damage, corrosion, or compromising the seal, which could lead to battery failure or reduced lifespan. The screws used for securing the battery pack are part number 217-0606 and include O-rings, suggesting a requirement for a sealed or moisture-resistant enclosure to protect the battery and internal components from environmental factors. The tightening pattern for these four screws (1-2-3-4) is also specified, ensuring even pressure and a proper seal.
The ELT's operational frequency of 121.5 MHz is mentioned for testing purposes, allowing users to verify its functionality with a communication receiver. This frequency is a standard for distress signals, enabling a wide range of rescue assets to detect the ELT.
The ELT 110/100 Series incorporates several usage features that are outlined in the installation and maintenance procedures. The device includes a manual switch with "ON," "OFF," and "ARMED" positions. The "ON" position is used for testing the ELT's operation, allowing the user to confirm that it is transmitting a signal. The "ARMED" position is the typical operational state where the ELT is ready to activate automatically in an emergency, or manually if needed. The "OFF" position deactivates the ELT.
The installation process involves disconnecting and reconnecting the antenna lead and remote control wire harness, indicating that the ELT can be integrated with external antenna systems and remote control panels for flexible installation within the aircraft. The modular design, with a removable battery pack secured by four screws, simplifies the replacement process.
Maintenance is a significant aspect of the ELT 110/100 Series, primarily centered around the battery pack. The manual strongly recommends a "six month inspection" to check for battery corrosion and leakage. This proactive maintenance is crucial for ensuring the ELT's reliability. The detailed instructions for replacing the battery pack are a core maintenance feature, guiding users through each step from disconnecting cables to applying silicone grease and tightening screws.
The requirement to affix a supplied expiration date placard to the ELT after battery replacement ensures that the next replacement date is clearly visible, facilitating future maintenance scheduling. Furthermore, the instruction to "Enter in the airframe logbook the date of the installation of the new battery pack and the next replacement date" is a critical maintenance record-keeping feature, essential for compliance with aviation regulations and ensuring the aircraft's airworthiness.
Proper disposal of the old battery pack is also addressed as a maintenance consideration, with the instruction "Do not discard the old battery pack in fire or flame. Dispose of the battery pack as per local environmental regulations." This highlights the environmental and safety considerations associated with battery disposal, given that batteries can contain hazardous materials and pose fire risks.
The manual also provides contact information for ACR's Technical Service Department and an email address (service@acrartex.com) for support, along with a website (www.acrartex.com/brc) for the latest BRC procedure revisions. This ensures that users have access to expert assistance and up-to-date information for troubleshooting and maintenance, further enhancing the maintainability of the ELT. The emphasis on TSO approval and compliance with 14 CFR part 43 or applicable airworthiness requirements underscores the strict regulatory framework governing the installation and maintenance of such critical aviation safety equipment.
| Brand | ARTEX |
|---|---|
| Model | ELT 110 Series |
| Category | Battery Pack |
| Language | English |