8 Aruba Instant On AP11 Access Point | Installation Guide
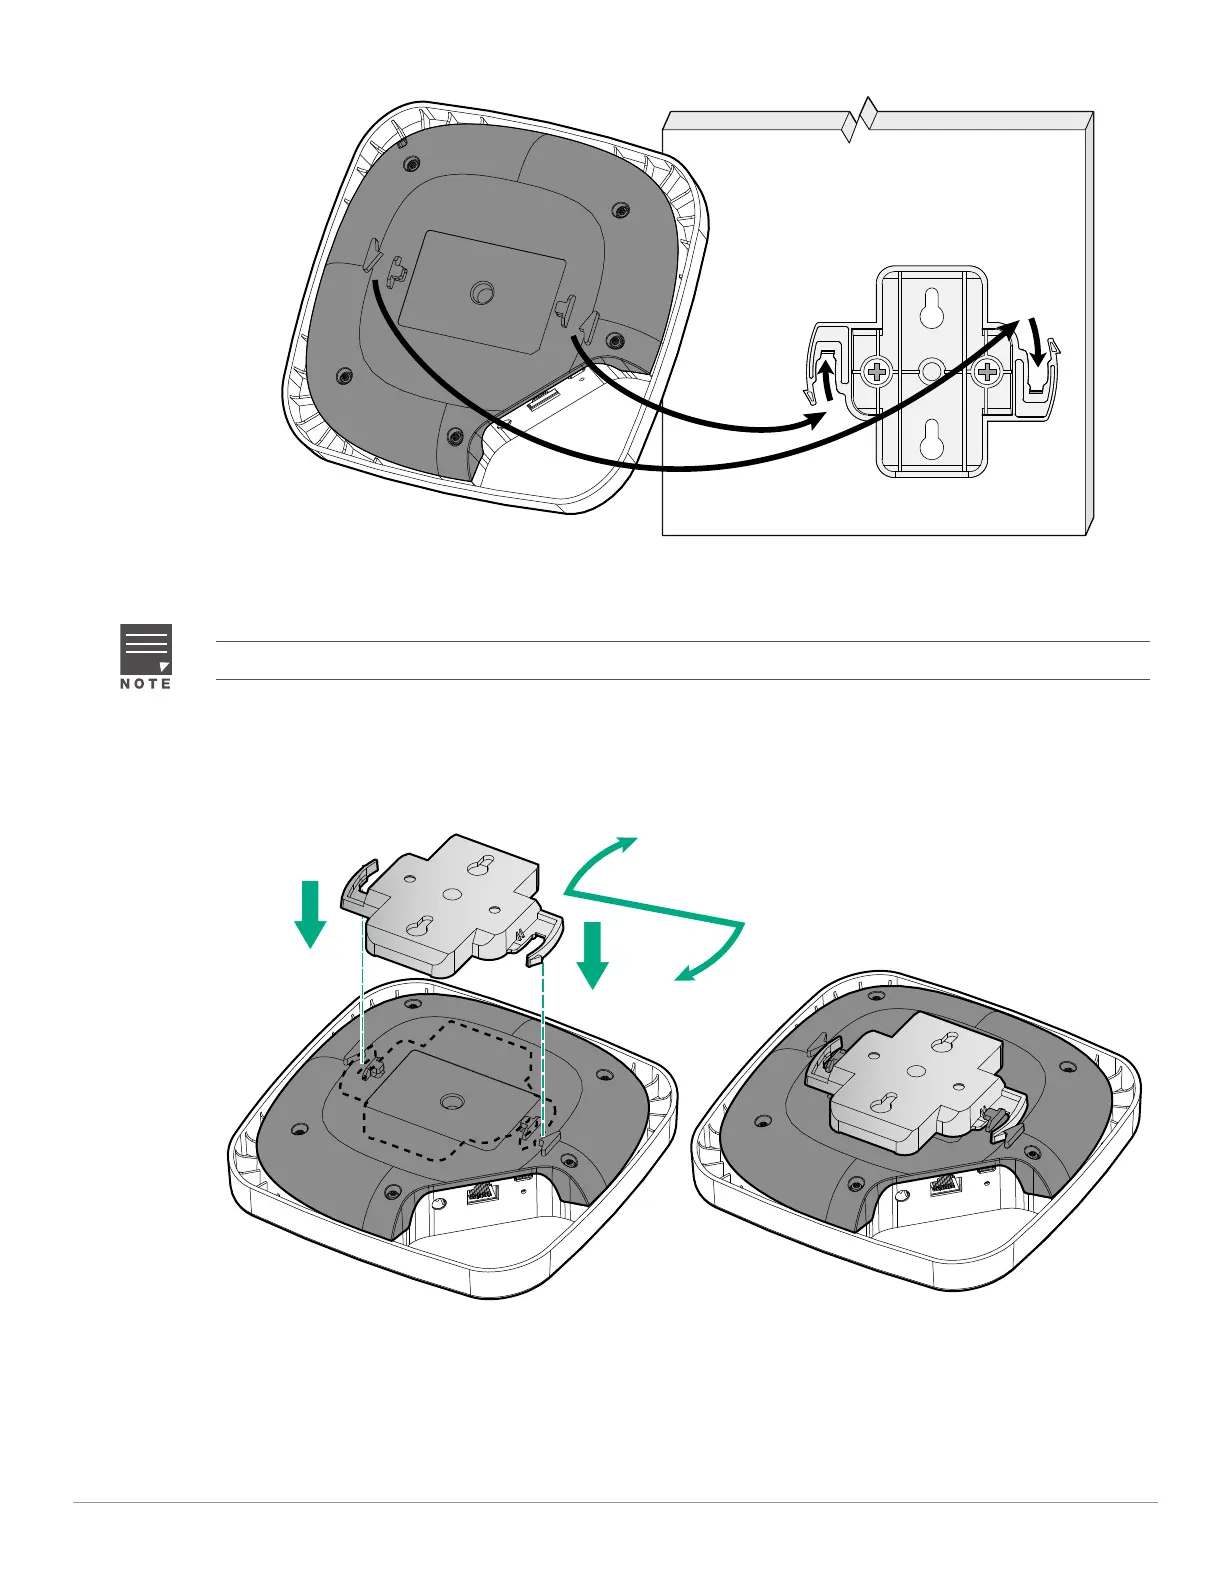
Figure 11 Attaching the AP to the Mount Bracket
AP-to-Bracket Option
1. Place the mount bracket against the back of the AP with the bracket at an angle of approximately 30 degrees
to the tab (see Figure 12).
2. Twist the bracket clockwise until it snaps into place in the tabs (see Figure 12).
Figure 12 Bracket Installation
3. Install two screws (and wall anchors if necessary), one above the other. Do not fully insert the screws into the
wall. Leave enough space between the screw head and the wall for the bracket.
4. Align the keyhole slots on the back of the bracket with the screws installed in step3.
5. Place the larger opening on the keyhole slot over the screw and pull the AP down until it is securely attached
to the screws (see Figure 13).
This mounting option works only with a wall.
 Loading...